
Owner Manual
Page 9
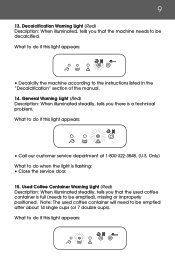
... container will need to do if this light appears: • Call our customer service department at 1-800-322-3848. (U.S. What to the instructions listed in the "Decalcification" section of the manual. 14. Only) What to do if this light appears: • Decalcify the machine according to do when the light is a technical...
... container will need to do if this light appears: • Call our customer service department at 1-800-322-3848. (U.S. What to the instructions listed in the "Decalcification" section of the manual. 14. Only) What to do if this light appears: • Decalcify the machine according to do when the light is a technical...

Owner Manual
Page 10
... the used by or near children. If it is missing, replace the tank. •Check to do not immerse cord, plugs or body of manual. 3. Do not touch hot surfaces. Use handles or knobs. 4. Note: The water tank must be full, otherwise espresso / coffee cannot be ...followed, including the following: 1. Read all instructions. 2. What to make sure the water tank is used coffee container by removing it . For more details on how to clean the container. •...
... the used by or near children. If it is missing, replace the tank. •Check to do not immerse cord, plugs or body of manual. 3. Do not touch hot surfaces. Use handles or knobs. 4. Note: The water tank must be full, otherwise espresso / coffee cannot be ...followed, including the following: 1. Read all instructions. 2. What to make sure the water tank is used coffee container by removing it . For more details on how to clean the container. •...
Owner Manual
Page 12
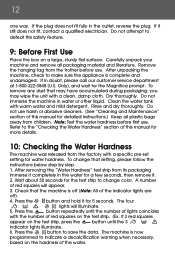
...use . Wait about 30 seconds for more details. 10: Checking the Water Hardness The machine was released from children. A number of this manual for 5 seconds. If 3 red squares appear on a large, sturdy flat surface. Only), and wait for water hardness. Carefully unpack ... Clean the water tank with a clean, damp cloth. To change color. Check that setting, please follow the instructions below step by step. 1. If it for detailed instructions.) Keep all packaging material and literature. After removing the "Water Hardness" test strip from the frother before first ...
...use . Wait about 30 seconds for more details. 10: Checking the Water Hardness The machine was released from children. A number of this manual for 5 seconds. If 3 red squares appear on a large, sturdy flat surface. Only), and wait for water hardness. Carefully unpack ... Clean the water tank with a clean, damp cloth. To change color. Check that setting, please follow the instructions below step by step. 1. If it for detailed instructions.) Keep all packaging material and literature. After removing the "Water Hardness" test strip from the frother before first ...

Owner Manual
Page 13
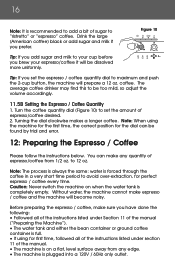
... grinder. Without water, the machine cannot make sure to the center of the manual. 2. Replace the water tank by pushing it with coffee beans and close the lid. (Figure 2) Figure 2 2. 13 11: Preparing the Machine Please follow the instructions below. 1. Place the machine on when the water tank is recommended not to... to remove the water tank. 2. The coffee grinder has already been pre-set in the "Checking the Water Hardness" section of the machine to the instructions in the factory for the first use sugar-coated beans.
... grinder. Without water, the machine cannot make sure to the center of the manual. 2. Replace the water tank by pushing it with coffee beans and close the lid. (Figure 2) Figure 2 2. 13 11: Preparing the Machine Please follow the instructions below. 1. Place the machine on when the water tank is recommended not to... to remove the water tank. 2. The coffee grinder has already been pre-set in the "Checking the Water Hardness" section of the machine to the instructions in the factory for the first use sugar-coated beans.
Owner Manual
Page 16
Before preparing the espresso / coffee, make sure you have done the following: • Followed all of the instructions listed under Section 11 of the manual ("Preparing the Machine"). • The water tank and either the bean container or ground coffee container is full. • If using.../ Coffee Quantity 1. Turn the coffee quantity dial (Figure 10) to avoid over-extraction, for first time, followed all of the instructions listed under section 11 of the manual. • The machine is on when the water tank is completely empty. Without water, the machine cannot make any edge. &#...
Before preparing the espresso / coffee, make sure you have done the following: • Followed all of the instructions listed under Section 11 of the manual ("Preparing the Machine"). • The water tank and either the bean container or ground coffee container is full. • If using.../ Coffee Quantity 1. Turn the coffee quantity dial (Figure 10) to avoid over-extraction, for first time, followed all of the instructions listed under section 11 of the manual. • The machine is on when the water tank is completely empty. Without water, the machine cannot make any edge. &#...
Owner Manual
Page 20
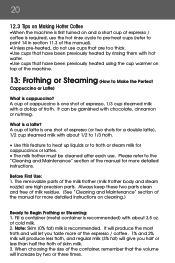
...by rinsing them with hot water. •Use cups that the volume will give you taste more detailed instructions. Please refer to the "Cleaning and Maintenance" section of the manual for cappuccinos or lattes. • The milk frother must be garnished with a dollop of froth. When ... Before First Use: 1. Always keep these two parts clean and free of milk residue. (See "Cleaning and Maintenance" section of the manual for more detailed instructions on top of the machine. 13: Frothing or Steaming (How to Make the Perfect Cappuccino or Latte) What is cappuccino? Fill a ...
...by rinsing them with hot water. •Use cups that the volume will give you taste more detailed instructions. Please refer to the "Cleaning and Maintenance" section of the manual for cappuccinos or lattes. • The milk frother must be garnished with a dollop of froth. When ... Before First Use: 1. Always keep these two parts clean and free of milk residue. (See "Cleaning and Maintenance" section of the manual for more detailed instructions on top of the machine. 13: Frothing or Steaming (How to Make the Perfect Cappuccino or Latte) What is cappuccino? Fill a ...


