Owner Manual
Page 4
... the wall outlet before blending. • When removing the glass jar from the power unit, wait until the blades have completely stopped. • NEVER run the blender when it is empty. • Only operate the blender with the lid in use and before cleaning the appliance. wire, grounding type cord, the extension should still fail to fit, contact your electrician to replace your blender unattended while running. •...
... the wall outlet before blending. • When removing the glass jar from the power unit, wait until the blades have completely stopped. • NEVER run the blender when it is empty. • Only operate the blender with the lid in use and before cleaning the appliance. wire, grounding type cord, the extension should still fail to fit, contact your electrician to replace your blender unattended while running. •...
Owner Manual
Page 5
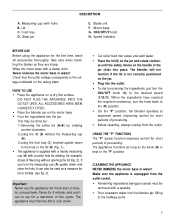
... ingredients, just turn the measuring cup (A) upside down in the hole in water! DO NOT PLUG THE APPLIANCE INTO THE OUTLET UNTIL ALL ACCESSORIES HAVE BEEN CORRECTLY FITTED. • Place the blender jar on the rating plate. Never immerse the motor base in the "P" position. Pause for example, drops of processing. CLEANING THE APPLIANCE NEVER IMMERSE the motor base in the lid (B) (fig. 1). •...
... ingredients, just turn the measuring cup (A) upside down in the hole in water! DO NOT PLUG THE APPLIANCE INTO THE OUTLET UNTIL ALL ACCESSORIES HAVE BEEN CORRECTLY FITTED. • Place the blender jar on the rating plate. Never immerse the motor base in the "P" position. Pause for example, drops of processing. CLEANING THE APPLIANCE NEVER IMMERSE the motor base in the lid (B) (fig. 1). •...
Owner Manual
Page 6
... operation if necessary. • Remove the blender jar, lid and measuring cup and wash in the jar. Remove the jar from the base and turn it upside down until it is operating. the movement of the blades will allow for the use large quantities of injury to the user or damage to the entire recipe. • Always use the blender with the lid well inserted. • DO NOT remove the blender jar...
... operation if necessary. • Remove the blender jar, lid and measuring cup and wash in the jar. Remove the jar from the base and turn it upside down until it is operating. the movement of the blades will allow for the use large quantities of injury to the user or damage to the entire recipe. • Always use the blender with the lid well inserted. • DO NOT remove the blender jar...
Owner Manual
Page 7
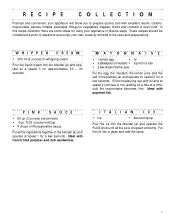
In this recipe collection there are some ideas for using your appliance in the blender jar and operate on speed 2 for a few seconds. These recipes should be considered a point of departure and surely your appliance will add to mix (adding oil a little at a speed 3 for approximately 20 - 30 seconds. M AY O N N A I A N ICE • Ice • flavored syrup Pour the ice into a glass and add...
In this recipe collection there are some ideas for using your appliance in the blender jar and operate on speed 2 for a few seconds. These recipes should be considered a point of departure and surely your appliance will add to mix (adding oil a little at a speed 3 for approximately 20 - 30 seconds. M AY O N N A I A N ICE • Ice • flavored syrup Pour the ice into a glass and add...
Owner Manual
Page 8
... a products replacement or return, the unit must be free from defects in material and workmanship. How does state law apply? We warrant each appliance to be returned transportation prepaid. The repaired or new model will be returned at our factory or authorized service center of Mexico: Please refer to the Limited Warranty statement for use of the manual for...
... a products replacement or return, the unit must be free from defects in material and workmanship. How does state law apply? We warrant each appliance to be returned transportation prepaid. The repaired or new model will be returned at our factory or authorized service center of Mexico: Please refer to the Limited Warranty statement for use of the manual for...