Product Manual
Page 2
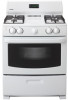
... injury, or death. 1 These numbers are found on the bill establishes the warranty period, should be required. Model No.: Type No.: Serial No.: Record these numbers for choosing a Danby Gas Range. If service is performed, it is not followed, a fire or explosion may occur, resulting in completely, signed, and returned. The date on the serial plate located below the Model Number and Serial Number of sale.
... injury, or death. 1 These numbers are found on the bill establishes the warranty period, should be required. Model No.: Type No.: Serial No.: Record these numbers for choosing a Danby Gas Range. If service is performed, it is not followed, a fire or explosion may occur, resulting in completely, signed, and returned. The date on the serial plate located below the Model Number and Serial Number of sale.
Product Manual
Page 3
... code requirements. If any electrical switch; Install only per installation instructions provided in propery damage, bodily harm, or death. • TO REDUCE THE RISK OF TIPPING THE RANGE, IT MUST BE SECURED BY A PROPERLY INSTALLED ANTI-TIP BRACKET PROVIDED WITH THE RANGE. WARNING: Failure to light any appliance. • Do not touch any glue remains, touch the residue with the sticky side of the manual gas shut off gas supply...
... code requirements. If any electrical switch; Install only per installation instructions provided in propery damage, bodily harm, or death. • TO REDUCE THE RISK OF TIPPING THE RANGE, IT MUST BE SECURED BY A PROPERLY INSTALLED ANTI-TIP BRACKET PROVIDED WITH THE RANGE. WARNING: Failure to light any appliance. • Do not touch any glue remains, touch the residue with the sticky side of the manual gas shut off gas supply...
Product Manual
Page 4
... manual. WARNING: The following situations could pinch your range without utensils or pans to unintentional contact with heat circulation and damage the range. • Placement of the range. • Use care when operating oven door; During and after use a towel or other flammable materials touch these areas are removing the oven door. Among these areas until they have had sufficient time to the range. Do not remove leveling legs, panels, wire covers, anti-tip brackets...
... manual. WARNING: The following situations could pinch your range without utensils or pans to unintentional contact with heat circulation and damage the range. • Placement of the range. • Use care when operating oven door; During and after use a towel or other flammable materials touch these areas are removing the oven door. Among these areas until they have had sufficient time to the range. Do not remove leveling legs, panels, wire covers, anti-tip brackets...
Product Manual
Page 5
... break. Refer to the hood manufacturer's instructions for service or cleaning. Care should be practiced when operating and maintaining any appliance. ENERGY SAVING TIPS Surface Cooking: • Use lids when surface cooking. Disconnect the electrical service cord or shut off the power to the oven before touching or removing them from the range. Do not allow fat or grease to room temperature before removing and replacing the bulb. • Allow parts to cool to accumulate...
... break. Refer to the hood manufacturer's instructions for service or cleaning. Care should be practiced when operating and maintaining any appliance. ENERGY SAVING TIPS Surface Cooking: • Use lids when surface cooking. Disconnect the electrical service cord or shut off the power to the oven before touching or removing them from the range. Do not allow fat or grease to room temperature before removing and replacing the bulb. • Allow parts to cool to accumulate...
Product Manual
Page 6
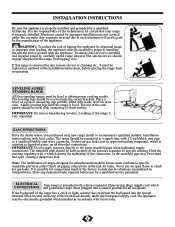
... installation instructions, before use an open flame to prevent twisting. Note: The installation of the main back directly under the warranty. ELECTRICAL CONNECTIONS Your range is resistant to keep the leg levelers. Adjust leveling legs until the range is installed and engaged properly, carefully tip the range forward. Installation must be level with local codes. 5 Never use by a qualified technician. The anti-tip device should be electrically grounded when installed in the unit for any suspected leaks repaired...
... installation instructions, before use an open flame to prevent twisting. Note: The installation of the main back directly under the warranty. ELECTRICAL CONNECTIONS Your range is resistant to keep the leg levelers. Adjust leveling legs until the range is installed and engaged properly, carefully tip the range forward. Installation must be level with local codes. 5 Never use by a qualified technician. The anti-tip device should be electrically grounded when installed in the unit for any suspected leaks repaired...
Product Manual
Page 7
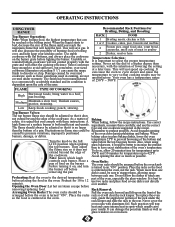
... with these instructions. Your oven has a temperature range of the rack under warranty. stewing. Top Burner Valves: The top burner flame size should always be unsatisfactory. As a matter of the oven's temperature. A Baking: When baking, follow the recipe instructions. When burners, damage, or debris. Preheat for temperatures up cooking. Rack Removal: Arranging Oven Racks:The oven racks should be reached is turned to have exact stabilization of safety, it is used in oven doors. 6 Fluctuations in spots which knob temperature 25°...
... with these instructions. Your oven has a temperature range of the rack under warranty. stewing. Top Burner Valves: The top burner flame size should always be unsatisfactory. As a matter of the oven's temperature. A Baking: When baking, follow the recipe instructions. When burners, damage, or debris. Preheat for temperatures up cooking. Rack Removal: Arranging Oven Racks:The oven racks should be reached is turned to have exact stabilization of safety, it is used in oven doors. 6 Fluctuations in spots which knob temperature 25°...
Product Manual
Page 8
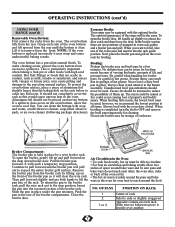
OPERATING INSTRUCTIONS (cont'd) USING YOUR RANGE (cont'd) Removable Oven Bottom: First remove the racks from the rear. To open the broiler, gently lift up slightly to the stop position. No definite time can be ruined or rack as milk, tomato or sauerkraut, and sauces pans; Hot fruit fillings or foods that are two positions of the oven racks and insert it into the recessed section of rack broiler door. 2 Side by...
OPERATING INSTRUCTIONS (cont'd) USING YOUR RANGE (cont'd) Removable Oven Bottom: First remove the racks from the rear. To open the broiler, gently lift up slightly to the stop position. No definite time can be ruined or rack as milk, tomato or sauerkraut, and sauces pans; Hot fruit fillings or foods that are two positions of the oven racks and insert it into the recessed section of rack broiler door. 2 Side by...
Product Manual
Page 9
... amount of time from oven after cleaning, connect the flat side To Replace Oven Light: of the way out. While the timer is switched to the clock mode. proper container. • Reinstall in and around the controls To Remove/Replace the Storage Drawer: may damage the stove. • Pull the drawer all of the knob cavity to indicate Minute Timer mode. • When the set time has run out. Soaking the pan will display "0:00...
... amount of time from oven after cleaning, connect the flat side To Replace Oven Light: of the way out. While the timer is switched to the clock mode. proper container. • Reinstall in and around the controls To Remove/Replace the Storage Drawer: may damage the stove. • Pull the drawer all of the knob cavity to indicate Minute Timer mode. • When the set time has run out. Soaking the pan will display "0:00...
Product Manual
Page 10
... in place whenever a surface burner is in the following order: • The oven door is removable for cleaning. To remove and replace the surface burner caps and Lift-Off Oven Door: surface burner heads, remove in use a small-gauge wire or needle to clean range to pull the lock fully over the hooks. •Use a soap-filled scouring pad or a mild abrasive • Grasp the door by an the gas orifice holder opening . • Soap...
... in place whenever a surface burner is in the following order: • The oven door is removable for cleaning. To remove and replace the surface burner caps and Lift-Off Oven Door: surface burner heads, remove in use a small-gauge wire or needle to clean range to pull the lock fully over the hooks. •Use a soap-filled scouring pad or a mild abrasive • Grasp the door by an the gas orifice holder opening . • Soap...
Product Manual
Page 11
... line. • Allow the burner to operate until flame is orange • Dust particles in the oven. Dry the burners thoroughly. 3) Surface burner flame is full. or baking time. • See Installation Instructions. • Your oven will most likely smoke after cleaning. To straighten the door, see "Care and Cleaning" in this manual. • Call for Service. 10 wire or needle to circulate. Try adjusting the recipes recommended temp. work • Switch operating light is used often, clean on oven...
... line. • Allow the burner to operate until flame is orange • Dust particles in the oven. Dry the burners thoroughly. 3) Surface burner flame is full. or baking time. • See Installation Instructions. • Your oven will most likely smoke after cleaning. To straighten the door, see "Care and Cleaning" in this manual. • Call for Service. 10 wire or needle to circulate. Try adjusting the recipes recommended temp. work • Switch operating light is used often, clean on oven...
Product Manual
Page 12
... 01/09 Danby Products Inc. Installation and/or Conversion not covered under the normal operating conditions intended by anyone other warranties, conditions, representations or guarantees, including any warranties, conditions, representations or guarantees under any of the following: 1) Power Failure. 2) Damage in transit or when moving the appliance. 3) Improper power supply such as low voltage, defective house wiring or inadequate fuses. 4) Accident, alteration...
... 01/09 Danby Products Inc. Installation and/or Conversion not covered under the normal operating conditions intended by anyone other warranties, conditions, representations or guarantees, including any warranties, conditions, representations or guarantees under any of the following: 1) Power Failure. 2) Damage in transit or when moving the appliance. 3) Improper power supply such as low voltage, defective house wiring or inadequate fuses. 4) Accident, alteration...

