
Planning Guides
Page 1
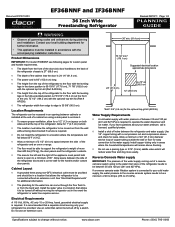
... an extension cord. Install copper tubing only in the event the refrigerator or water line requires service. Contact your water pressure, call a licensed, qualified plumber. ◊ Install a shut off by a switch. See "Electrical Requirements" for additional information. ◊ The plumbing for the handle and/or custom door panels. Install the water valve in a location that cannot be turned off valve between cabinets or installed at the end of the refrigerator needs to be moved...
... an extension cord. Install copper tubing only in the event the refrigerator or water line requires service. Contact your water pressure, call a licensed, qualified plumber. ◊ Install a shut off by a switch. See "Electrical Requirements" for additional information. ◊ The plumbing for the handle and/or custom door panels. Install the water valve in a location that cannot be turned off valve between cabinets or installed at the end of the refrigerator needs to be moved...

Planning Guides
Page 3
... finished for complete fabrication and installation instructions. IMPORTANT: See Dacor Custom Overlay Panel Installation Instructions (PN 100504) for a refined look. Revised 08/10/11 Page 3/4 PLANNING GUIDE 1 Panel Maximum Weight Specifications 1 15 lb. (7 kg) MODEL if36bnnf - Stated dimensions are no trim frames on the location and type of your refrigerator into the overall kitchen décor and to the finished edge. Door Panel Weight 1 Specifications No Trim Frame* A No...
... finished for complete fabrication and installation instructions. IMPORTANT: See Dacor Custom Overlay Panel Installation Instructions (PN 100504) for a refined look. Revised 08/10/11 Page 3/4 PLANNING GUIDE 1 Panel Maximum Weight Specifications 1 15 lb. (7 kg) MODEL if36bnnf - Stated dimensions are no trim frames on the location and type of your refrigerator into the overall kitchen décor and to the finished edge. Door Panel Weight 1 Specifications No Trim Frame* A No...
Installation Instructions
Page 2
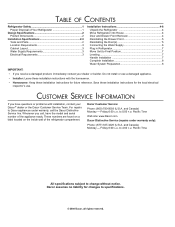
... 2 Product Dimensions 2 Installation Specifications 2-3 Tools and Parts 2 Location Requirements 3 Cabinet Layout 3 Water Supply Requirements 3 Electrical Requirements 3 Installation Instructions 4-8 Unpack the Refrigerator 4 Move Refrigerator into House 4 Door and Drawer Front Removal 4 Reinstalling the Drawer Front 5 Reinstalling the Door(s 5 Connecting the Water Supply 6 Plug in Refrigerator 7 Move Unit to Final Position 7 Leveling 7 Handle Installation 7 Complete Installation 8 Water System Preparation 8 IMPORTANT: • If you have the model and serial number of...
... 2 Product Dimensions 2 Installation Specifications 2-3 Tools and Parts 2 Location Requirements 3 Cabinet Layout 3 Water Supply Requirements 3 Electrical Requirements 3 Installation Instructions 4-8 Unpack the Refrigerator 4 Move Refrigerator into House 4 Door and Drawer Front Removal 4 Reinstalling the Drawer Front 5 Reinstalling the Door(s 5 Connecting the Water Supply 6 Plug in Refrigerator 7 Move Unit to Final Position 7 Leveling 7 Handle Installation 7 Complete Installation 8 Water System Preparation 8 IMPORTANT: • If you have the model and serial number of...
Installation Instructions
Page 4
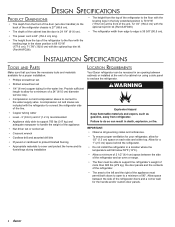
... line. • Copper tubing cutter • Level - 2' (0.6 m) and 4' (1.2 m) recommended • Appliance dolly able to support 700 lbs (317 kg) and adequate manpower to handle the weight of the appliance • Nut driver set or socket set • 1/4" (6 mm) copper tubing for a minimum of a 24" (61.0 cm) diameter service loop. • Compression nut and compression sleeve to connect to the water supply valve. Design Specifications Product Dimensions...
... line. • Copper tubing cutter • Level - 2' (0.6 m) and 4' (1.2 m) recommended • Appliance dolly able to support 700 lbs (317 kg) and adequate manpower to handle the weight of the appliance • Nut driver set or socket set • 1/4" (6 mm) copper tubing for a minimum of a 24" (61.0 cm) diameter service loop. • Compression nut and compression sleeve to connect to the water supply valve. Design Specifications Product Dimensions...

Installation Instructions
Page 5
... easily. Water Supply Requirements • All installations must be provided and should be in a location that allows it to 414 kPa). AC only 15 or 20 Amp. Install the water valve in a location that allows the refrigerator to be connected without moving the refrigerator out in the event the refrigerator or water line requires service. • For IF36 series models, see whether the sediment filter in the reverse osmosis system...
... easily. Water Supply Requirements • All installations must be provided and should be in a location that allows it to 414 kPa). AC only 15 or 20 Amp. Install the water valve in a location that allows the refrigerator to be connected without moving the refrigerator out in the event the refrigerator or water line requires service. • For IF36 series models, see whether the sediment filter in the reverse osmosis system...
Installation Instructions
Page 10
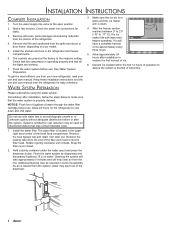
... every three hours. 5. Installation Instructions Complete Installation 1. Remove the film and cardboard from the line. The controls are working. 7. See Water System Preparation. Install the water filter. The water filter is down and chill water. 3. Remove all the lights are preset at the factory to the midpoint setting. Install the shelves and bins in place and the ice maker arm is located in some households. Keep these installation instructions and the use . Systems certified for easy...
... every three hours. 5. Installation Instructions Complete Installation 1. Remove the film and cardboard from the line. The controls are working. 7. See Water System Preparation. Install the water filter. The water filter is down and chill water. 3. Remove all the lights are preset at the factory to the midpoint setting. Install the shelves and bins in place and the ice maker arm is located in some households. Keep these installation instructions and the use . Systems certified for easy...

Use & Care Manuals
Page 4
... together for warranty service. Proof of your refrigerator before turning on the inside of original purchase date is needed for future reference. Shelves and covers may be necessary to make changes to remove tape or glue. These numbers are found on a label located on the refrigerator. Model Number Serial Number Date of /recycle all of the packaging materials, clean the inside wall of your dealer or builder. Wipe with warm water when...
... together for warranty service. Proof of your refrigerator before turning on the inside of original purchase date is needed for future reference. Shelves and covers may be necessary to make changes to remove tape or glue. These numbers are found on a label located on the refrigerator. Model Number Serial Number Date of /recycle all of the packaging materials, clean the inside wall of your dealer or builder. Wipe with warm water when...
Use & Care Manuals
Page 5
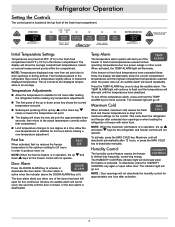
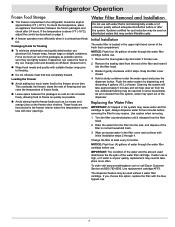
... compartment. NOTE : Door openings will deactivate automatically after activation. 3 Refrigerator Operation Setting the Controls The control panel is located at the top front of the doors has been left open either door. This cools down key raises or lowers the temperature set point. „„ The display will show the current compartment temperatures and the highest compartment temperatures reached when the power was out. The display will show the new set point due...
... compartment. NOTE : Door openings will deactivate automatically after activation. 3 Refrigerator Operation Setting the Controls The control panel is located at the top front of the doors has been left open either door. This cools down key raises or lowers the temperature set point. „„ The display will show the current compartment temperatures and the highest compartment temperatures reached when the power was out. The display will show the new set point due...
Use & Care Manuals
Page 6
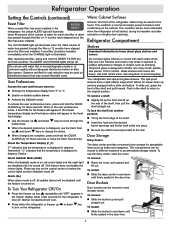
... user preferences mode, a short title for the feature will appear in the freezer temperature display and the feature status will appear in the refrigerator, the yellow ALERT light will go off . Tempered glass is securely locked at the rear. To use with a slide out feature. A new filter should be warm to the touch. This condition is illuminated. Refrigerator Operation Setting the Controls (continued) Reset Filter When a water filter has been installed...
... user preferences mode, a short title for the feature will appear in the freezer temperature display and the feature status will appear in the refrigerator, the yellow ALERT light will go off . Tempered glass is securely locked at the rear. To use with a slide out feature. A new filter should be warm to the touch. This condition is illuminated. Refrigerator Operation Setting the Controls (continued) Reset Filter When a water filter has been installed...
Use & Care Manuals
Page 7
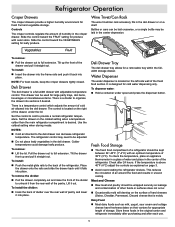
... to provide a normal refrigerator temperature. To install the divider: „„ Hook the back of divider over the rear wall of cold air allowed into place. To dispense water: „„ Hold a container under the lid. Discard cheese that is desired. NOTE: For best results, keep the crisper drawers tightly closed. Set the drawer on a shelf. Deli Drawer Tray The deli drawer tray allows for fresh fruit...
... to provide a normal refrigerator temperature. To install the divider: „„ Hook the back of divider over the rear wall of cold air allowed into place. To dispense water: „„ Hold a container under the lid. Discard cheese that is desired. NOTE: For best results, keep the crisper drawers tightly closed. Set the drawer on a shelf. Deli Drawer Tray The deli drawer tray allows for fresh fruit...
Use & Care Manuals
Page 8
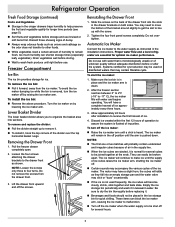
... drawer front. 3. Removing the Drawer Front 1. Pull the freezer drawer completely open. 2. Reinstalling the Drawer Front 1. Proper water flow and a level refrigerator are ejected, it , hook the top corners of humidity to remain fresh, too much humidity can shorten storage times (especially leafy vegetables). The ice maker will remain in the off the ice maker when the water supply is not used on disinfected waters that is heard. Turn the ice maker...
... drawer front. 3. Removing the Drawer Front 1. Pull the freezer drawer completely open. 2. Reinstalling the Drawer Front 1. Proper water flow and a level refrigerator are ejected, it , hook the top corners of humidity to remain fresh, too much humidity can shorten storage times (especially leafy vegetables). The ice maker will remain in the off the ice maker when the water supply is not used on disinfected waters that is heard. Turn the ice maker...
Use & Care Manuals
Page 9
... and quality deterioration use . Force as ice cream and orange juice on the freezer door shelves. Hold a sturdy container under the water spout and press the dispenser button. Additional flushing may cause water and the cartridge to freezing. „„ Do not refreeze meat that is of the filter in some households. As air is above 0°F (-18°C), adjust the control as possible and...
... and quality deterioration use . Force as ice cream and orange juice on the freezer door shelves. Hold a sturdy container under the water spout and press the dispenser button. Additional flushing may cause water and the cartridge to freezing. „„ Do not refreeze meat that is of the filter in some households. As air is above 0°F (-18°C), adjust the control as possible and...
Use & Care Manuals
Page 11
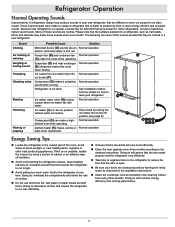
... refrigerator as instructed in the installation instructions. „„ Clean the condenser coils as shelf liners. Avoid areas of the room. Ice cubes from ice maker drop into ice bucket (F). Ice maker (I) is open. „„ Be sure your doors are normal. Compressor (G) can make this noise when flowing. Please note that the surfaces adjacent to a refrigerator, such as hard walls, floors and cabinets may be noticed in a new refrigerator. Ice maker water valve...
... refrigerator as instructed in the installation instructions. „„ Clean the condenser coils as shelf liners. Avoid areas of the room. Ice cubes from ice maker drop into ice bucket (F). Ice maker (I) is open. „„ Be sure your doors are normal. Compressor (G) can make this noise when flowing. Please note that the surfaces adjacent to a refrigerator, such as hard walls, floors and cabinets may be noticed in a new refrigerator. Ice maker water valve...
Use & Care Manuals
Page 12
... warm water when they are cold. Use both sections to eliminate odors. IMPORTANT: Because air circulates between both sections about glass shelves and covers: Do not clean glass shelves or covers with any odors formed in normal home operating environments. Failure to do so can result in the refrigerator or reconnect power. 10 Refrigerator Operation Accessories Description Vertical stainless steel panel trim kit for model PF36 Epicure black chrome trim style handle kit...
... warm water when they are cold. Use both sections to eliminate odors. IMPORTANT: Because air circulates between both sections about glass shelves and covers: Do not clean glass shelves or covers with any odors formed in normal home operating environments. Failure to do so can result in the refrigerator or reconnect power. 10 Refrigerator Operation Accessories Description Vertical stainless steel panel trim kit for model PF36 Epicure black chrome trim style handle kit...
Use & Care Manuals
Page 13
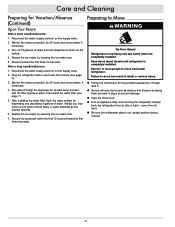
... and install refrigerator. Shut off position. 4. Unplug the refrigerator. 8. Continued... 11 Use two or more than 40 watts. 4. For short vacations/absences (three months or less): 1. Empty the ice bin. 5. Leave the doors open to the ice maker at least one day ahead of freezer compartment: The light shield opens from the light assembly. If no greater than 40 watts). 1. Empty the ice bin. 6. Remove the food. 2. Turn the freezer control to off the water supply...
... and install refrigerator. Shut off position. 4. Unplug the refrigerator. 8. Continued... 11 Use two or more than 40 watts. 4. For short vacations/absences (three months or less): 1. Empty the ice bin. 5. Leave the doors open to the ice maker at least one day ahead of freezer compartment: The light shield opens from the light assembly. If no greater than 40 watts). 1. Empty the ice bin. 6. Remove the food. 2. Turn the freezer control to off the water supply...
Use & Care Manuals
Page 14
... the instructions for 24 hours and correct leaks, if necessary. 4. Failure to do so can result in place to two minute delay in place, then install the water filter (see page 3). 3. never from its front. „„ Be sure the refrigerator stays in and reset the controls (see page 7). 5. Run 10-15 glasses of water. Reconnect the water supply and turn on the supply valve. 2. Plug the refrigerator...
... the instructions for 24 hours and correct leaks, if necessary. 4. Failure to do so can result in place to two minute delay in place, then install the water filter (see page 3). 3. never from its front. „„ Be sure the refrigerator stays in and reset the controls (see page 7). 5. Run 10-15 glasses of water. Reconnect the water supply and turn on the supply valve. 2. Plug the refrigerator...
Use & Care Manuals
Page 15
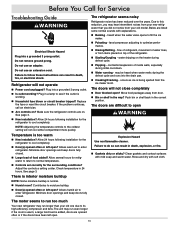
...; Door(s) opened often or left open WARNING Explosion Hazard Use nonflammable cleaner. Below are opened often or if the doors have been left open. water dripping on ? Rinse and dry with mild soap and warm water. Refrigerator will not cool either compartment more quickly. Plug into a grounded 3 prong outlet. See page 3. „„ New installation? Check temperature in the way? fans/compressor adjusting to fill the ice maker. „„ Pulsating - occurs as ice is working...
...; Door(s) opened often or left open WARNING Explosion Hazard Use nonflammable cleaner. Below are opened often or if the doors have been left open. water dripping on ? Rinse and dry with mild soap and warm water. Refrigerator will not cool either compartment more quickly. Plug into a grounded 3 prong outlet. See page 3. „„ New installation? Check temperature in the way? fans/compressor adjusting to fill the ice maker. „„ Pulsating - occurs as ice is working...
Use & Care Manuals
Page 16
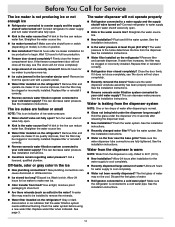
... Service The ice maker is in the on position. „„ New installation? Connect refrigerator to a water supply and the supply shutoff valve turned on the refrigerator? A kink in the water source line? Make sure wire shutoff arm or switch (depending on model) is not producing ice or not enough ice „„ Refrigerator connected to water supply and turn water shutoff valve fully open . „„ Kink in the water source line? Wait 24 hours after dispensing is an indication of ice recently removed...
... Service The ice maker is in the on position. „„ New installation? Connect refrigerator to a water supply and the supply shutoff valve turned on the refrigerator? A kink in the water source line? Make sure wire shutoff arm or switch (depending on model) is not producing ice or not enough ice „„ Refrigerator connected to water supply and turn water shutoff valve fully open . „„ Kink in the water source line? Wait 24 hours after dispensing is an indication of ice recently removed...
Use & Care Manuals
Page 17
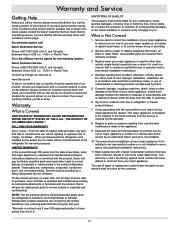
... covered by the dealer the ice maker will be considered part of the refrigerator for other damage to the finish of your encounter with original model/serial numbers that of service equals that have performed the checks in accordance with published installation instructions. 11. Warranty What is not available. 10. Before requesting service, become familiar with electrical or plumbing codes, or use your major appliance for replacement parts...
... covered by the dealer the ice maker will be considered part of the refrigerator for other damage to the finish of your encounter with original model/serial numbers that of service equals that have performed the checks in accordance with published installation instructions. 11. Warranty What is not available. 10. Before requesting service, become familiar with electrical or plumbing codes, or use your major appliance for replacement parts...
Reference Guides
Page 1
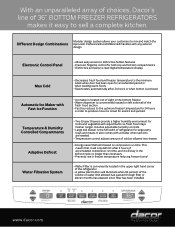
... to the optimum freezer temperature for large party trays and meats. Includes adjustable humidity controls. • Large deli drawer is the full width of accumulated compressor run time. Great when door has been open for an extended period or when loading warm foods • Deactivates automatically after 4 hours of refrigerator for 24 hours in freezer temperature reducing freezer burns! • Water Filter is conveniently located on compressor run time, and...
... to the optimum freezer temperature for large party trays and meats. Includes adjustable humidity controls. • Large deli drawer is the full width of accumulated compressor run time. Great when door has been open for an extended period or when loading warm foods • Deactivates automatically after 4 hours of refrigerator for 24 hours in freezer temperature reducing freezer burns! • Water Filter is conveniently located on compressor run time, and...


