Product Manual
Page 5
Configuration 18 Installing the Web Management Utility 18 Discovery List 20 Monitor List 21 Device Setting 23 Toolbar 25 Configuring the Switch 26 Login 27 Setup Menu 30 Configuring Setup Setting 31 Port Settings 31 VLAN Settings (Virtual Local Area Network 33 Trunk Setting 35 Mirror Setting 36 PoE Setting 37 Device Status 39 Statistic 40 System Setting 42 Trap Setting 43 Set Password 44 Backup Setting 45 Reset Setting 46 Logout 46 Technical Specifications 48 5
Configuration 18 Installing the Web Management Utility 18 Discovery List 20 Monitor List 21 Device Setting 23 Toolbar 25 Configuring the Switch 26 Login 27 Setup Menu 30 Configuring Setup Setting 31 Port Settings 31 VLAN Settings (Virtual Local Area Network 33 Trunk Setting 35 Mirror Setting 36 PoE Setting 37 Device Status 39 Statistic 40 System Setting 42 Trap Setting 43 Set Password 44 Backup Setting 45 Reset Setting 46 Logout 46 Technical Specifications 48 5
Product Manual
Page 10
Wire speed reception and transmission Store-and-Forward switching scheme capability to support rate adaptation and ensure data integrity Up to 4K unicast addresses entities per device, self-learning, and table aging 512KBytes packet ... Supports Port based Trunking Supports Port-mirroring Supports Port-setting for Speed/Disable, Flow control and Port based QoS (Quality of Service) Easy configuration via Web Browser Easy setting via Web Management Utility Standard 19" Rack-mount size 10
Wire speed reception and transmission Store-and-Forward switching scheme capability to support rate adaptation and ensure data integrity Up to 4K unicast addresses entities per device, self-learning, and table aging 512KBytes packet ... Supports Port based Trunking Supports Port-mirroring Supports Port-setting for Speed/Disable, Flow control and Port based QoS (Quality of Service) Easy configuration via Web Browser Easy setting via Web Management Utility Standard 19" Rack-mount size 10
Product Manual
Page 11
... performance. The carton should contain the following pointers: Install the Switch in a site free from strong electromagnetic field generators (such as motors), vibration, dust, and direct exposure to be used for shock cushioning Screws and two mounting brackets CD-ROM with Web Management Utility and Manual If any item is found missing or damaged...
... performance. The carton should contain the following pointers: Install the Switch in a site free from strong electromagnetic field generators (such as motors), vibration, dust, and direct exposure to be used for shock cushioning Screws and two mounting brackets CD-ROM with Web Management Utility and Manual If any item is found missing or damaged...
Product Manual
Page 18
... in the CD-ROM Drive. 2. With the attached Web Management Utility, you through the installation of the Web Management utility. 1. From the Start menu on -screen instructions to Program Files -> web_management_utility and execute the Web Management utility. (Figure 6.) 18 etc. CONFIGURATION Through the Web browser you can easily discover all the Web Management Switches, assign the IP Address, changing the password, and upgrade...
... in the CD-ROM Drive. 2. With the attached Web Management Utility, you through the installation of the Web Management utility. 1. From the Start menu on -screen instructions to Program Files -> web_management_utility and execute the Web Management utility. (Figure 6.) 18 etc. CONFIGURATION Through the Web browser you can easily discover all the Web Management Switches, assign the IP Address, changing the password, and upgrade...

Product Manual
Page 19
Web Management Utility The Web Management Utility is divided into four parts, Discovery List, Monitor List, Device Setting, and Toolbar function, for detailed instructions, follow the section below. 19 Figure 6.
Web Management Utility The Web Management Utility is divided into four parts, Discovery List, Monitor List, Device Setting, and Toolbar function, for detailed instructions, follow the section below. 19 Figure 6.

Product Manual
Page 20
By pressing the "Discovery" button, you can list all the Web management devices in the entire network. IP Address: Shows the current IP address of the Utility protocol. Location: Shows where the device is to the Monitor List. Trap IP: Shows the IP where the Trap is located. System word definitions in ...
By pressing the "Discovery" button, you can list all the Web management devices in the entire network. IP Address: Shows the current IP address of the Utility protocol. Location: Shows where the device is to the Monitor List. Trap IP: Shows the IP where the Trap is located. System word definitions in ...
Product Manual
Page 21
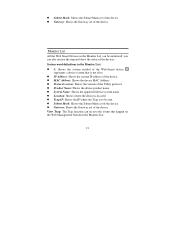
Subnet Mask: Shows the Subnet Mask set of the Web-Smart device, represents a device system that happen on the Web Management Switch in the Monitor List can be sent. System word definitions in the Monitor List: S: Shows the system symbol of the device. System Name: Shows the ... trap and show the status of the device. Gateway: Shows the Gateway set of the device. Subnet Mask: Shows the Subnet Mask set of the Utility protocol. Gateway: Shows the Gateway set of the device. Protocol version: Shows the version of the device. Location: Shows where the device is to be...
Subnet Mask: Shows the Subnet Mask set of the Web-Smart device, represents a device system that happen on the Web Management Switch in the Monitor List can be sent. System word definitions in the Monitor List: S: Shows the system symbol of the device. System Name: Shows the ... trap and show the status of the device. Gateway: Shows the Gateway set of the device. Subnet Mask: Shows the Subnet Mask set of the Utility protocol. Gateway: Shows the Gateway set of the device. Protocol version: Shows the version of the device. Location: Shows where the device is to be...

Product Manual
Page 25
Figure 11. Toolbar The toolbar in Web browser. Web Access: Double click the device in the Monitor List or select a device in the Monitor List and press the "Web Access" button to access the device in the Web Management Utility has four main tabs: File, View, Options, and Help. 25
Figure 11. Toolbar The toolbar in Web browser. Web Access: Double click the device in the Monitor List or select a device in the Monitor List and press the "Web Access" button to access the device in the Web Management Utility has four main tabs: File, View, Options, and Help. 25
Product Manual
Page 26
... to select the time for smart switch configuration. Configuring the Switch The 16-Port 10/100Mbps Ethernet Web Smart Switch with 8-Port PoE has a Web GUI interface for monitoring. This function helps you to the default settings so that when you open the Web Management Utility the next time, it will help... you display trap settings. Clear Log: To clear the log. The Switch can manage, control, and monitor the Switch from the local LAN. 26 Monitor Load: To manually load the ...
... to select the time for smart switch configuration. Configuring the Switch The 16-Port 10/100Mbps Ethernet Web Smart Switch with 8-Port PoE has a Web GUI interface for monitoring. This function helps you to the default settings so that when you open the Web Management Utility the next time, it will help... you display trap settings. Clear Log: To clear the log. The Switch can manage, control, and monitor the Switch from the local LAN. 26 Monitor Load: To manually load the ...
Product Manual
Page 28
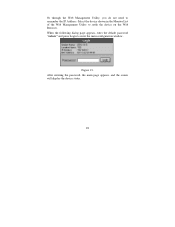
Or through the Web Management Utility, you do not need to enter the main configuration window. When the following dialog page appears, enter the default password "admin" and press Login to remember the IP Address. Figure 13. After entering the password, the main page appears, and the screen will display the device status. 28 Select the device shown in the Monitor List of the Web Management Utility to settle the device on the Web Browser.
Or through the Web Management Utility, you do not need to enter the main configuration window. When the following dialog page appears, enter the default password "admin" and press Login to remember the IP Address. Figure 13. After entering the password, the main page appears, and the screen will display the device status. 28 Select the device shown in the Monitor List of the Web Management Utility to settle the device on the Web Browser.
Product Manual
Page 42
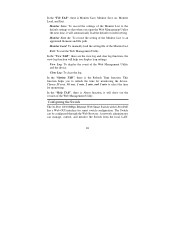
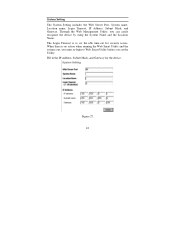
Through the Web Management Utility, you set the idle time-out for the device. System Setting The System Setting includes the Web Server Port, System name, Location name, Login Timeout, IP Address, Subnet Mask, and Gateway. Fill in the IP Address, Subnet Mask, and Gateway for security issues. Figure 27. 42 When there is to Web Smart Utility before you can easily recognize the device by using the System Name and the Location Name. The Login Timeout is no action when running the Web Smart Utility and the it times out, you must re-login to set the Utility.
Through the Web Management Utility, you set the idle time-out for the device. System Setting The System Setting includes the Web Server Port, System name, Location name, Login Timeout, IP Address, Subnet Mask, and Gateway. Fill in the IP Address, Subnet Mask, and Gateway for security issues. Figure 27. 42 When there is to Web Smart Utility before you can easily recognize the device by using the System Name and the Location Name. The Login Timeout is no action when running the Web Smart Utility and the it times out, you must re-login to set the Utility.

Product Manual
Page 43
Trap Setting The Trap Setting enables the device to be sent. Trap Setting System Events: Monitoring the system's trap. 43 Figure 28. Set the Trap IP Address of the manager where the trap is to monitor the Trap through the Web Management Utility.
Trap Setting The Trap Setting enables the device to be sent. Trap Setting System Events: Monitoring the system's trap. 43 Figure 28. Set the Trap IP Address of the manager where the trap is to monitor the Trap through the Web Management Utility.


