
Manual
Page 2
TABLE OF CONTENTS ABOUT THIS GUIDE 1 PURPOSE 1 INTRODUCTION 2 FAST ETHERNET TECHNOLOGY 2 SWITCHING TECHNOLOGY 2 FEATURES 4 UNPACKING AND SETUP 6 UNPACKING 6 SETUP 6 IDENTIFYING EXTERNAL COMPONENTS 7 FRONT PANEL 7 LED INDICATORS 7 REAR PANEL 8 CONNECTING THE SWITCH 9 PC TO DES-1005D/ DSS-5 9 HUB TO DES-1005D/ DSS-5 9 DES-1005D/ DSS-5+ TO OTHER DEVICES 9 PORT SPEED & DUPLEX MODE 10 MOUNTING THE SWITCH ON A WALL 11 TECHNICAL SPECIFICATIONS 12 RJ-45 PIN SPECIFICATION 14 ii
TABLE OF CONTENTS ABOUT THIS GUIDE 1 PURPOSE 1 INTRODUCTION 2 FAST ETHERNET TECHNOLOGY 2 SWITCHING TECHNOLOGY 2 FEATURES 4 UNPACKING AND SETUP 6 UNPACKING 6 SETUP 6 IDENTIFYING EXTERNAL COMPONENTS 7 FRONT PANEL 7 LED INDICATORS 7 REAR PANEL 8 CONNECTING THE SWITCH 9 PC TO DES-1005D/ DSS-5 9 HUB TO DES-1005D/ DSS-5 9 DES-1005D/ DSS-5+ TO OTHER DEVICES 9 PORT SPEED & DUPLEX MODE 10 MOUNTING THE SWITCH ON A WALL 11 TECHNICAL SPECIFICATIONS 12 RJ-45 PIN SPECIFICATION 14 ii

Manual
Page 6
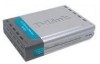
... 100Mbps shared-bandwidth workgroups. With the highest bandwidth at 200Mbps (100Mbps full-duplex mode), any one of small Ethernet workgroups. The DES-1005D/ DSS-5+ can provide workstations with store-and-forward switching to ensure that offers solutions for the accelerating bandwidth needs of its small, compact size, was specifically designed for a department or...
... 100Mbps shared-bandwidth workgroups. With the highest bandwidth at 200Mbps (100Mbps full-duplex mode), any one of small Ethernet workgroups. The DES-1005D/ DSS-5+ can provide workstations with store-and-forward switching to ensure that offers solutions for the accelerating bandwidth needs of its small, compact size, was specifically designed for a department or...

Manual
Page 8
...-5+ can be performed using the following steps: „ The power outlet should contain the following items: „ One DES-1005D or DSS-5+: 5-port 10/100Mbps Ethernet Switch „ One External Power Adapter „ Four Rubber Feet „ This Manual „ Quick Installation Guide If any item is adequate ventilation around it . UNPACKING ...
...-5+ can be performed using the following steps: „ The power outlet should contain the following items: „ One DES-1005D or DSS-5+: 5-port 10/100Mbps Ethernet Switch „ One External Power Adapter „ Four Rubber Feet „ This Manual „ Quick Installation Guide If any item is adequate ventilation around it . UNPACKING ...

Manual
Page 9
DES-1005D/ DSS-5+ 10/100Mb Fast Ethernet Switch LED Indicators „ Power Indicator (PWR): This green indicator light is on when the DES-1005D/ DSS-5+ is connected to a 10Mbps Ethernet station, or other network device. otherwise, it is off. „ 100Mbps Link/Activity, 10Mbps Link/Activity Indicator (100 Link/Act (green), 10 Link/Act (amber): This LED indicator light is...
DES-1005D/ DSS-5+ 10/100Mb Fast Ethernet Switch LED Indicators „ Power Indicator (PWR): This green indicator light is on when the DES-1005D/ DSS-5+ is connected to a 10Mbps Ethernet station, or other network device. otherwise, it is off. „ 100Mbps Link/Activity, 10Mbps Link/Activity Indicator (100 Link/Act (green), 10 Link/Act (amber): This LED indicator light is...

Manual
Page 10
Check the technical specification section for information about the DC power input voltage. The Auto MDI/MDI-X function makes it simple to connect to the switch-just plug either a Crossover or Straight-Through CAT5 cable into a power outlet will immediately power it on. 8 DC Power Jack: Power is supplied through an external AC power adapter. Since the DES-1005D/ DSS-5+ does not require a power button, plugging its power adapter into any port. Rear Panel DES-1005D/ DSS-5+ 10/100Mb Fast Ethernet Switch Auto MDI/MDI-X Ports: All ports support automatic MDI/MDI-X crossover detection.
Check the technical specification section for information about the DC power input voltage. The Auto MDI/MDI-X function makes it simple to connect to the switch-just plug either a Crossover or Straight-Through CAT5 cable into a power outlet will immediately power it on. 8 DC Power Jack: Power is supplied through an external AC power adapter. Since the DES-1005D/ DSS-5+ does not require a power button, plugging its power adapter into any port. Rear Panel DES-1005D/ DSS-5+ 10/100Mb Fast Ethernet Switch Auto MDI/MDI-X Ports: All ports support automatic MDI/MDI-X crossover detection.

Manual
Page 11
... equipped with a RJ-45 10/100Mbps port can be connected to any port of the computer's Ethernet card. DES-1005D/ DSS-5+ to other devices The DES-1005D/ DSS-5+ can be connected to another switch or other devices (routers, bridges, etc.) via a two-pair Category 3, 4, 5 UTP/STP Straight-Through ...of the hub to any of the 10Mbps or 100Mbps (MDI-X) ports on the DES-1005D/ DSS-5+ to any of the five DES-1005D/ DSS-5+ ports. CONNECTING THE SWITCH PC to DES-1005D/ DSS-5+ A computer can be connected to the DES-1005D/ DSS-5+ via a two-pair Category 3, 4, or 5 UTP/STP Straight-Through...
... equipped with a RJ-45 10/100Mbps port can be connected to any port of the computer's Ethernet card. DES-1005D/ DSS-5+ to other devices The DES-1005D/ DSS-5+ can be connected to another switch or other devices (routers, bridges, etc.) via a two-pair Category 3, 4, 5 UTP/STP Straight-Through ...of the hub to any of the 10Mbps or 100Mbps (MDI-X) ports on the DES-1005D/ DSS-5+ to any of the five DES-1005D/ DSS-5+ ports. CONNECTING THE SWITCH PC to DES-1005D/ DSS-5+ A computer can be connected to the DES-1005D/ DSS-5+ via a two-pair Category 3, 4, or 5 UTP/STP Straight-Through...

Manual
Page 13
...a cement wall. 2. you have completed the wall-mount. (1) 3/4 inch minimum for wood wall (2) 3 inch minimum for this purpose. MOUNTING THE SWITCH ON A WALL The DES-1005D/ DSS-5+ can also be mounted on a wood wall 1. Two mounting slots are provided on a cement wall 1. Please make sure that the front ...panel is exposed in order to the illustration below: A.) Mounting on the bottom of the switch for cement wall. 11 Mount...
...a cement wall. 2. you have completed the wall-mount. (1) 3/4 inch minimum for wood wall (2) 3 inch minimum for this purpose. MOUNTING THE SWITCH ON A WALL The DES-1005D/ DSS-5+ can also be mounted on a wood wall 1. Two mounting slots are provided on a cement wall 1. Please make sure that the front ...panel is exposed in order to the illustration below: A.) Mounting on the bottom of the switch for cement wall. 11 Mount...


