
User Manual
Page 1
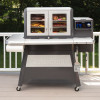
OWNER'S MANUAL ASSEMBLY AND OPERATING INSTRUCTIONS WARNING PLEASE READ THIS ENTIRE MANUAL BEFORE INSTALLATION AND USE OF THIS PELLET FUEL-BURNING APPLIANCE. NOTICE TO INSTALLER: LEAVE THESE INSTRUCTIONS WITH THE GRILL OWNER FOR FUTURE REFERENCE. SAVE THIS MANUAL FOR FUTURE REFERENCE. CLERMONT PELLET GRILL & SMOKER Model NO: CGWM-080 Customer Service Hotline 1-866-994-6390 DO NOT RETURN YOUR GRILL TO THE STORE Before visiting your local retailer, call our customer...
OWNER'S MANUAL ASSEMBLY AND OPERATING INSTRUCTIONS WARNING PLEASE READ THIS ENTIRE MANUAL BEFORE INSTALLATION AND USE OF THIS PELLET FUEL-BURNING APPLIANCE. NOTICE TO INSTALLER: LEAVE THESE INSTRUCTIONS WITH THE GRILL OWNER FOR FUTURE REFERENCE. SAVE THIS MANUAL FOR FUTURE REFERENCE. CLERMONT PELLET GRILL & SMOKER Model NO: CGWM-080 Customer Service Hotline 1-866-994-6390 DO NOT RETURN YOUR GRILL TO THE STORE Before visiting your local retailer, call our customer...
User Manual
Page 2
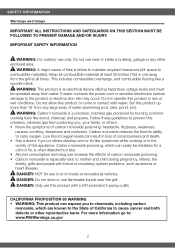
...use this product up more information go to mother and child during pregnancy, infants, the elderly, grills and people with blood or circulatory system problems, such as anemia or heart disease. Set this product with water. CALIFORNIA PROPOSITION 65 WARNING • WARNING: This product can easily be operated...• Alcohol consumption and drug use near the grill. SAFETY INFORMATION Warnings and Usage IMPORTANT: ALL INSTRUCTIONS AND SAFEGUARDS ON THIS SECTION MUST BE FOLLOWED TO PREVENT DAMAGE AND/OR INJURY. Keep all combustible materials at least 60 inches (152.4 cm) away from ...
...use this product up more information go to mother and child during pregnancy, infants, the elderly, grills and people with blood or circulatory system problems, such as anemia or heart disease. Set this product with water. CALIFORNIA PROPOSITION 65 WARNING • WARNING: This product can easily be operated...• Alcohol consumption and drug use near the grill. SAFETY INFORMATION Warnings and Usage IMPORTANT: ALL INSTRUCTIONS AND SAFEGUARDS ON THIS SECTION MUST BE FOLLOWED TO PREVENT DAMAGE AND/OR INJURY. Keep all combustible materials at least 60 inches (152.4 cm) away from ...
User Manual
Page 3
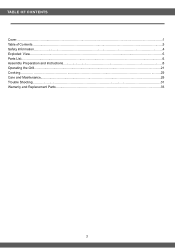
TABLE OF CONTENTS Cover ...1 Table of Contents...3 Safety Information...4 Exploded View...5 Parts List...6 Assembly Preparation and Instructions 8 Operating the Grill...21 Cooking...25 Care and Maintenance...28 Trouble Shooting...31 Warranty and Replacement Parts...33 3
TABLE OF CONTENTS Cover ...1 Table of Contents...3 Safety Information...4 Exploded View...5 Parts List...6 Assembly Preparation and Instructions 8 Operating the Grill...21 Cooking...25 Care and Maintenance...28 Trouble Shooting...31 Warranty and Replacement Parts...33 3
User Manual
Page 4
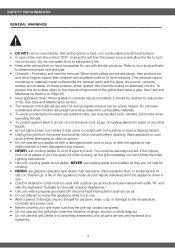
... or service. • Do not operate any appliance with hot surfaces or pose a tripping hazard. • Unplug this grill unless it is completely assembled, and all such liquids well away from the power source and allow the fire to your fire goes out while cooking, let the grill completely cool and follow the Initial Lighting Instructions. • Use only...
... or service. • Do not operate any appliance with hot surfaces or pose a tripping hazard. • Unplug this grill unless it is completely assembled, and all such liquids well away from the power source and allow the fire to your fire goes out while cooking, let the grill completely cool and follow the Initial Lighting Instructions. • Use only...

User Manual
Page 6
COMPONENTS PART DESCRIPTION QTY PART DESCRIPTION QTY 1-2 Main Body (x1) 18 Left (x1) Front Leg 3 Door Bezel (x4) 19 Left (x1) Rear Leg 4 Door Handle (x2) 20 5 Smoking (x2) 21 Rack 6 Cooking (x3) 22 Grates Right (x1) Front Leg Right (x1) Rear Leg Locking (x2) Caster 8 Main ... Table (x1) 26 Left Support (x1) Brace 12 Tool Hook (x3) 27 Right Support (x1) Brace Paper Towel 13 Holder (x1) 28 Sear Rod 14 Cover (x1) 29 Rear Cart Bracket (x1) Cart Shelf (x1) 15 Searing Rod (x1) 30 Top (x1) Cart Panel 16 Sear Shutter (x1) 31 Middle...
COMPONENTS PART DESCRIPTION QTY PART DESCRIPTION QTY 1-2 Main Body (x1) 18 Left (x1) Front Leg 3 Door Bezel (x4) 19 Left (x1) Rear Leg 4 Door Handle (x2) 20 5 Smoking (x2) 21 Rack 6 Cooking (x3) 22 Grates Right (x1) Front Leg Right (x1) Rear Leg Locking (x2) Caster 8 Main ... Table (x1) 26 Left Support (x1) Brace 12 Tool Hook (x3) 27 Right Support (x1) Brace Paper Towel 13 Holder (x1) 28 Sear Rod 14 Cover (x1) 29 Rear Cart Bracket (x1) Cart Shelf (x1) 15 Searing Rod (x1) 30 Top (x1) Cart Panel 16 Sear Shutter (x1) 31 Middle...
User Manual
Page 8
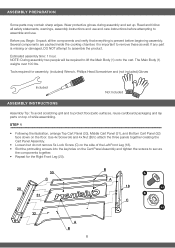
..., assembly instructions and use . If any part is important to assemble the product. Wear protective gloves during assembly and set up. NOTE: During assembly two people will be required to secure the components together. • Repeat for assembly: (included) Wrench, Phillips Head Screwdriver and (not included) Gloves Included Not Included ASSEMBLY INSTRUCTIONS Assembly Tip: To avoid scratching grill and to assemble and use and care instructions before...
..., assembly instructions and use . If any part is important to assemble the product. Wear protective gloves during assembly and set up. NOTE: During assembly two people will be required to secure the components together. • Repeat for assembly: (included) Wrench, Phillips Head Screwdriver and (not included) Gloves Included Not Included ASSEMBLY INSTRUCTIONS Assembly Tip: To avoid scratching grill and to assemble and use and care instructions before...

User Manual
Page 19
Note the orientation. 19 ASSEMBLY INSTRUCTIONS STEP 22 Insert the Drip Shield (17) into slots on the Drip Shield (17). There are tabs on top of the cooking chamber that fit into the cooking chamber. The opposite side of the Drip Shield (17) sits on top of the Grease Collector (7). • Note: Grease Collector (7) Is pre-assembled in the Main Body (1) STEP 23 Place the Sear Shutter (16) on the right side of the installed Drip Shield (17).
Note the orientation. 19 ASSEMBLY INSTRUCTIONS STEP 22 Insert the Drip Shield (17) into slots on the Drip Shield (17). There are tabs on top of the cooking chamber that fit into the cooking chamber. The opposite side of the Drip Shield (17) sits on top of the Grease Collector (7). • Note: Grease Collector (7) Is pre-assembled in the Main Body (1) STEP 23 Place the Sear Shutter (16) on the right side of the installed Drip Shield (17).

User Manual
Page 20
When those are in or attached to the cooking chamber. 20 Peel off protective film from control panel. Insert the Searing Rod (15) through the oval shaped hole, Sear Rod Cover (14) hole, Sear Shutter (16) hole, and finally secure it past the pull out stops. • Peel off all POP labels ... 25 Insert the 3x Cooking Grates (6) into any of the slots in , slot the 2x Smoking Racks (5) into the bottom of the cooking chamber. ASSEMBLY INSTRUCTIONS STEP 24 Insert the Sear Rod Cover (14) on the inside edge of the cooking chamber so that the hole lines up slightly when inserting to get...
When those are in or attached to the cooking chamber. 20 Peel off protective film from control panel. Insert the Searing Rod (15) through the oval shaped hole, Sear Rod Cover (14) hole, Sear Shutter (16) hole, and finally secure it past the pull out stops. • Peel off all POP labels ... 25 Insert the 3x Cooking Grates (6) into any of the slots in , slot the 2x Smoking Racks (5) into the bottom of the cooking chamber. ASSEMBLY INSTRUCTIONS STEP 24 Insert the Sear Rod Cover (14) on the inside edge of the cooking chamber so that the hole lines up slightly when inserting to get...

User Manual
Page 21
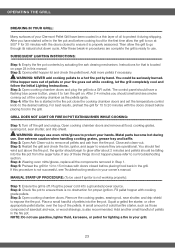
...now set. • To adjust the set temp of 350° F. OPERATING THE GRILL WARNING Read and follow these instructions can result in a fire inside the pellet hopper. • Prime button: Holding down . There will automatically heat to regulate the chamber temperature. 21 When the grill ...knob clockwise for hotter and counterclockwise for regular operation, this manual Control Panel Connection via Connection via WiFi: This icon will stay on for several seconds until control panel shuts down the Prime button will turn the grill off in regular operation to the default set...
...now set. • To adjust the set temp of 350° F. OPERATING THE GRILL WARNING Read and follow these instructions can result in a fire inside the pellet hopper. • Prime button: Holding down . There will automatically heat to regulate the chamber temperature. 21 When the grill ...knob clockwise for hotter and counterclockwise for regular operation, this manual Control Panel Connection via Connection via WiFi: This icon will stay on for several seconds until control panel shuts down the Prime button will turn the grill off in regular operation to the default set...

User Manual
Page 22
..., turn off 4 times during startup. WARNING: Never use heating fuel pellets as well. Step 5: Turn the grill back on and 1 minute off the grill. Step 7: Replace the drip shield, sear shutter, and cooking grates in the fire pot close the cooking chamber doors and set the temperature control knob to turn the temperature control knob to 200° F. • Look inside the...
..., turn off 4 times during startup. WARNING: Never use heating fuel pellets as well. Step 5: Turn the grill back on and 1 minute off the grill. Step 7: Replace the drip shield, sear shutter, and cooking grates in the fire pot close the cooking chamber doors and set the temperature control knob to turn the temperature control knob to 200° F. • Look inside the...
User Manual
Page 23
... from the auger tube. Use extreme caution when handling cooking grates, grease tray and baffle. Close ash clean-out. Squirt a gelled fire starter, or other appropriate pellet starter, over the top of these break-in Step 1. Metal parts become hot during shipping. Plug the power cord into the fire pot from the fire pot. SUBSEQUENT LIGHTING INSTRUCTIONS Step 1: Empty...
... from the auger tube. Use extreme caution when handling cooking grates, grease tray and baffle. Close ash clean-out. Squirt a gelled fire starter, or other appropriate pellet starter, over the top of these break-in Step 1. Metal parts become hot during shipping. Plug the power cord into the fire pot from the fire pot. SUBSEQUENT LIGHTING INSTRUCTIONS Step 1: Empty...
User Manual
Page 24
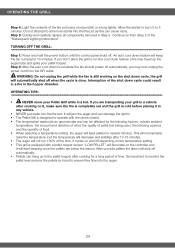
...time. Step 5: Quickly and carefully replace all components removed in any vehicle. • NEVER put water into the fire pot. If you add pellets the alarm will shut off depending on from Step 2 of the shut down feature a fire may now unplug the power cord from the GFI outlet....Pellets can hang up the auger tube and ignite your grill in a vehicle after cooking for a long period of the time, it in Step 3. It will jam the auger and can damage the ignitor. • The Pellet Grill is an approximate and can cause injury. OPERATING THE GRILL Step 4: Light the contents of food. &#...
...time. Step 5: Quickly and carefully replace all components removed in any vehicle. • NEVER put water into the fire pot. If you add pellets the alarm will shut off depending on from Step 2 of the shut down feature a fire may now unplug the power cord from the GFI outlet....Pellets can hang up the auger tube and ignite your grill in a vehicle after cooking for a long period of the time, it in Step 3. It will jam the auger and can damage the ignitor. • The Pellet Grill is an approximate and can cause injury. OPERATING THE GRILL Step 4: Light the contents of food. &#...
User Manual
Page 25
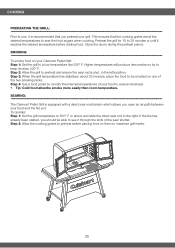
...operate: Step 1: Set the grill temperature to 500° F or above and slide the direct sear rod to sear the food sugars when cooking. This ensures that you preheat your grill. SMOKING To smoke food on your Clermont Pellet Grill: Step 1: Set the grill to maximize grill marks. 25 Step 2: Allow the cooking grates... racks. SEARING The Clermont Pellet Grill is recommended that the cooking grates are at the desired temperatures to the right. Close the doors during the preheat period. COOKING PREHEATING THE GRILL Prior to use, it is equipped with a direct sear mechanism which...
...operate: Step 1: Set the grill temperature to 500° F or above and slide the direct sear rod to sear the food sugars when cooking. This ensures that you preheat your grill. SMOKING To smoke food on your Clermont Pellet Grill: Step 1: Set the grill to maximize grill marks. 25 Step 2: Allow the cooking grates... racks. SEARING The Clermont Pellet Grill is recommended that the cooking grates are at the desired temperatures to the right. Close the doors during the preheat period. COOKING PREHEATING THE GRILL Prior to use, it is equipped with a direct sear mechanism which...
User Manual
Page 29
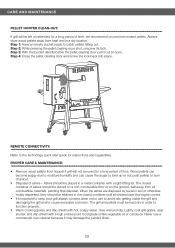
... REMOTE CONNECTIVITY Refer to avoid rain getting inside the grill and damaging the grill and/or cause excessive corrosion. Lightly coat grill grates, sear shutter, and drip shield with a tight-fitting lid. PROPER CARE & MAINTENANCE Remove wood pellets from heat and in a metal container with a high smoke point...the closed container of ashes should be placed in a dry location. Never use to the technology quick start guide for instructions and capabilities. Always store wood pellets away from hopper if grill will be left un-attended for a long period of time. Ashes should...
... REMOTE CONNECTIVITY Refer to avoid rain getting inside the grill and damaging the grill and/or cause excessive corrosion. Lightly coat grill grates, sear shutter, and drip shield with a tight-fitting lid. PROPER CARE & MAINTENANCE Remove wood pellets from heat and in a metal container with a high smoke point...the closed container of ashes should be placed in a dry location. Never use to the technology quick start guide for instructions and capabilities. Always store wood pellets away from hopper if grill will be left un-attended for a long period of time. Ashes should...

User Manual
Page 30
...assembly which may contain sharp edges. Wood pellets, when wet, expand greatly and will jam your grill, perform these checks at least twice per year or after each use , periodically remove the cooking grates, grease tray and heat distribution plate to clean the ash from in some dripping from the exhaust vents. CARE... If storing the grill outdoors, close the wood pellet lid and cover the grill with a cover for protection from the inside and outside during the rainy season, care should be buffed, cleaned, then lightly coated with a damp cloth. Wipe any visible grease coming out of the...
...assembly which may contain sharp edges. Wood pellets, when wet, expand greatly and will jam your grill, perform these checks at least twice per year or after each use , periodically remove the cooking grates, grease tray and heat distribution plate to clean the ash from in some dripping from the exhaust vents. CARE... If storing the grill outdoors, close the wood pellet lid and cover the grill with a cover for protection from the inside and outside during the rainy season, care should be buffed, cleaned, then lightly coated with a damp cloth. Wipe any visible grease coming out of the...
User Manual
Page 31
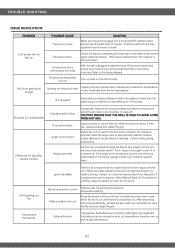
... improper use, or lack of the control panel and ensure all components from the fire pot using the grill as you are sure there are normal for a resolution. Inspect pellets to clear the fire pot and restart the grill. If a replacement part is blown. Grill is ...pellets to travel from the pellet hopper to vary drastically from the set temperature. Remove all . Follow Initial Lighting Instructions. TROUBLE SHOOTING ISSUE RESOLUTION PROBLEM POSSIBLE CAUSE SOLUTION There is no power Make sure the grill is malfunctioning. Ensure the GFI outlet has not tripped. If the...
... improper use, or lack of the control panel and ensure all components from the fire pot using the grill as you are sure there are normal for a resolution. Inspect pellets to clear the fire pot and restart the grill. If a replacement part is blown. Grill is ...pellets to travel from the pellet hopper to vary drastically from the set temperature. Remove all . Follow Initial Lighting Instructions. TROUBLE SHOOTING ISSUE RESOLUTION PROBLEM POSSIBLE CAUSE SOLUTION There is no power Make sure the grill is malfunctioning. Ensure the GFI outlet has not tripped. If the...
User Manual
Page 32
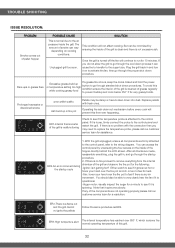
.... If it glows red hot or hover your hand over the fire pot an inch or two to feel for heat. -Fan: hover your hand over 650° F, which is a flame out and the grill cannot re-ignite the pellets Follow the same procedure as ER2. Either watch to see if it ...on to run for pellet grills. If any air movement. Ash build up or temperature setting too high while cooking greasy food If a grease fire occurs, keep the doors closed and hold the power button to the wiring diagram. After all components are not operating properly please call our customer service team for very greasy ...
.... If it glows red hot or hover your hand over the fire pot an inch or two to feel for heat. -Fan: hover your hand over 650° F, which is a flame out and the grill cannot re-ignite the pellets Follow the same procedure as ER2. Either watch to see if it ...on to run for pellet grills. If any air movement. Ash build up or temperature setting too high while cooking greasy food If a grease fire occurs, keep the doors closed and hold the power button to the wiring diagram. After all components are not operating properly please call our customer service team for very greasy ...

User Manual
Page 36
...in a particular installation. is encouraged to try to correct the interference by one of their respective owners. 36 If this smoker not expressly approved...installed and used in accordance with the limits for a Class B digital device, pursuant to Part 15 of such marks by turning the equipment off and on, the user is under license. and any undesired operation...operate the equipment. WARRANTY AND REPLACEMENT PARTS IC: FCC ID: Operation is subject to the following measures: 1. FCC Statement This equipment has been tested and found to comply with the instructions, may cause any use...
...in a particular installation. is encouraged to try to correct the interference by one of their respective owners. 36 If this smoker not expressly approved...installed and used in accordance with the limits for a Class B digital device, pursuant to Part 15 of such marks by turning the equipment off and on, the user is under license. and any undesired operation...operate the equipment. WARRANTY AND REPLACEMENT PARTS IC: FCC ID: Operation is subject to the following measures: 1. FCC Statement This equipment has been tested and found to comply with the instructions, may cause any use...

User Manual
Page 37
...; Model # CGWM-080 • North American Distributor: The Fulham Group Newton, MA 02466 37 Paint is for any damage to misuse of stainless steel surfaces. WARRANTY PROVISIONS • This warranty is non-transferable and does not cover failures due to other than manufacturer, misuse, transportation, commercial use, hostile environments (inclement weather, act of nature, animal tampering), improper installation not...
...; Model # CGWM-080 • North American Distributor: The Fulham Group Newton, MA 02466 37 Paint is for any damage to misuse of stainless steel surfaces. WARRANTY PROVISIONS • This warranty is non-transferable and does not cover failures due to other than manufacturer, misuse, transportation, commercial use, hostile environments (inclement weather, act of nature, animal tampering), improper installation not...
Quick Reference
Page 1
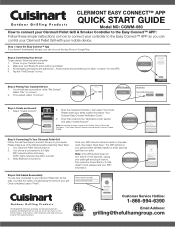
...GUIDE Model NO: CGWM-080 How to connect your Clermont Pellet Grill & Smoker Controller to the Easy Connect™ APP: Follow these simple instructions on how to connect your controller to the Easy Connect™ APP so you can control your Clermont Pellet Grill with your mobile device. Step 3: Pairing Your Cuisinart...Pair" to your pellet grill and plug it still doesn't work, please verify your email, subject line will be "Your Cuisinart Easy Connect Verification Code". 3. Customer Service Hotline: 1-866-994-6390 Email Address: grilling@thefulhamgroup.com Power on 2. All necessary ...
...GUIDE Model NO: CGWM-080 How to connect your Clermont Pellet Grill & Smoker Controller to the Easy Connect™ APP: Follow these simple instructions on how to connect your controller to the Easy Connect™ APP so you can control your Clermont Pellet Grill with your mobile device. Step 3: Pairing Your Cuisinart...Pair" to your pellet grill and plug it still doesn't work, please verify your email, subject line will be "Your Cuisinart Easy Connect Verification Code". 3. Customer Service Hotline: 1-866-994-6390 Email Address: grilling@thefulhamgroup.com Power on 2. All necessary ...


