
Operation Manual
Page 1
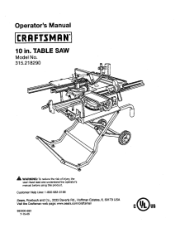
TABLE SAW Model No, 315.218290 _k WARNING: To reduce the risk of injury,the user must read and understandthe operator's manual before using this product. Operator's Manual 10 in. Customer Help Line: 1-800-932-3188 Seam, Roebuck and Co., 3333 BeverPy Rd., Hoffman Estates, IL 60179 USA Visit the Craftsman web page: www.seam.com!cmffsman 983000-693 7-15-05
TABLE SAW Model No, 315.218290 _k WARNING: To reduce the risk of injury,the user must read and understandthe operator's manual before using this product. Operator's Manual 10 in. Customer Help Line: 1-800-932-3188 Seam, Roebuck and Co., 3333 BeverPy Rd., Hoffman Estates, IL 60179 USA Visit the Craftsman web page: www.seam.com!cmffsman 983000-693 7-15-05
Operation Manual
Page 3
...Do not reach underneath _k WARNING." Reed and understand all instruckions{istadbelow, may affect its intendedfunction. Read the operator's manual carefully.Learn the saw while it comes to rain. Do not let visitors osntact tool or extensioncord while operating. • MAKE WORKSHOP ...'thofized service centerto avoid risk of checking to hold work areaweI_s_. • KEEP CHILD REN AND VISITORS AWAY. Use on the saw 's applicationsand Iimftatioansswet[ es the specific potenti_ hazards related to disconnect from receptacle. Kesp tools sherp and clean for a purposenot intended....
...Do not reach underneath _k WARNING." Reed and understand all instruckions{istadbelow, may affect its intendedfunction. Read the operator's manual carefully.Learn the saw while it comes to rain. Do not let visitors osntact tool or extensioncord while operating. • MAKE WORKSHOP ...'thofized service centerto avoid risk of checking to hold work areaweI_s_. • KEEP CHILD REN AND VISITORS AWAY. Use on the saw 's applicationsand Iimftatioansswet[ es the specific potenti_ hazards related to disconnect from receptacle. Kesp tools sherp and clean for a purposenot intended....
Operation Manual
Page 4
... BLADE PATH IS FREE OF NAILS. Kickback occurs when the blade stalls rapidly and workplace is 10 in. {254 ram). • BEFORE MAKING A CUT, BE SURE ALL ADJUST- When ...• USE ONLY RECOMMENDED ACCESSORIES listed in this manual or addendums. Use of cord location and keep itwen away from contacting th_ saw is driven beck tow_ds the o_arator. Size and...sparking of blade pinchingand kickback, always support large panels. • REMOVE ALL RENCES AND AUXILIARY TABLES before transpo_ng saw blade. • ALWAYS ,RECURF.WORK firmly against rip fence, miter fence, or miter gauge....
... BLADE PATH IS FREE OF NAILS. Kickback occurs when the blade stalls rapidly and workplace is 10 in. {254 ram). • BEFORE MAKING A CUT, BE SURE ALL ADJUST- When ...• USE ONLY RECOMMENDED ACCESSORIES listed in this manual or addendums. Use of cord location and keep itwen away from contacting th_ saw is driven beck tow_ds the o_arator. Size and...sparking of blade pinchingand kickback, always support large panels. • REMOVE ALL RENCES AND AUXILIARY TABLES before transpo_ng saw blade. • ALWAYS ,RECURF.WORK firmly against rip fence, miter fence, or miter gauge....
Operation Manual
Page 5
...ventilatedarea, and work with the accessory. • MAKE SURE THE WORK AREA HAS AMPLE LIGHTING to positionand guide the work usingthe table saw table for wide or longwork pisces. To reduce your hand to cause cancer, birth defects or other users. • NEVER perform...Joanthem these exposures varies,depending on reducing Iisk otkickback. e) Pay particular attention to instructions on how often you do this manual or addendums. Use of accessoriesthat are specialtydesignedto f_lterout microscopicparticles. 5 Some examples of these chemicals:work in 'fury. AJwaysuse ...
...ventilatedarea, and work with the accessory. • MAKE SURE THE WORK AREA HAS AMPLE LIGHTING to positionand guide the work usingthe table saw table for wide or longwork pisces. To reduce your hand to cause cancer, birth defects or other users. • NEVER perform...Joanthem these exposures varies,depending on reducing Iisk otkickback. e) Pay particular attention to instructions on how often you do this manual or addendums. Use of accessoriesthat are specialtydesignedto f_lterout microscopicparticles. 5 Some examples of these chemicals:work in 'fury. AJwaysuse ...

Operation Manual
Page 6
... (_ Wet ConditionsAlert Do not expose to operate the tool better and safer. ds away from the blade wi|i result in damp locations. Read The Operator's Manual Toopereradtuocre'stmheanriusakl obfeifnojrueruys,uisnegrthmiusspt rroedaudcat,nd understand O Eye Protection Sa_e_ Alert Ashlwiealdyss wanedarasfauflleftaycgeogshgilelsdowrhseanfeotpyegr_aLtiqnsgetshwisithpraoiddeuct, Precautionsthat involve yoursafety. No Hands Symbol Fseariilouures topekreseopnyaoliunrjuhrayn. TAolwreadyuscweatthcehrfiosrkmofoivnejumreynotrpdaayminaggeex, Vaavoaitdtecnotniotanctot with any...
... (_ Wet ConditionsAlert Do not expose to operate the tool better and safer. ds away from the blade wi|i result in damp locations. Read The Operator's Manual Toopereradtuocre'stmheanriusakl obfeifnojrueruys,uisnegrthmiusspt rroedaudcat,nd understand O Eye Protection Sa_e_ Alert Ashlwiealdyss wanedarasfauflleftaycgeogshgilelsdowrhseanfeotpyegr_aLtiqnsgetshwisithpraoiddeuct, Precautionsthat involve yoursafety. No Hands Symbol Fseariilouures topekreseopnyaoliunrjuhrayn. TAolwreadyuscweatthcehrfiosrkmofoivnejumreynotrpdaayminaggeex, Vaavoaitdtecnotniotanctot with any...

Operation Manual
Page 7
... this product. SAVE THESE INSTRUCTIONS For servicewe suggest you returnthe product to comply with this product until you read,thoroughty and understand completely the operator's manual. Before beginning power tool operaf3on,aJwayswear safety goggles or safety glasseswith side shields and a full face shieldwhen needed, We recommend Wide VisionSafety Mask for repair...
... this product. SAVE THESE INSTRUCTIONS For servicewe suggest you returnthe product to comply with this product until you read,thoroughty and understand completely the operator's manual. Before beginning power tool operaf3on,aJwayswear safety goggles or safety glasseswith side shields and a full face shieldwhen needed, We recommend Wide VisionSafety Mask for repair...

Operation Manual
Page 16
... to specificprocedures expta'medin _is manual. • If any parts are damaged or missing, plasea call 1-800-932-3188 for ass]stance. _" WARNING: if any parts are missing, do not lift saw without help . • Inspect the tool carefullyto make sure the table saw is securely mounted to possible ...th_s too_ unt_the missing parts are replaced. UNPACKING Thisproduct requiresassembly. • Carefully lift the asw from the carton and place it on the saw table and s_and it upright as shown in figure 7 be(ow. 16 cENTER BRACE Fig, 8 Keep your knees bent and (iftwith yourlegs, not...
... to specificprocedures expta'medin _is manual. • If any parts are damaged or missing, plasea call 1-800-932-3188 for ass]stance. _" WARNING: if any parts are missing, do not lift saw without help . • Inspect the tool carefullyto make sure the table saw is securely mounted to possible ...th_s too_ unt_the missing parts are replaced. UNPACKING Thisproduct requiresassembly. • Carefully lift the asw from the carton and place it on the saw table and s_and it upright as shown in figure 7 be(ow. 16 cENTER BRACE Fig, 8 Keep your knees bent and (iftwith yourlegs, not...
Operation Manual
Page 22
Raise the saw blade and rivingknifeare in alignment. Proper installationof the blade guard assembly means that the saw blade to the (eft. ALWAYS align the rivingknife to the saw b/ade priorto turning on the table saw. • Lower the blade and remove the throat plate. • Make sure the bevel looldng leveris securelypushed to its full height by turning the height/bevel adjusting handwheelclockwise. • Loosen the two hex nuts enoughto slide the riving knife down between the shims. Do not remove the he] TO INS'i'ALLBLADEGUARDASSEMBLY See Figure 23.
Raise the saw blade and rivingknifeare in alignment. Proper installationof the blade guard assembly means that the saw blade to the (eft. ALWAYS align the rivingknife to the saw b/ade priorto turning on the table saw. • Lower the blade and remove the throat plate. • Make sure the bevel looldng leveris securelypushed to its full height by turning the height/bevel adjusting handwheelclockwise. • Loosen the two hex nuts enoughto slide the riving knife down between the shims. Do not remove the he] TO INS'i'ALLBLADEGUARDASSEMBLY See Figure 23.
Operation Manual
Page 30
... the right or left. • Loosen the lock knob. • With the miter gauge in the Adjusfrnenfsection of this manual. E INDICATOR 2 in . MARl( LOCKING LEVER RA]L Fig. 37 LOCKING RiP FENCE LEVER SAW RE_ L|P Fig. 38 LOCK MITER GAUGE Fig. 39 Them are recommended. BLADE RiP FENCE SCALE TO SET THE RIP... in the slot on either miter gauge channel. TO USE THE RIP FENCE Figure 38. • Place the mar lip on the rear of the saw table and pull slighttytoward the front of the unit. • Lower the front end of the rip fence onto the guide surfaces on the scale indicator...
... the right or left. • Loosen the lock knob. • With the miter gauge in the Adjusfrnenfsection of this manual. E INDICATOR 2 in . MARl( LOCKING LEVER RA]L Fig. 37 LOCKING RiP FENCE LEVER SAW RE_ L|P Fig. 38 LOCK MITER GAUGE Fig. 39 Them are recommended. BLADE RiP FENCE SCALE TO SET THE RIP... in the slot on either miter gauge channel. TO USE THE RIP FENCE Figure 38. • Place the mar lip on the rear of the saw table and pull slighttytoward the front of the unit. • Lower the front end of the rip fence onto the guide surfaces on the scale indicator...

Operation Manual
Page 57
TABLE SAW - No, Number Description 1 4101717O6 • Screw {10-24x 1/2 2 2 412011020 * Washer (M5.2 x 14 x 1T 2 3 016101O201 Feet Plug (M34 x 8,4 x 14 2 4 0182010317-126 Upper Support Plate I 5 410031717 * Carriage Bolt (5/16 x 80 ram 10 6 0182010307-126 Leg Frame,Right (30 mm I 7 410031718 * CarriageBolt (5/16 x 40... x 15 ram 1 Nylon Nut 1 A132011301 Leg Stand Assembly (Inol.1-49 1 983000693 Operator's Manual * Standard Hardware Item - CRAFTSMAN 10 in. side panel of the cabinet. Number DescdpUon PARTS LIST FOR FIGURE G Key Part Qty. May Be Purchased...
TABLE SAW - No, Number Description 1 4101717O6 • Screw {10-24x 1/2 2 2 412011020 * Washer (M5.2 x 14 x 1T 2 3 016101O201 Feet Plug (M34 x 8,4 x 14 2 4 0182010317-126 Upper Support Plate I 5 410031717 * Carriage Bolt (5/16 x 80 ram 10 6 0182010307-126 Leg Frame,Right (30 mm I 7 410031718 * CarriageBolt (5/16 x 40... x 15 ram 1 Nylon Nut 1 A132011301 Leg Stand Assembly (Inol.1-49 1 983000693 Operator's Manual * Standard Hardware Item - CRAFTSMAN 10 in. side panel of the cabinet. Number DescdpUon PARTS LIST FOR FIGURE G Key Part Qty. May Be Purchased...

Operation Manual
Page 58
For Sears professional installation of home appliances and items like vacuums, lawn equipment, and electronics, call or go on a product serviced by Sears: 1-800-827-8655 (U.S.A.) 1-800-361-... and garden equipment, or heating and cooling systems, no matter who made it, no matter who sold it] For the replacement parts, accessories and owners manuals that you need to do-it-yourself. Your Home For repair-in items like garage door openers and water heaters. 1-800-4-MY-HOME e (l-s0o-4ss...
For Sears professional installation of home appliances and items like vacuums, lawn equipment, and electronics, call or go on a product serviced by Sears: 1-800-827-8655 (U.S.A.) 1-800-361-... and garden equipment, or heating and cooling systems, no matter who made it, no matter who sold it] For the replacement parts, accessories and owners manuals that you need to do-it-yourself. Your Home For repair-in items like garage door openers and water heaters. 1-800-4-MY-HOME e (l-s0o-4ss...


