Operation Manual
Page 22
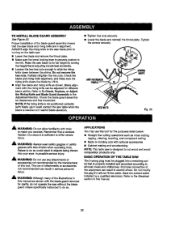
ALWAYS align the rivingknife to the saw b/ade priorto turning on the table saw. • Lower the blade and remove the throat plate. • Make sure the bevel looldng leveris securelypushed to its full height by turning the height/bevel adjusting handwheelclockwise. • Loosen the two hex nuts enoughto slide the riving knife down between the shims. Do not remove the he] TO INS'i'ALLBLADEGUARDASSEMBLY See Figure 23. Raise the saw blade and rivingknifeare in alignment. Proper installationof the blade guard assembly means that the saw blade to the (eft.
ALWAYS align the rivingknife to the saw b/ade priorto turning on the table saw. • Lower the blade and remove the throat plate. • Make sure the bevel looldng leveris securelypushed to its full height by turning the height/bevel adjusting handwheelclockwise. • Loosen the two hex nuts enoughto slide the riving knife down between the shims. Do not remove the he] TO INS'i'ALLBLADEGUARDASSEMBLY See Figure 23. Raise the saw blade and rivingknifeare in alignment. Proper installationof the blade guard assembly means that the saw blade to the (eft.
Operation Manual
Page 35
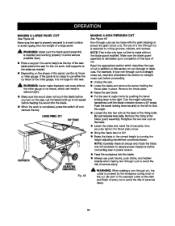
...right. Do not remove hex nuts. Add supportsto the sides as the top of the saw table behind the saw , Let the blade bu_d up to full speed beforefoeding the wood _,ntothe blade. ...a straight cross cut, read and understandthe sectionon straight cross cuts before you turn on non-throughor dado cuts. Push the bevel locking{eversecurelyto the [eft to avoid the risk of the riving knife... needed. • Depending on the base, • Lower the blade and insert the throat plate, then securelytighten the throat plate screw. • Bring the blade backto gO°. • Raise the blade _o the...
...right. Do not remove hex nuts. Add supportsto the sides as the top of the saw table behind the saw , Let the blade bu_d up to full speed beforefoeding the wood _,ntothe blade. ...a straight cross cut, read and understandthe sectionon straight cross cuts before you turn on non-throughor dado cuts. Push the bevel locking{eversecurelyto the [eft to avoid the risk of the riving knife... needed. • Depending on the base, • Lower the blade and insert the throat plate, then securelytighten the throat plate screw. • Bring the blade backto gO°. • Raise the blade _o the...
Operation Manual
Page 36
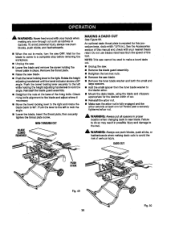
... the left to make a bevel dado CUt. • Unplug the saw. • Remove the blade guard aseembly. • Ratlghtanthe two hex nuts. • Remove the saw . • Lower the blade and remove the screw holding the throat plate in place. An optior_l _Ladothroat plate _sreq_drsdfor this tooL NOTE: This saw cannot be used to lock the...
... the left to make a bevel dado CUt. • Unplug the saw. • Remove the blade guard aseembly. • Ratlghtanthe two hex nuts. • Remove the saw . • Lower the blade and remove the screw holding the throat plate in place. An optior_l _Ladothroat plate _sreq_drsdfor this tooL NOTE: This saw cannot be used to lock the...
Operation Manual
Page 46
...rata'd: Item No. 9-22212 Zero Clearance Throat Plate A 41& WARNING; Replace blade if necessary Remount therip fence. Lookfortheseaccessories at rear. STACK DADOES. ',= NEVER BEVEL DAJDO. • NEVER USE ADJUSTABLE DADOES ON THIS SAW, PROBLEM Excess vibration. Cutting binds or burns work... blade, Align miterbase. Adiust the dvlng knife with convex side to table surface. 46 CAUSE Blade is damaged. Blade is uneven. Replace blade. Repositionon flat surface. Check Saw Blade Inst_la_on. Align the _lpfence. Always cut with shims provided. Adjustclamp...
...rata'd: Item No. 9-22212 Zero Clearance Throat Plate A 41& WARNING; Replace blade if necessary Remount therip fence. Lookfortheseaccessories at rear. STACK DADOES. ',= NEVER BEVEL DAJDO. • NEVER USE ADJUSTABLE DADOES ON THIS SAW, PROBLEM Excess vibration. Cutting binds or burns work... blade, Align miterbase. Adiust the dvlng knife with convex side to table surface. 46 CAUSE Blade is damaged. Blade is uneven. Replace blade. Repositionon flat surface. Check Saw Blade Inst_la_on. Align the _lpfence. Always cut with shims provided. Adjustclamp...


