Hp dx7510 Microtower Driver - Compaq PC
Hp dx7510 Microtower Driver
Related Manual Pages
Similar Questions

Hp Dx20000mt Driver Download For Window Xp
(Posted by allbest9100 10 years ago)

I Need Hp Compaq Drivers D248mt Software
i need hp compaq drivers d248mt software
i need hp compaq drivers d248mt software
(Posted by huska 12 years ago)

Hp Compaq Dc7800 Drivers
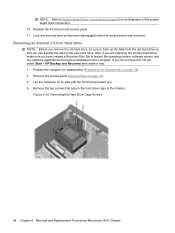
i tried to help somebody with his compaq dc7800 minitower convertible which had been affected by vir...
i tried to help somebody with his compaq dc7800 minitower convertible which had been affected by vir...
(Posted by rashidkamau 12 years ago)