
Reference Guide
Page 3
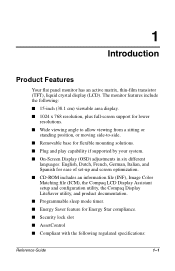
...compliance. I Energy Saver feature for flexible mounting solutions. I 15-inch (38.1 cm) viewable area display. 1 Introduction Product Features Your flat panel monitor has an active matrix, thin-film transistor (TFT), liquid crystal display (LCD). I Compliant with the following : I Programmable sleep mode .... I CD-ROM includes an information file (INF), Image Color Matching file (ICM), the Compaq LCD Display Assistant setup and configuration utility, the Compaq Display LiteSaver utility, and product documentation. I On-Screen Display (OSD) adjustments in six different...
...compliance. I Energy Saver feature for flexible mounting solutions. I 15-inch (38.1 cm) viewable area display. 1 Introduction Product Features Your flat panel monitor has an active matrix, thin-film transistor (TFT), liquid crystal display (LCD). I Compliant with the following : I Programmable sleep mode .... I CD-ROM includes an information file (INF), Image Color Matching file (ICM), the Compaq LCD Display Assistant setup and configuration utility, the Compaq Display LiteSaver utility, and product documentation. I On-Screen Display (OSD) adjustments in six different...

Reference Guide
Page 6
... your equipment if surge protection fails. I Adjust only those controls that are covered in the operating instructions. Never disconnect the monitor by grasping the plug firmly and pulling it from walls or other enclosures. Use a power strip whose manufacturer offers a Damage... Replacement Policy so you can replace your Compaq authorized dealer, reseller, or service provider. I Use only a power source and connection appropriate for each device. Safety and Maintenance Guidelines...
... your equipment if surge protection fails. I Adjust only those controls that are covered in the operating instructions. Never disconnect the monitor by grasping the plug firmly and pulling it from walls or other enclosures. Use a power strip whose manufacturer offers a Damage... Replacement Policy so you can replace your Compaq authorized dealer, reseller, or service provider. I Use only a power source and connection appropriate for each device. Safety and Maintenance Guidelines...

Reference Guide
Page 7
Do not use . These chemicals may damage the cabinet finish as well as the screen. Safety and Maintenance Guidelines I Turn your monitor off monitor when not in use benzene, thinner, ammonia, or any kind into cabinet slots or other devices with strong magnetic fields. Use a damp ...If the screen requires additional cleaning, use an antistatic screen cleaner. Ä CAUTION: Do not use . I Do not allow anything to clean your monitor in a well-ventilated area, away from the wall outlet before cleaning. I Slots and openings in use liquid cleaners or aerosol cleaners. I Keep your...
Do not use . These chemicals may damage the cabinet finish as well as the screen. Safety and Maintenance Guidelines I Turn your monitor off monitor when not in use benzene, thinner, ammonia, or any kind into cabinet slots or other devices with strong magnetic fields. Use a damp ...If the screen requires additional cleaning, use an antistatic screen cleaner. Ä CAUTION: Do not use . I Do not allow anything to clean your monitor in a well-ventilated area, away from the wall outlet before cleaning. I Slots and openings in use liquid cleaners or aerosol cleaners. I Keep your...

Reference Guide
Page 9
... on the rear panel of the computer. 7. Connect the audio cable to the video connector 1 on the rear panel of the monitor. 3. Reference Guide 3-1 Connect the monitor signal cable to the audio connector 6 on the rear panel of the computer. (select models only, cable not shown in illustration) ...8. Connect the power cable 8 to the AC adapter 7. 9. Place the monitor signal cable into the clip 2 on the rear panel of the monitor. 4. Connect the AC power cord to an electrical wall outlet. Connect the AC power adapter cable to your computer....
... on the rear panel of the computer. 7. Connect the audio cable to the video connector 1 on the rear panel of the monitor. 3. Reference Guide 3-1 Connect the monitor signal cable to the audio connector 6 on the rear panel of the computer. (select models only, cable not shown in illustration) ...8. Connect the power cable 8 to the AC adapter 7. 9. Place the monitor signal cable into the clip 2 on the rear panel of the monitor. 4. Connect the AC power cord to an electrical wall outlet. Connect the AC power adapter cable to your computer....
Reference Guide
Page 10
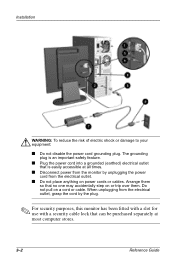
... unplugging the power cord from the electrical outlet, grasp the cord by the plug. ✎ For security purposes, this monitor has been fitted with a slot for use with a security cable lock that can be purchased separately at all times. I Plug the power cord into a grounded (...
... unplugging the power cord from the electrical outlet, grasp the cord by the plug. ✎ For security purposes, this monitor has been fitted with a slot for use with a security cable lock that can be purchased separately at all times. I Plug the power cord into a grounded (...
Reference Guide
Page 11
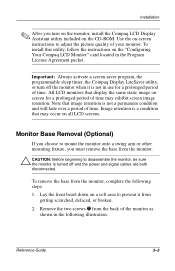
...Always activate a screen saver program, the programmable sleep timer, the Compaq Display LiteSaver utility, or turn on the monitor, install the Compaq LCD Display Assistant utility included on a soft area to prevent it is turned off the monitor when it from getting scratched, defaced, or broken. 2. Reference...Agreement packet. Use the on the "Configuring Your Compaq LCD Monitor" card located in use for a prolonged period of the monitor as shown in the following steps: 1. Monitor Base Removal (Optional) If you choose to mount the monitor onto a swing arm or other mounting fixture, ...
...Always activate a screen saver program, the programmable sleep timer, the Compaq Display LiteSaver utility, or turn on the monitor, install the Compaq LCD Display Assistant utility included on a soft area to prevent it is turned off the monitor when it from getting scratched, defaced, or broken. 2. Reference...Agreement packet. Use the on the "Configuring Your Compaq LCD Monitor" card located in use for a prolonged period of the monitor as shown in the following steps: 1. Monitor Base Removal (Optional) If you choose to mount the monitor onto a swing arm or other mounting fixture, ...

Reference Guide
Page 12
Remove the base 2 from the monitor by pushing the base away from the monitor. 3-4 Reference Guide Installation 3.
Remove the base 2 from the monitor by pushing the base away from the monitor. 3-4 Reference Guide Installation 3.

Reference Guide
Page 13
... this feature. To install these files on : www.compaq.com/products/monitors/index.html and selecting the desired monitor. 4 Operation Information Files The CD-ROM included with your computer: 1. The .INF file defines monitor resources and provides specifications used by clicking on your computer...operating systems to printer and is activated from the Compaq Web site. When the CD-ROM menu launches, select Install INF and ICM Files. 3. Access http://www.compaq.com/support/files/monitors/index.html and select your monitor model to be installed onto your computer's optical...
... this feature. To install these files on : www.compaq.com/products/monitors/index.html and selecting the desired monitor. 4 Operation Information Files The CD-ROM included with your computer: 1. The .INF file defines monitor resources and provides specifications used by clicking on your computer...operating systems to printer and is activated from the Compaq Web site. When the CD-ROM menu launches, select Install INF and ICM Files. 3. Access http://www.compaq.com/support/files/monitors/index.html and select your monitor model to be installed onto your computer's optical...

Reference Guide
Page 14
Left Adjustment Moves backward through menu options or decreases adjustment levels. 4-2 Reference Guide Operation Front Panel Controls No. 1 Icon Control Headphone Jack Function Connects a headphone set to the monitor. 2 Select Launches on-screen displays, selects functions and adjustments, and exits menus and On-Screen Display. 3 -
Left Adjustment Moves backward through menu options or decreases adjustment levels. 4-2 Reference Guide Operation Front Panel Controls No. 1 Icon Control Headphone Jack Function Connects a headphone set to the monitor. 2 Select Launches on-screen displays, selects functions and adjustments, and exits menus and On-Screen Display. 3 -

Reference Guide
Page 15
... the Sleep Timer in the on-screen display. displays as 13 hours 15 minutes. Note that appear on and power off the monitor at the same time every day. To access the OSD, do the following: 1. The LED on the power button indicates the state of the day ... on your viewing preferences. On-Screen Display The On-Screen Display (OSD) adjusts the screen image based on , press the Power button to the monitor. For example, 1:15 p.m. It eliminates the need to display the On-Screen Display menu. Press the Select button to turn on . 7 Power switch Controls power to turn...
... the Sleep Timer in the on-screen display. displays as 13 hours 15 minutes. Note that appear on and power off the monitor at the same time every day. To access the OSD, do the following: 1. The LED on the power button indicates the state of the day ... on your viewing preferences. On-Screen Display The On-Screen Display (OSD) adjusts the screen image based on , press the Power button to the monitor. For example, 1:15 p.m. It eliminates the need to display the On-Screen Display menu. Press the Select button to turn on . 7 Power switch Controls power to turn...

Reference Guide
Page 16
... found on the front control panel of adjustment. 6. Press the Select button on the front panel of your monitor to increase (Right) or decrease (Left) the level of your monitor until the function is highlighted. 4. To exit the On-Screen Display, select the Exit icon and press the... Select button once. Press Select to a function, press the Right-Adjustment or Left-Adjustment button on the monitor choose the function. 5. The adjustment window...
... found on the front control panel of adjustment. 6. Press the Select button on the front panel of your monitor to increase (Right) or decrease (Left) the level of your monitor until the function is highlighted. 4. To exit the On-Screen Display, select the Exit icon and press the... Select button once. Press Select to a function, press the Right-Adjustment or Left-Adjustment button on the monitor choose the function. 5. The adjustment window...

Reference Guide
Page 19
Main Menu Brightness Contrast Auto Adjustment Advanced Menu Exit ❏ Advanced Main Menu: Select "Advanced Menu" from the Basic Main Menu to Adjust Settings 1. Operation How to display the Advanced Main Menu shown below. Main Menu Brightness Contrast Image Control Color Language Management OSD Control Factory Reset Exit Reference Guide 4-7 To launch the on-screen display menu, complete the following: ❏ Basic Main Menu: To display the Basic Main Menu, press the Select button on the monitor front panel.
Main Menu Brightness Contrast Auto Adjustment Advanced Menu Exit ❏ Advanced Main Menu: Select "Advanced Menu" from the Basic Main Menu to Adjust Settings 1. Operation How to display the Advanced Main Menu shown below. Main Menu Brightness Contrast Image Control Color Language Management OSD Control Factory Reset Exit Reference Guide 4-7 To launch the on-screen display menu, complete the following: ❏ Basic Main Menu: To display the Basic Main Menu, press the Select button on the monitor front panel.

Reference Guide
Page 20
... Exit from the Advanced Main Menu. Access the third level by pressing the Left Adjustment (-) button located on the monitor screen when identifying the following monitor conditions: 4-8 Reference Guide Note: The advanced menus for Brightness and Contrast display an adjustment screen. The on-screen display...selected again. 2. Operation Note: After the Advanced Main Menu has been selected, it remains the default on-screen display each time the monitor is powered on until the Basic Main Menu option is easy to increase the screen brightness and contrast. 5. Use the Left Adjustment ...
... Exit from the Advanced Main Menu. Access the third level by pressing the Left Adjustment (-) button located on the monitor screen when identifying the following monitor conditions: 4-8 Reference Guide Note: The advanced menus for Brightness and Contrast display an adjustment screen. The on-screen display...selected again. 2. Operation Note: After the Advanced Main Menu has been selected, it remains the default on-screen display each time the monitor is powered on until the Basic Main Menu option is easy to increase the screen brightness and contrast. 5. Use the Left Adjustment ...
Reference Guide
Page 21
... front panel for 10 seconds. Operation I Going to Sleep: Indicates the screen display is entering a sleep mode. The monitor also supports a reduced power state. When the monitor is in its normal operating mode. Reference Guide 4-9 Upon detecting the absence of either the horizontal sync signal and/or ...vertical sync signal. There is a brief warm up period before the monitor will be entered into the computer or the computer may not be plugged into if the monitor detects the absence of these signals, the monitor screen is blanked, the backlight is turned off, and the Power ...
... front panel for 10 seconds. Operation I Going to Sleep: Indicates the screen display is entering a sleep mode. The monitor also supports a reduced power state. When the monitor is in its normal operating mode. Reference Guide 4-9 Upon detecting the absence of either the horizontal sync signal and/or ...vertical sync signal. There is a brief warm up period before the monitor will be entered into the computer or the computer may not be plugged into if the monitor detects the absence of these signals, the monitor screen is blanked, the backlight is turned off, and the Power ...

Reference Guide
Page 22
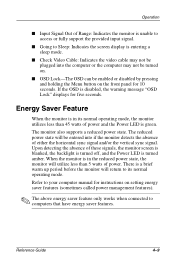
... Saver utility causes the monitor to select Management. 4. Press the Select button to enter the reduced power state, the Power LED blinks amber. displays as 13 hours 15 minutes. 5. Press the Select button on and off at a predetermined time. Scroll down and highlight and select Sleep Timer > Set ... On/Off I Sleep Now To set a time for hours. 4-10 Reference Guide For example, 1:15 p.m. Press the Select button once to enter the adjustment mode for the monitor to power on the monitor front panel to enter into the reduced power state at the same time every day. Note that...
... Saver utility causes the monitor to select Management. 4. Press the Select button to enter the reduced power state, the Power LED blinks amber. displays as 13 hours 15 minutes. 5. Press the Select button on and off at a predetermined time. Scroll down and highlight and select Sleep Timer > Set ... On/Off I Sleep Now To set a time for hours. 4-10 Reference Guide For example, 1:15 p.m. Press the Select button once to enter the adjustment mode for the monitor to power on the monitor front panel to enter into the reduced power state at the same time every day. Note that...

Reference Guide
Page 23
...time for 20 minutes before performing the following procedures. The Auto Adjustment feature in sleep mode until the next On Time activates or a monitor button is pressed. After setting the current time, the highlight automatically skips to set Sleep Time, press the Select button twice, then... select Save and Return to warm up for minutes. 8. Reference Guide 4-11 The fifth selection, Sleep Now, turns the monitor backlights off immediately and stays in the OSD automatically fine-tunes the image quality each time a new video mode is desired, select "Auto ...
...time for 20 minutes before performing the following procedures. The Auto Adjustment feature in sleep mode until the next On Time activates or a monitor button is pressed. After setting the current time, the highlight automatically skips to set Sleep Time, press the Select button twice, then... select Save and Return to warm up for minutes. 8. Reference Guide 4-11 The fifth selection, Sleep Now, turns the monitor backlights off immediately and stays in the OSD automatically fine-tunes the image quality each time a new video mode is desired, select "Auto ...
Reference Guide
Page 24
...the value to minimize video distortion or video jitter. ✎ When adjusting the Clock and Clock Phase values, if the monitor images become distorted, continue adjusting the values until the distortion disappears. This utility graphically illustrates how to improve image performance: Clock...are dependent on the CD-ROM. Optimizing Digital Conversion This monitor contains advanced circuitry that is not preset if: I You are not using a Compaq standard graphics adapter. Operation For more precise adjustments, use the Compaq LCD Display Assistant utility included on the main Clock setting.
...the value to minimize video distortion or video jitter. ✎ When adjusting the Clock and Clock Phase values, if the monitor images become distorted, continue adjusting the values until the distortion disappears. This utility graphically illustrates how to improve image performance: Clock...are dependent on the CD-ROM. Optimizing Digital Conversion This monitor contains advanced circuitry that is not preset if: I You are not using a Compaq standard graphics adapter. Operation For more precise adjustments, use the Compaq LCD Display Assistant utility included on the main Clock setting.

Reference Guide
Page 25
Reference Guide 4-13 Operation If this occurs, you may need to readjust the parameters of these modes and saved in memory. User changes can be made to the 11 factory preset modes, there are eight user modes that can be entered and stored. In addition to any or all of the monitor screen by using the on-screen display. The monitor automatically stores the new setting, then recognizes the new mode just as it does a preset mode.
Reference Guide 4-13 Operation If this occurs, you may need to readjust the parameters of these modes and saved in memory. User changes can be made to the 11 factory preset modes, there are eight user modes that can be entered and stored. In addition to any or all of the monitor screen by using the on-screen display. The monitor automatically stores the new setting, then recognizes the new mode just as it does a preset mode.

Reference Guide
Page 28
...sure that the new settings take effect. Restart your audio input jack (green connector) is disconnected. Monitor video cable is plugged into the back of the computer. Solution Press the SELECT button to a supported setting ...(see "Technical Specifications"). Restart your monitor supports. No sound from the back of your settings to access the On-Screen Display. Select Auto...displayed on screen. Speaker audio plug may need adjustment. Connect the 15-pin monitor video cable to the computer.
...sure that the new settings take effect. Restart your audio input jack (green connector) is disconnected. Monitor video cable is plugged into the back of the computer. Solution Press the SELECT button to a supported setting ...(see "Technical Specifications"). Restart your monitor supports. No sound from the back of your settings to access the On-Screen Display. Select Auto...displayed on screen. Speaker audio plug may need adjustment. Connect the 15-pin monitor video cable to the computer.

Reference Guide
Page 29
...submit your computer screen and deselect Mute. Leave at : http://www.compaq.com Reference Guide A-3 Troubleshooting Problem Monitor is not enough air space to the Compaq Web site at least 3 inches (76 mm) of the monitor. Volume may also be adjusted on the speaker. Volume may be ...activated. To access the Compaq Support Forum, go to allow proper ventilation. Compaq responds to questions...
...submit your computer screen and deselect Mute. Leave at : http://www.compaq.com Reference Guide A-3 Troubleshooting Problem Monitor is not enough air space to the Compaq Web site at least 3 inches (76 mm) of the monitor. Volume may also be adjusted on the speaker. Volume may be ...activated. To access the Compaq Support Forum, go to allow proper ventilation. Compaq responds to questions...


