Compaq 210189-001 - P 710 17" CRT Display Research
Related Manual Pages


Similar Questions

What Is R429 Resistor Value In Hp S7500 Pe1163
(Posted by malibhms125 1 year ago)

Service And Repair Manual For Compaq Wf1907 19 Inch Wide Screen Monitor
rerplaced bad caps and it lights up but no desk top display!!
rerplaced bad caps and it lights up but no desk top display!!
(Posted by deacchaz 11 years ago)

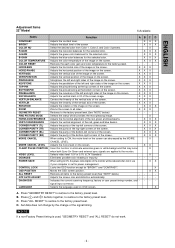
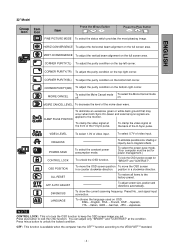
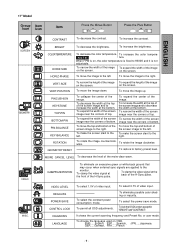
How To Do Menu Adjust
(Posted by Anonymous-51445 12 years ago)

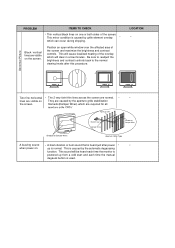
Using Fs 7550 & Display Shrunk Horizontally. On Screen Setting At 100%. Pls Help
(Posted by morewala 13 years ago)