Instruction Manual
Page 7
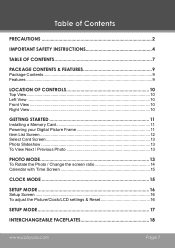
...10 Right View...10 Getting Started 11 Installing a Memory Card 11 Powering your Digital Picture Frame 11 Item List Screen 12 Select Card Screen 13 Photo Slideshow 13 To View Next / Previous Photo 13 Photo Mode 13 To Rotate the Photo / Change the screen ratio 14 Calendar with Time Screen 15 Clock Mode ...15 Setup Mode 16 Setup Screen...16 To adjust the Picture/Clock/LCD settings & Reset 16 ...
...10 Right View...10 Getting Started 11 Installing a Memory Card 11 Powering your Digital Picture Frame 11 Item List Screen 12 Select Card Screen 13 Photo Slideshow 13 To View Next / Previous Photo 13 Photo Mode 13 To Rotate the Photo / Change the screen ratio 14 Calendar with Time Screen 15 Clock Mode ...15 Setup Mode 16 Setup Screen...16 To adjust the Picture/Clock/LCD settings & Reset 16 ...
Instruction Manual
Page 11
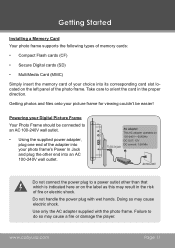
...100-240V wall outlet. • Using the supplied power adapter, plug one end of the adapter into your Digital Picture Frame Your Photo Frame should be easier! Powering your photo frame's Power In Jack and plug the other than that which is indicated here or on the left panel of...wet hands. Getting Started Installing a Memory Card Your photo frame supports the following types of memory cards: • Compact Flash cards (CF) • Secure Digital cards (SD) • MultiMedia Card (MMC) Simply insert the memory card of your picture frame for viewing couldn't be connected to a power ...
...100-240V wall outlet. • Using the supplied power adapter, plug one end of the adapter into your Digital Picture Frame Your Photo Frame should be easier! Powering your photo frame's Power In Jack and plug the other than that which is indicated here or on the left panel of...wet hands. Getting Started Installing a Memory Card Your photo frame supports the following types of memory cards: • Compact Flash cards (CF) • Secure Digital cards (SD) • MultiMedia Card (MMC) Simply insert the memory card of your picture frame for viewing couldn't be connected to a power ...

Instruction Manual
Page 20
.... • Ensure that the memory card is properly installed. • Ensure that the memory card is connected using the RCA AV cable. COBY Electronics Technical Support 56-65 Rust Street Maspeth, NY 11378 Email: [email protected] Web: www.cobyusa.com Phone: 800-727-3592 (8:00 ... cord has been properly connected to the ON position). • Ensure that the photo frame is not defective. Page 20 Coby Electronics Corporation If these resources do not resolve the problem, please contact Technical Support. The picture is noisy or distorted. • Reset the color system of the TV set...
.... • Ensure that the memory card is properly installed. • Ensure that the memory card is connected using the RCA AV cable. COBY Electronics Technical Support 56-65 Rust Street Maspeth, NY 11378 Email: [email protected] Web: www.cobyusa.com Phone: 800-727-3592 (8:00 ... cord has been properly connected to the ON position). • Ensure that the photo frame is not defective. Page 20 Coby Electronics Corporation If these resources do not resolve the problem, please contact Technical Support. The picture is noisy or distorted. • Reset the color system of the TV set...


