
User Guide
Page 2
... 5 Pre-Installation Considerations 5 Fast Ethernet Considerations 5 Full-Duplex Considerations 5 1000BASE-T Cable Requirements 5 Positioning the Switch 5 Placement Options 5 Desktop Placement 6 Rack-Mount Placement 6 Hardware Installation 6 Uplinking the Switch 6 Chapter 4: Configuration Using the Console Interface 7 Overview 7 Configuring the HyperTerminal Application 7 Configuring the Switch through the Console Interface 8 Login 8 Switch Main Menu 8 System Configuration Menu 8 Port...
... 5 Pre-Installation Considerations 5 Fast Ethernet Considerations 5 Full-Duplex Considerations 5 1000BASE-T Cable Requirements 5 Positioning the Switch 5 Placement Options 5 Desktop Placement 6 Rack-Mount Placement 6 Hardware Installation 6 Uplinking the Switch 6 Chapter 4: Configuration Using the Console Interface 7 Overview 7 Configuring the HyperTerminal Application 7 Configuring the Switch through the Console Interface 8 Login 8 Switch Main Menu 8 System Configuration Menu 8 Port...

User Guide
Page 6
... the amount of connected devices, eliminating the need to 8 trunking groups. All ports have automatic MDI/MDI-X crossover detection. The Switch can use the integrated console port to non-PoE devices. Or if you prefer, you need for connecting to your network backbone. All of the 48-Port 10/100 + 4-Port... optical fiber. Detection and authentication prevent damage to configure the Switch. These instructions should be all you can provide DC power to a wide range of cables attached to each device.
... the amount of connected devices, eliminating the need to 8 trunking groups. All ports have automatic MDI/MDI-X crossover detection. The Switch can use the integrated console port to non-PoE devices. Or if you prefer, you need for connecting to your network backbone. All of the 48-Port 10/100 + 4-Port... optical fiber. Detection and authentication prevent damage to configure the Switch. These instructions should be all you can provide DC power to a wide range of cables attached to each device.

User Guide
Page 8
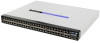
...to install a MFEFX1 (100BASE-FX) or MFELX1 (100BASE-LX) 100SFP Transceiver and use fiber optic cabling. Side Panel The security slot is located on the back panel of the Switch. Back Panel The console and power ports are located on a side panel of the Switch. You can be utilized to ... fiber optic cabling. Chapter 2 MiniGBIC (1-2) The Switch is equipped with two miniGBIC ports that allows you to connect to the Switch. 48-Port 10/100 + 4-Port Gigabit Switch with a serial port labeled Console (located on the back of the switch) that have shared Gigabit Ethernet ports (G3 and G4) which...
...to install a MFEFX1 (100BASE-FX) or MFELX1 (100BASE-LX) 100SFP Transceiver and use fiber optic cabling. Side Panel The security slot is located on the back panel of the Switch. Back Panel The console and power ports are located on a side panel of the Switch. You can be utilized to ... fiber optic cabling. Chapter 2 MiniGBIC (1-2) The Switch is equipped with two miniGBIC ports that allows you to connect to the Switch. 48-Port 10/100 + 4-Port Gigabit Switch with a serial port labeled Console (located on the back of the switch) that have shared Gigabit Ethernet ports (G3 and G4) which...

User Guide
Page 10
Hardware Installation To connect network devices to the miniGBIC port. Make sure all the devices you are using the Console Interface", for the switch and check the environmental restrictions mentioned in "Appendix C: Specifications" as you are placing the Switch. •... these instructions: 1 . Attaching the Brackets 3 . After the brackets are attached to the Switch, use a surge protector. 7 . Connect a Category 5 Ethernet network cable to one side of the Switch with the supplied screws and secure the bracket tightly. Power on the devices connected to the Switch's 10/100...
Hardware Installation To connect network devices to the miniGBIC port. Make sure all the devices you are using the Console Interface", for the switch and check the environmental restrictions mentioned in "Appendix C: Specifications" as you are placing the Switch. •... these instructions: 1 . Attaching the Brackets 3 . After the brackets are attached to the Switch, use a surge protector. 7 . Connect a Category 5 Ethernet network cable to one side of the Switch with the supplied screws and secure the bracket tightly. Power on the devices connected to the Switch's 10/100...

