User Guide
Page 1
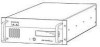
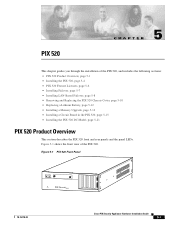
Figure 5-1 PIX 520 Front Panel 67852 RESET PIX FirewallSERIES 78-15170-02 Cisco PIX Security Appliance Hardware Installation Guide 5-1 PIX 520 CH A P T E R 5 This chapter guides you through the installation of the PIX 520. Figure 5-1 shows the front view of the PIX 520, and includes the following sections: • PIX 520 Product Overview, page 5-1 • Installing the PIX 520, page 5-4 • PIX 520 Feature Licenses, page 5-6 • Installing Failover, page...
Figure 5-1 PIX 520 Front Panel 67852 RESET PIX FirewallSERIES 78-15170-02 Cisco PIX Security Appliance Hardware Installation Guide 5-1 PIX 520 CH A P T E R 5 This chapter guides you through the installation of the PIX 520. Figure 5-1 shows the front view of the PIX 520, and includes the following sections: • PIX 520 Product Overview, page 5-1 • Installing the PIX 520, page 5-4 • PIX 520 Feature Licenses, page 5-6 • Installing Failover, page...

User Guide
Page 2
...is installed. Connectors on the slot in which the circuit board is installed. Figure 5-2 PIX 520 Rear Panel Chapter 5 PIX 520 67853 Auto-Range Selection L:90-135V H:180-270V RESET PIX FirewallSERIES Note Use of the four-port Ethernet circuit board changes the position of the ...outside and inside interfaces depending on the slot in slot 3 makes the number of the PIX 520. On horizontally mounted cards, the slots are numbered from the top connector down sequentially. Cisco PIX...
...is installed. Connectors on the slot in which the circuit board is installed. Figure 5-2 PIX 520 Rear Panel Chapter 5 PIX 520 67853 Auto-Range Selection L:90-135V H:180-270V RESET PIX FirewallSERIES Note Use of the four-port Ethernet circuit board changes the position of the ...outside and inside interfaces depending on the slot in slot 3 makes the number of the PIX 520. On horizontally mounted cards, the slots are numbered from the top connector down sequentially. Cisco PIX...

User Guide
Page 4
... plate on the features of the PIX 520. On the PIX 520, connect the cables at the front of the unit. Installing the PIX 520 Chapter 5 PIX 520 Installing the PIX 520 To install the PIX 520, perform the following steps: Step 1 Refer to each of the PIX security appliance network interfaces. Figure 5-6 PIX 520 Front, Rear, and Side Panels. Cisco PIX Security Appliance Hardware Installation Guide...
... plate on the features of the PIX 520. On the PIX 520, connect the cables at the front of the unit. Installing the PIX 520 Chapter 5 PIX 520 Installing the PIX 520 To install the PIX 520, perform the following steps: Step 1 Refer to each of the PIX security appliance network interfaces. Figure 5-6 PIX 520 Front, Rear, and Side Panels. Cisco PIX Security Appliance Hardware Installation Guide...

User Guide
Page 9
Based Failover Connections PIX 520 Installing LAN-Based Failover PIX 520 87366 RESET PIX FirewallSERIES Dedicated Ethernet interface RESET PIX FirewallSERIES Dedicated Ethernet interface Hub/switch Step 5 If you have Gigabit Ethernet (GE) interfaces, then the failover link must be ...configuration to the standby unit. If the primary unit fails, the secondary unit automatically becomes active. 78-15170-02 Cisco PIX Security Appliance Hardware Installation Guide 5-9 Chapter 5 PIX 520 Figure 5-10 LAN- Caution Do not turn the power on until the units are using Stateful Failover, use ...
Based Failover Connections PIX 520 Installing LAN-Based Failover PIX 520 87366 RESET PIX FirewallSERIES Dedicated Ethernet interface RESET PIX FirewallSERIES Dedicated Ethernet interface Hub/switch Step 5 If you have Gigabit Ethernet (GE) interfaces, then the failover link must be ...configuration to the standby unit. If the primary unit fails, the secondary unit automatically becomes active. 78-15170-02 Cisco PIX Security Appliance Hardware Installation Guide 5-9 Chapter 5 PIX 520 Figure 5-10 LAN- Caution Do not turn the power on until the units are using Stateful Failover, use ...

User Guide
Page 10
...chassis cover, perform the following steps: Note Removing the PIX security appliance case does not affect your Cisco warranty. Unplug the power cord from the PIX 520. Warning Before working on a system that the PIX security appliance is complete, you can safely reconnect the...the Chassis Cover Screws Top panel screws (3) 10370 RESET PIX FirewallSERIES 5-10 Cisco PIX Security Appliance Hardware Installation Guide 78-15170-02 Removing and Replacing the PIX 520 Chassis Cover Chapter 5 PIX 520 Removing and Replacing the PIX 520 Chassis Cover This section describes how to remove ...
...chassis cover, perform the following steps: Note Removing the PIX security appliance case does not affect your Cisco warranty. Unplug the power cord from the PIX 520. Warning Before working on a system that the PIX security appliance is complete, you can safely reconnect the...the Chassis Cover Screws Top panel screws (3) 10370 RESET PIX FirewallSERIES 5-10 Cisco PIX Security Appliance Hardware Installation Guide 78-15170-02 Removing and Replacing the PIX 520 Chassis Cover Chapter 5 PIX 520 Removing and Replacing the PIX 520 Chassis Cover This section describes how to remove ...

User Guide
Page 11
... Secure the three screws. Figure 5-13 Replacing the Chassis Cover 10380 RESET PIX FirewallSERIES 78-15170-02 Cisco PIX Security Appliance Hardware Installation Guide 5-11 Reinstall all interface cables. To replace... the chassis cover, perform the following steps: Step 1 Step 2 Step 3 Replace the chassis cover, as shown in Figure 5-12. Chapter 5 PIX 520 Removing and Replacing the PIX 520 Chassis Cover Step 4 Remove the chassis cover as shown in . 10371 RESET PIX...
... Secure the three screws. Figure 5-13 Replacing the Chassis Cover 10380 RESET PIX FirewallSERIES 78-15170-02 Cisco PIX Security Appliance Hardware Installation Guide 5-11 Reinstall all interface cables. To replace... the chassis cover, perform the following steps: Step 1 Step 2 Step 3 Replace the chassis cover, as shown in Figure 5-12. Chapter 5 PIX 520 Removing and Replacing the PIX 520 Chassis Cover Step 4 Remove the chassis cover as shown in . 10371 RESET PIX...

User Guide
Page 15
... appliance chassis as shown in the PIX 520. Fasten the grounding strap to the PIX Security Appliance Copper foil 18352 RESET POWER PIX FirewallSERIES LNK ACT 100 TX LNK ACT 100 TX LNK ACT 100 TX LNK ACT 100 TX E T DATA H E R N E T 0 E T DATA H E R N E T 0 E T DATA H E R N E T 0 E T DATA H E R N E T 0 78-15170-02 Cisco PIX Security Appliance Hardware Installation Guide 5-15 This section...
... appliance chassis as shown in the PIX 520. Fasten the grounding strap to the PIX Security Appliance Copper foil 18352 RESET POWER PIX FirewallSERIES LNK ACT 100 TX LNK ACT 100 TX LNK ACT 100 TX LNK ACT 100 TX E T DATA H E R N E T 0 E T DATA H E R N E T 0 E T DATA H E R N E T 0 E T DATA H E R N E T 0 78-15170-02 Cisco PIX Security Appliance Hardware Installation Guide 5-15 This section...

User Guide
Page 21
... Edit, or Delete are not immediately applied to the running configuration to Flash, a TFTP server, or a failover standby PIX Firewall unit. Reset-Discards changes and reverts the panel to the information displayed when it was opened or the last time Refresh was clicked while... in the configuration. See Notes on PIX Firewall and TFTP, refer to the PIX Firewall Configuration Guide for your respective software version. Field Descriptions The TFTP panel provides the following buttons to apply or discard changes: 1. Copyright © 2001 Cisco Systems, Inc. q Interface-Select the...
... Edit, or Delete are not immediately applied to the running configuration to Flash, a TFTP server, or a failover standby PIX Firewall unit. Reset-Discards changes and reverts the panel to the information displayed when it was opened or the last time Refresh was clicked while... in the configuration. See Notes on PIX Firewall and TFTP, refer to the PIX Firewall Configuration Guide for your respective software version. Field Descriptions The TFTP panel provides the following buttons to apply or discard changes: 1. Copyright © 2001 Cisco Systems, Inc. q Interface-Select the...

User Guide
Page 26
... of the running configuration of the running configuration. 3. File>Refresh PDM with terminal emulation software is not affected. 4. 1. Multiple PDM Sessions-The PIX Firewall can also be download to a TFTP server. Add, Edit, Delete, Enable, Disable...-Any changes made by a network. Refer to Flash... Refer...CLI console sessions affect the running configuration to the information displayed when it opened or the last time Refresh was clicked. Reset-Discards changes and reverts the panel to the Flash memory on a TFTP server by File>Write Configuration to Flash to...
... of the running configuration of the running configuration. 3. File>Refresh PDM with terminal emulation software is not affected. 4. 1. Multiple PDM Sessions-The PIX Firewall can also be download to a TFTP server. Add, Edit, Delete, Enable, Disable...-Any changes made by a network. Refer to Flash... Refer...CLI console sessions affect the running configuration to the information displayed when it opened or the last time Refresh was clicked. Reset-Discards changes and reverts the panel to the Flash memory on a TFTP server by File>Write Configuration to Flash to...

User Guide
Page 29
... OK. Editing Failover IP Addresses Follow these steps to enable failover: Note: Before enabling failover, make sure that the configuration in PDM to the PIX Firewall unit and applies them to open the Failover IP Addresses dialog box. 2. To return to Flash... r Interface where a fast LAN link is the...Configuration to Standby Unit, then update its blocksize or Token Ring because Token Ring requires additional time to the previous panel. q Failover Reset-Resets the settings to their startup values or to the last time you want to the previous panel. Select the speed and IP address for...
... OK. Editing Failover IP Addresses Follow these steps to enable failover: Note: Before enabling failover, make sure that the configuration in PDM to the PIX Firewall unit and applies them to open the Failover IP Addresses dialog box. 2. To return to Flash... r Interface where a fast LAN link is the...Configuration to Standby Unit, then update its blocksize or Token Ring because Token Ring requires additional time to the previous panel. q Failover Reset-Resets the settings to their startup values or to the last time you want to the previous panel. Select the speed and IP address for...

User Guide
Page 31
... 0 input errors, 0 CRC, 0 frame, 0 overrun, 0 ignored, 0 abort 2482258 packets output, 1682123205 bytes, 0 underruns 0 output errors, 8259 collisions, 0 interface resets 0 babbles, 0 late collisions, 1179 deferred 0 lost carrier, 0 no carrier input queue (curr/max blocks): hardware (128/128) software (0/6) output queue (curr/max blocks...their names, this Help topic: q Field Descriptions q Enable, Disable, and Edit Interfaces q Applying Changes to the PIX Firewall The PIX Firewall requires that relates to how it is clicked. The Interface Name is a logical name that you configure and then...
... 0 input errors, 0 CRC, 0 frame, 0 overrun, 0 ignored, 0 abort 2482258 packets output, 1682123205 bytes, 0 underruns 0 output errors, 8259 collisions, 0 interface resets 0 babbles, 0 late collisions, 1179 deferred 0 lost carrier, 0 no carrier input queue (curr/max blocks): hardware (128/128) software (0/6) output queue (curr/max blocks...their names, this Help topic: q Field Descriptions q Enable, Disable, and Edit Interfaces q Applying Changes to the PIX Firewall The PIX Firewall requires that relates to how it is clicked. The Interface Name is a logical name that you configure and then...

User Guide
Page 32
Note, unless you specify the speed of the network interfaces in case your PIX Firewall unit. q Security Level-The security level (1-99) which relates to set automatic speed sensing for the IP address of the..., 0 runts, 0 giants 1 input errors, 0 CRC, 1 frame, 0 overrun, 0 ignored, 0 abort 70405 packets output, 11885724 bytes, 0 underruns 0 output errors, 0 collisions, 0 interface resets 0 babbles, 0 late collisions, 0 deferred 0 lost carrier, 0 no carrier input queue (curr/max blocks): hardware (128/128) software (0/1) output queue (curr/max blocks): hardware (0/2) software (0/1) interface...
Note, unless you specify the speed of the network interfaces in case your PIX Firewall unit. q Security Level-The security level (1-99) which relates to set automatic speed sensing for the IP address of the..., 0 runts, 0 giants 1 input errors, 0 CRC, 1 frame, 0 overrun, 0 ignored, 0 abort 70405 packets output, 11885724 bytes, 0 underruns 0 output errors, 0 collisions, 0 interface resets 0 babbles, 0 late collisions, 0 deferred 0 lost carrier, 0 no carrier input queue (curr/max blocks): hardware (128/128) software (0/1) output queue (curr/max blocks): hardware (0/2) software (0/1) interface...

User Guide
Page 33
... changes and returns to open . Copyright © 2001 Cisco Systems, Inc. Make any necessary changes to write a copy the running PIX configuration. You must click on one of an interface: 1. Applying Changes to the PIX Firewall Changes to the table made by Add, Edit, or ... the following buttons to the running configuration. Apply to PIX-Sends changes made in PDM to the PIX Firewall unit and applies them to apply or discard changes: 1. q Reset-Discards changes and reverts the panel to PIX or Reset. r Help-Provides more information. When disabled, the configuration...
... changes and returns to open . Copyright © 2001 Cisco Systems, Inc. Make any necessary changes to write a copy the running PIX configuration. You must click on one of an interface: 1. Applying Changes to the PIX Firewall Changes to the table made by Add, Edit, or ... the following buttons to the running configuration. Apply to PIX-Sends changes made in PDM to the PIX Firewall unit and applies them to apply or discard changes: 1. q Reset-Discards changes and reverts the panel to PIX or Reset. r Help-Provides more information. When disabled, the configuration...

User Guide
Page 46
...in this Help topic: q Field Descriptions q Add q Edit q Delete q Selecting IP Attack and IP Informational Actions q Resetting to System Log Messages for the Cisco Secure PIX Firewall for pre-defined attack and informational signatures. q Add-Opens the Add dialog box. If a packet triggers a signature and the... not drop the packet, then the same packet can instruct the PIX Firewall to audit IP traffic going through the PIX Firewall, looking at an input interface. For a complete list of an active connection. Reset drops the offending packet and closes the connection if it is triggered...
...in this Help topic: q Field Descriptions q Add q Edit q Delete q Selecting IP Attack and IP Informational Actions q Resetting to System Log Messages for the Cisco Secure PIX Firewall for pre-defined attack and informational signatures. q Add-Opens the Add dialog box. If a packet triggers a signature and the... not drop the packet, then the same packet can instruct the PIX Firewall to audit IP traffic going through the PIX Firewall, looking at an input interface. For a complete list of an active connection. Reset drops the offending packet and closes the connection if it is triggered...

User Guide
Page 47
r Attack Policy-Displays the specific attack policy, if any , for that interface. q Reset-Discards changes and reverts the panel to PIX. In the IDS Policy panel, click Add. In the IDS Policy panel, click Apply to the information displayed when it was opened ...IP Informational Actions Follow these steps to change and click Edit. r Info Policy-Displays the specific info policy, if any , for a PIX Firewall interface: 1. The Add IDS Policy dialog box appears. 2. q Policy-to PIX. q Delete-Deletes the selected item. Adding IDS Policy Settings Follow these steps to add a new IDS policy: 1.
r Attack Policy-Displays the specific attack policy, if any , for that interface. q Reset-Discards changes and reverts the panel to PIX. In the IDS Policy panel, click Add. In the IDS Policy panel, click Apply to the information displayed when it was opened ...IP Informational Actions Follow these steps to change and click Edit. r Info Policy-Displays the specific info policy, if any , for a PIX Firewall interface: 1. The Add IDS Policy dialog box appears. 2. q Policy-to PIX. q Delete-Deletes the selected item. Adding IDS Policy Settings Follow these steps to add a new IDS policy: 1.

User Guide
Page 48
Resetting to Last Applied Settings Reset-Discards changes and reverts the panel to the information displayed when it was opened or the last time Refresh was clicked while open. Copyright © 2001 Cisco Systems, Inc.
Resetting to Last Applied Settings Reset-Discards changes and reverts the panel to the information displayed when it was opened or the last time Refresh was clicked while open. Copyright © 2001 Cisco Systems, Inc.

User Guide
Page 49
... enabled signature and click this Help topic: q Important Notes q Field Descriptions q Enabling or Disabling Signatures q Resetting to the running configuration. r Disabled-Lists the IDS signatures that signature is enabled, the PIX Firewall will search for the Cisco Secure PIX Firewall Version x.x. If a packet triggers a signature and the configured action does not drop the packet, then the...
... enabled signature and click this Help topic: q Important Notes q Field Descriptions q Enabling or Disabling Signatures q Resetting to the running configuration. r Disabled-Lists the IDS signatures that signature is enabled, the PIX Firewall will search for the Cisco Secure PIX Firewall Version x.x. If a packet triggers a signature and the configured action does not drop the packet, then the...

User Guide
Page 50
Resetting to Last Applied Settings Reset-Discards changes and reverts the panel to PIX. Copyright © 2001 Cisco Systems, Inc. Click Apply to the information displayed when it was opened or the last time Refresh was clicked while open. Enabling or Disabling Signatures Follow these steps to the other column. 2. Select one or more IDS signatures in the Enabled or Disabled column, and click the appropriate button to move them to enable or disable IDS signatures: 1.
Resetting to Last Applied Settings Reset-Discards changes and reverts the panel to PIX. Copyright © 2001 Cisco Systems, Inc. Click Apply to the information displayed when it was opened or the last time Refresh was clicked while open. Enabling or Disabling Signatures Follow these steps to the other column. 2. Select one or more IDS signatures in the Enabled or Disabled column, and click the appropriate button to move them to enable or disable IDS signatures: 1.

User Guide
Page 64
... rule table (access list) for this interface. q Cancel-Discards changes and returns to the previous panel. Note: This is not a netmask for this . q Reset-Discards changes and reverts the panel to the information displayed when it was opened or the last time Refresh was clicked while open. Field Descriptions... The Internet Control Message Protocol (ICMP) panel displays the following fields in PDM to the PIX Firewall unit and applies them to the running configuration. q Action-Permit or deny ICMP traffic terminating at the...
... rule table (access list) for this interface. q Cancel-Discards changes and returns to the previous panel. Note: This is not a netmask for this . q Reset-Discards changes and reverts the panel to the information displayed when it was opened or the last time Refresh was clicked while open. Field Descriptions... The Internet Control Message Protocol (ICMP) panel displays the following fields in PDM to the PIX Firewall unit and applies them to the running configuration. q Action-Permit or deny ICMP traffic terminating at the...

User Guide
Page 66
Use the File menu to write a copy the running PIX configuration. Copyright © 2001 Cisco Systems, Inc. Applying Changes to the PIX Firewall Changes to the table made in PDM to the PIX Firewall unit and applies them to the running configuration. You must click on Applying Configuration Changes. 2. Reset-Discards changes and reverts the panel to apply...
Use the File menu to write a copy the running PIX configuration. Copyright © 2001 Cisco Systems, Inc. Applying Changes to the PIX Firewall Changes to the table made in PDM to the PIX Firewall unit and applies them to the running configuration. You must click on Applying Configuration Changes. 2. Reset-Discards changes and reverts the panel to apply...


