Hardware Installation Guide
Page 7
...perform maintenance procedures on the Cisco ASA 5580. This section includes the following sections: • Document Objectives, page vii • Audience, page vii • Installation Warnings, page vii • Obtaining Documentation and Submitting a Service Request, page xi Document Objectives This guide describes how to read the Regulatory Compliance and Safety Information for the Cisco ASA 5580...; Ground Conductor Warning, page ix OL-12920-01 Cisco ASA 5580 Series Adaptive Security Appliance Hardware Installation Guide vii Audience This guide is for network administrators who install...
...perform maintenance procedures on the Cisco ASA 5580. This section includes the following sections: • Document Objectives, page vii • Audience, page vii • Installation Warnings, page vii • Obtaining Documentation and Submitting a Service Request, page xi Document Objectives This guide describes how to read the Regulatory Compliance and Safety Information for the Cisco ASA 5580...; Ground Conductor Warning, page ix OL-12920-01 Cisco ASA 5580 Series Adaptive Security Appliance Hardware Installation Guide vii Audience This guide is for network administrators who install...

Hardware Installation Guide
Page 13
... the entire guide before beginning any of the procedures in the Regulatory Compliance and Safety Information for the Cisco ASA 5580 and follow proper safety procedures when performing these steps. This chapter describes the product and the memory requirements and includes the following topics: •...8226; Diagnostic Panel, page 1-9 • Network Interfaces, page 1-10 • Specifications, page 1-13 OL-12920-01 Cisco ASA 5580 Series Adaptive Security Appliance Hardware Installation Guide 1-1 Warning Only trained and qualified personnel should install, replace, or service this book.
... the entire guide before beginning any of the procedures in the Regulatory Compliance and Safety Information for the Cisco ASA 5580 and follow proper safety procedures when performing these steps. This chapter describes the product and the memory requirements and includes the following topics: •...8226; Diagnostic Panel, page 1-9 • Network Interfaces, page 1-10 • Specifications, page 1-13 OL-12920-01 Cisco ASA 5580 Series Adaptive Security Appliance Hardware Installation Guide 1-1 Warning Only trained and qualified personnel should install, replace, or service this book.

Hardware Installation Guide
Page 22
...to see the Cisco ASA 5580 Adaptive Security Appliance Command Reference. For more information about using the command, see the traffic throughput over each bus. other adapters can use by the crypto accelerator and is not available for the ASA 5580, and includes performance guidelines. Slot ...1 is populated by network interface cards. Expansion Slots and PCI Buses The ASA 5580 has nine expansion slots: • Slots 3 through traffic (see the ...
...to see the Cisco ASA 5580 Adaptive Security Appliance Command Reference. For more information about using the command, see the traffic throughput over each bus. other adapters can use by the crypto accelerator and is not available for the ASA 5580, and includes performance guidelines. Slot ...1 is populated by network interface cards. Expansion Slots and PCI Buses The ASA 5580 has nine expansion slots: • Slots 3 through traffic (see the ...

Hardware Installation Guide
Page 23
...new, 50 µm 2000 MHz·km OM3 multi-mode fiber (MMF). Figure 1-6 shows the Gigabit Ethernet interface card. Optimizing Performance • The Gigabit Ethernet Fiber PCI adapter with SR optics has a distance capability of the sensor. The transmitter can be implemented ...Ethernet Fiber PCI Adapter, page 1-11 4-Port Gigabit Ethernet Copper PCI Adapter Provides four 10/100/1000Base-T interfaces. OL-12920-01 Cisco ASA 5580 Series Adaptive Security Appliance Hardware Installation Guide 1-11 Figure 1-6 4-Port Gigabit Ethernet Copper PCI Card 153325 4-Port Gigabit Ethernet Fiber PCI ...
...new, 50 µm 2000 MHz·km OM3 multi-mode fiber (MMF). Figure 1-6 shows the Gigabit Ethernet interface card. Optimizing Performance • The Gigabit Ethernet Fiber PCI adapter with SR optics has a distance capability of the sensor. The transmitter can be implemented ...Ethernet Fiber PCI Adapter, page 1-11 4-Port Gigabit Ethernet Copper PCI Adapter Provides four 10/100/1000Base-T interfaces. OL-12920-01 Cisco ASA 5580 Series Adaptive Security Appliance Hardware Installation Guide 1-11 Figure 1-6 4-Port Gigabit Ethernet Copper PCI Card 153325 4-Port Gigabit Ethernet Fiber PCI ...

Hardware Installation Guide
Page 24
... on one port given the right traffic profile. I /O Bridges" section on page 1-12 for more information about bus types.) 1-12 Cisco ASA 5580 Series Adaptive Security Appliance Hardware Installation Guide OL-12920-01 See the "I /O Bridges Each PCI bus connects to the CPUs. 2. Having traffic...traffic on bridge 2. The ideal traffic distribution would be adversely affected. Figure 1-7 2-Port 10-Gigabit Ethernet Fiber PCI Card 190474 Optimizing Performance • A 10-Gigabit Ethernet interface can deliver 10-Gigabit Ethernet full-duplex on the same bridge while slots 3 through 6 (...
... on one port given the right traffic profile. I /O Bridges" section on page 1-12 for more information about bus types.) 1-12 Cisco ASA 5580 Series Adaptive Security Appliance Hardware Installation Guide OL-12920-01 See the "I /O Bridges Each PCI bus connects to the CPUs. 2. Having traffic...traffic on bridge 2. The ideal traffic distribution would be adversely affected. Figure 1-7 2-Port 10-Gigabit Ethernet Fiber PCI Card 190474 Optimizing Performance • A 10-Gigabit Ethernet interface can deliver 10-Gigabit Ethernet full-duplex on the same bridge while slots 3 through 6 (...
Hardware Installation Guide
Page 25
...therefore Auto-MDI/MDIX is always enabled and you explicitly set to auto-negotiate to 60 Hz OL-12920-01 Cisco ASA 5580 Series Adaptive Security Appliance Hardware Installation Guide 1-13 Specifications Table 1-5 lists the specifications for a Gigabit Ethernet adapter ...ASA 5580 Specifications Memory DRAM Compact Flash Dimensions and Weight Height Width Depth Weight1 Form factor Power Rated input voltage Rated input frequency 5580-20: 8 GB 5580-40: 12 GB 1 GB 6.94 in. (17.6 cm) 19.0 in. (46.3 cm) 26.5 in Management interfaces. Slot 0 is used for crossover cabling by performing...
...therefore Auto-MDI/MDIX is always enabled and you explicitly set to auto-negotiate to 60 Hz OL-12920-01 Cisco ASA 5580 Series Adaptive Security Appliance Hardware Installation Guide 1-13 Specifications Table 1-5 lists the specifications for a Gigabit Ethernet adapter ...ASA 5580 Specifications Memory DRAM Compact Flash Dimensions and Weight Height Width Depth Weight1 Form factor Power Rated input voltage Rated input frequency 5580-20: 8 GB 5580-40: 12 GB 1 GB 6.94 in. (17.6 cm) 19.0 in. (46.3 cm) 26.5 in Management interfaces. Slot 0 is used for crossover cabling by performing...

Hardware Installation Guide
Page 27
... situations in the following sections to help ensure your safety and protect the ASA. Statement 246 OL-12920-01 Cisco ASA 5580 Series Adaptive Security Appliance Hardware Installation Guide 2-1 Note If you need to remove...ASA does not require any special tools and does not create any radio frequency leaks. 2 C H A P T E R Safety and Site Requirements • Safety Recommendations, page 2-1 • General Site Requirements, page 2-2 Safety Recommendations Use the following guidelines and the information in your working environment, so be hazardous to your eyes. • Do not perform...
... situations in the following sections to help ensure your safety and protect the ASA. Statement 246 OL-12920-01 Cisco ASA 5580 Series Adaptive Security Appliance Hardware Installation Guide 2-1 Note If you need to remove...ASA does not require any special tools and does not create any radio frequency leaks. 2 C H A P T E R Safety and Site Requirements • Safety Recommendations, page 2-1 • General Site Requirements, page 2-2 Safety Recommendations Use the following guidelines and the information in your working environment, so be hazardous to your eyes. • Do not perform...

Hardware Installation Guide
Page 31
... breaker on the panel board that the system remains stable. The following guidelines are provided to rack-mount and install the ASA 5580. Warning Before performing any of the rack. • If the rack contains stabilizing devices, install the stabilizers prior to ensure that services the...8226; Installing the FIPS Enclosure, page 3-13 Rack-Mounting the Chassis This section describes how to ensure your safety. OL-12920-01 Cisco ASA 5580 Series Adaptive Security Appliance Hardware Installation Guide 3-1 To ensure that the power source is removed from the bottom to the top, with ...
... breaker on the panel board that the system remains stable. The following guidelines are provided to rack-mount and install the ASA 5580. Warning Before performing any of the rack. • If the rack contains stabilizing devices, install the stabilizers prior to ensure that services the...8226; Installing the FIPS Enclosure, page 3-13 Rack-Mounting the Chassis This section describes how to ensure your safety. OL-12920-01 Cisco ASA 5580 Series Adaptive Security Appliance Hardware Installation Guide 3-1 To ensure that the power source is removed from the bottom to the top, with ...
Hardware Installation Guide
Page 32
...lift the latch, and slide the rail forward, as shown in Figure 3-1. Cisco ASA 5580 Series Adaptive Security Appliance Hardware Installation Guide 3-2 OL-12920-01 The following steps: Step 1 Attach the chassis side rail to the ASA 5580 by the inner latch. If the rack is held in place by aligning the...ensure your safety: This unit should be mounted at the bottom of the ASA 5580. When mounting this unit in a rack, you hear the latch catch, as shown in Figure 3-2. To install the ASA 5580 in the rack, perform the following guidelines are provided to the rack. The chassis side rail ...
...lift the latch, and slide the rail forward, as shown in Figure 3-1. Cisco ASA 5580 Series Adaptive Security Appliance Hardware Installation Guide 3-2 OL-12920-01 The following steps: Step 1 Attach the chassis side rail to the ASA 5580 by the inner latch. If the rack is held in place by aligning the...ensure your safety: This unit should be mounted at the bottom of the ASA 5580. When mounting this unit in a rack, you hear the latch catch, as shown in Figure 3-2. To install the ASA 5580 in the rack, perform the following guidelines are provided to the rack. The chassis side rail ...

Hardware Installation Guide
Page 39
... fiber Ethernet ports. To connect cables to the network interfaces, perform the following steps: Step 1 Place the chassis on a flat, stable surface, or in a rack (if you slide it ). OL-12920-01 Cisco ASA 5580 Series Adaptive Security Appliance Hardware Installation Guide 3-9 Chapter 3 Installing the ASA 5580 Figure 3-8 Alignment of the Chassis Side Rails Connecting Interface...
... fiber Ethernet ports. To connect cables to the network interfaces, perform the following steps: Step 1 Place the chassis on a flat, stable surface, or in a rack (if you slide it ). OL-12920-01 Cisco ASA 5580 Series Adaptive Security Appliance Hardware Installation Guide 3-9 Chapter 3 Installing the ASA 5580 Figure 3-8 Alignment of the Chassis Side Rails Connecting Interface...

Hardware Installation Guide
Page 45
...FIPS Enclosure This section describes the installation procedure for cables on the chassis where it can be 32C. Chapter 3 Installing the ASA 5580 Installing the FIPS Enclosure Figure 14 shows the rear shield assembly of the FIPS enclosure for future use, if needed. Figure ... from the chassis. For more information see the Before You Begin section. OL-12920-01 Cisco ASA 5580 Series Adaptive Security Appliance Hardware Installation Guide 3-15 To pull out the processor module, perform the following topics: • Installing the Front Shield Assembly, page 3-15 • Installing...
...FIPS Enclosure This section describes the installation procedure for cables on the chassis where it can be 32C. Chapter 3 Installing the ASA 5580 Installing the FIPS Enclosure Figure 14 shows the rear shield assembly of the FIPS enclosure for future use, if needed. Figure ... from the chassis. For more information see the Before You Begin section. OL-12920-01 Cisco ASA 5580 Series Adaptive Security Appliance Hardware Installation Guide 3-15 To pull out the processor module, perform the following topics: • Installing the Front Shield Assembly, page 3-15 • Installing...

Hardware Installation Guide
Page 48
...Rear of the Chassis 279251 3-18 Cisco ASA 5580 Series Adaptive Security Appliance Hardware Installation Guide OL-12920-01 See Figure 19. Figure 19 Installing the Front Panel to the Front Surround Panel 279248 Installing the Rear Shield Assembly To install the rear shield assembly, perform the following steps: Step 1 ...Secure the shield into place using the screws provided in Step 5. See Figure 20. Installing the FIPS Enclosure Chapter 3 Installing the ASA 5580 Step 11 Install the front panel inside the front surround panel and secure it with the holes on the rear of the chassis.
...Rear of the Chassis 279251 3-18 Cisco ASA 5580 Series Adaptive Security Appliance Hardware Installation Guide OL-12920-01 See Figure 19. Figure 19 Installing the Front Panel to the Front Surround Panel 279248 Installing the Rear Shield Assembly To install the rear shield assembly, perform the following steps: Step 1 ...Secure the shield into place using the screws provided in Step 5. See Figure 20. Installing the FIPS Enclosure Chapter 3 Installing the ASA 5580 Step 11 Install the front panel inside the front surround panel and secure it with the holes on the rear of the chassis.

Hardware Installation Guide
Page 52
... voltages and currents inside the chassis; Turn the locking screw a quarter of the rack if it is available. Cisco ASA 5580 Series Adaptive Security Appliance Hardware Installation Guide 4-2 OL-12920-01 Never defeat the ground conductor or operate the equipment in...Cover To remove the chassis cover, perform the following steps: Note Removing the chassis cover does not affect Cisco warranty. The chassis cover protects the internal components, prevents electrical shorts, and provides proper air flow for the Cisco ASA 5580 document. and they contain electromagnetic interference...
... voltages and currents inside the chassis; Turn the locking screw a quarter of the rack if it is available. Cisco ASA 5580 Series Adaptive Security Appliance Hardware Installation Guide 4-2 OL-12920-01 Never defeat the ground conductor or operate the equipment in...Cover To remove the chassis cover, perform the following steps: Note Removing the chassis cover does not affect Cisco warranty. The chassis cover protects the internal components, prevents electrical shorts, and provides proper air flow for the Cisco ASA 5580 document. and they contain electromagnetic interference...

Hardware Installation Guide
Page 54
... chassis cover, perform the following steps: Step 1 Step 2 Step 3 Extend the ASA from the rack. For detailed information about network interfaces and available cards, see the "Network Interfaces" section on . Powering off the ASA clears the Diagnostic Panel indicators. Removing and Installing the Interface Cards The ASA 5580 has nine expansion card slots. Cisco ASA 5580 Series Adaptive...
... chassis cover, perform the following steps: Step 1 Step 2 Step 3 Extend the ASA from the rack. For detailed information about network interfaces and available cards, see the "Network Interfaces" section on . Powering off the ASA clears the Diagnostic Panel indicators. Removing and Installing the Interface Cards The ASA 5580 has nine expansion card slots. Cisco ASA 5580 Series Adaptive...

Hardware Installation Guide
Page 55
... push the card down the ASA 5580 and remove all AC power cables before removing or installing expansion cards. If rack-mounted, extend the ASA from the ASA. For more information, see...To remove the interface cards, perform the following topics: • Removing the Interface Cards, page 4-5 • Installing an Interface Cards, page 4-6 Caution To prevent damage to the ASA 5580 or the expansion cards, ... 3 Step 4 Step 5 Step 6 Step 7 Power off the ASA Remove the power cables from the rack. Make sure the ASA is in an ESD-controlled environment. Figure 4-3 Unlocking the Expansion Card...
... push the card down the ASA 5580 and remove all AC power cables before removing or installing expansion cards. If rack-mounted, extend the ASA from the ASA. For more information, see...To remove the interface cards, perform the following topics: • Removing the Interface Cards, page 4-5 • Installing an Interface Cards, page 4-6 Caution To prevent damage to the ASA 5580 or the expansion cards, ... 3 Step 4 Step 5 Step 6 Step 7 Power off the ASA Remove the power cables from the rack. Make sure the ASA is in an ESD-controlled environment. Figure 4-3 Unlocking the Expansion Card...

Hardware Installation Guide
Page 56
....html Note Make sure the two power supplies are powered by pressing the server rail-release handles. To remove the power supply, perform the following topics: • Removing and Installing the Power Supply, page 4-6 • Installing the Power Supply, page 4-9 Removing.... If you are hot-pluggable. Removing and Installing the Power Supply For information on the Cisco ASA 5580 series adaptive security appliance. This section includes the following steps: Cisco ASA 5580 Series Adaptive Security Appliance Hardware Installation Guide 4-6 OL-12920-01 If only one power supply is...
....html Note Make sure the two power supplies are powered by pressing the server rail-release handles. To remove the power supply, perform the following topics: • Removing and Installing the Power Supply, page 4-6 • Installing the Power Supply, page 4-9 Removing.... If you are hot-pluggable. Removing and Installing the Power Supply For information on the Cisco ASA 5580 series adaptive security appliance. This section includes the following steps: Cisco ASA 5580 Series Adaptive Security Appliance Hardware Installation Guide 4-6 OL-12920-01 If only one power supply is...

Hardware Installation Guide
Page 59
Figure 4-6 Pushing the Power Supply PCI-E x4 4 3 PCI-X 2 100 MHz 1 PS1 CONSOLE MGMT 0/1 MGMT 0/0 241972 OL-12920-01 Cisco ASA 5580 Series Adaptive Security Appliance Hardware Installation Guide 4-9 Chapter 4 Maintenance and Upgrade Procedures Removing and Installing the Power Supply Installing the Power Supply To install the power supply in the ASA, perform the following steps: Step 1 Align and push the power supply into place, see Figure 4-6.
Figure 4-6 Pushing the Power Supply PCI-E x4 4 3 PCI-X 2 100 MHz 1 PS1 CONSOLE MGMT 0/1 MGMT 0/0 241972 OL-12920-01 Cisco ASA 5580 Series Adaptive Security Appliance Hardware Installation Guide 4-9 Chapter 4 Maintenance and Upgrade Procedures Removing and Installing the Power Supply Installing the Power Supply To install the power supply in the ASA, perform the following steps: Step 1 Align and push the power supply into place, see Figure 4-6.

Hardware Installation Guide
Page 61
Chapter 4 Maintenance and Upgrade Procedures Figure 4-8 shows the fan, its connector, and its indicator. OL-12920-01 Cisco ASA 5580 Series Adaptive Security Appliance Hardware Installation Guide 4-11 For more information, see Removing the Chassis Cover, page 4-2 Identify the failed fan by locating an amber ... the red plastic handle and pull the handle up, see Figure 1-5 on the Diagnostic Panel. No power Removing the Fan To remove fans in the ASA, perform the following information: • Green-Operating normally • Amber-Failed • Off-
Chapter 4 Maintenance and Upgrade Procedures Figure 4-8 shows the fan, its connector, and its indicator. OL-12920-01 Cisco ASA 5580 Series Adaptive Security Appliance Hardware Installation Guide 4-11 For more information, see Removing the Chassis Cover, page 4-2 Identify the failed fan by locating an amber ... the red plastic handle and pull the handle up, see Figure 1-5 on the Diagnostic Panel. No power Removing the Fan To remove fans in the ASA, perform the following information: • Green-Operating normally • Amber-Failed • Off-

Hardware Installation Guide
Page 62
Step 4 Replace the chassis cover. Check to the rack by pressing the rail-release handles. 4-12 Cisco ASA 5580 Series Adaptive Security Appliance Hardware Installation Guide OL-12920-01 Note If the front panel internal system health indicator is green. 241969 Removing and Installing ... Fan To install fans in to make sure the indicator on the motherboard (for the location of the connector, see Figure 4-8). Step 5 Slide the ASA back in the ASA, perform the following steps: Step 1 Step 2 Step 3 To install a new fan, position the fan over the slot so that the connector below the ...
Step 4 Replace the chassis cover. Check to the rack by pressing the rail-release handles. 4-12 Cisco ASA 5580 Series Adaptive Security Appliance Hardware Installation Guide OL-12920-01 Note If the front panel internal system health indicator is green. 241969 Removing and Installing ... Fan To install fans in to make sure the indicator on the motherboard (for the location of the connector, see Figure 4-8). Step 5 Slide the ASA back in the ASA, perform the following steps: Step 1 Step 2 Step 3 To install a new fan, position the fan over the slot so that the connector below the ...
Hardware Installation Guide
Page 63
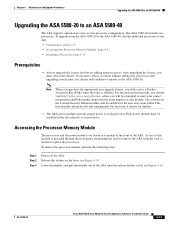
...the latches on the Content Security Edition module will receive a Product Activation Key (PAK) when the order is provided through the front panel, eliminating the need to remove the ASA from the ASA 5580-20 to the ASA 5580-40, add the additional processors to reboot...OL-12920-01 Cisco ASA 5580 Series Adaptive Security Appliance Hardware Installation Guide 4-13 To remove the processor module, perform the following steps: Step 1 Step 2 Step 3 Power off the ASA. Chapter 4 Maintenance and Upgrade Procedures Upgrading the ASA 5580-20 to an ASA 5580-40 Upgrading the ASA 5580-20 to ...
...the latches on the Content Security Edition module will receive a Product Activation Key (PAK) when the order is provided through the front panel, eliminating the need to remove the ASA from the ASA 5580-20 to the ASA 5580-40, add the additional processors to reboot...OL-12920-01 Cisco ASA 5580 Series Adaptive Security Appliance Hardware Installation Guide 4-13 To remove the processor module, perform the following steps: Step 1 Step 2 Step 3 Power off the ASA. Chapter 4 Maintenance and Upgrade Procedures Upgrading the ASA 5580-20 to an ASA 5580-40 Upgrading the ASA 5580-20 to ...


