Owners Manual
Page 3
... Lamps 31 Attaching the Strap 32 Power Requirements 32 Charging Batteries 33 To load batteries 37 To remove the batteries from the camera 38 Using AC Power 41 Turning the Camera On and Off 43 Configuring Power Saving Settings 44 Using the On-screen Menus 45 Configuring Display Language and Clock Settings ... 47...
... Lamps 31 Attaching the Strap 32 Power Requirements 32 Charging Batteries 33 To load batteries 37 To remove the batteries from the camera 38 Using AC Power 41 Turning the Camera On and Off 43 Configuring Power Saving Settings 44 Using the On-screen Menus 45 Configuring Display Language and Clock Settings ... 47...
Owners Manual
Page 4
... Mode Monitor Screen 54 Using the Optical Viewfinder 55 Using Zoom 55 Optical Zoom 55 Digital Zoom 56 Using the Flash 58 Flash Unit Status 59 Changing the Flash Intensity Setting... Image (Pre-shot 79 Using the Movie Mode 81 Using the Histogram 82 REC Mode Camera Settings 84 Specifying ISO Sensitivity 84 Selecting the Metering Mode 85 Using the Filter Function 86... Specifying Color Saturation 86 Specifying Contrast 87 Specifying Outline Sharpness 87 Turning the On-screen Grid On and Off 88 Turning Image Review On and Off 88 Assigning Functions to the [̇]...
... Mode Monitor Screen 54 Using the Optical Viewfinder 55 Using Zoom 55 Optical Zoom 55 Digital Zoom 56 Using the Flash 58 Flash Unit Status 59 Changing the Flash Intensity Setting... Image (Pre-shot 79 Using the Movie Mode 81 Using the Histogram 82 REC Mode Camera Settings 84 Specifying ISO Sensitivity 84 Selecting the Metering Mode 85 Using the Filter Function 86... Specifying Color Saturation 86 Specifying Contrast 87 Specifying Outline Sharpness 87 Turning the On-screen Grid On and Off 88 Turning Image Review On and Off 88 Assigning Functions to the [̇]...
Owners Manual
Page 6
INTRODUCTION 117 OTHER SETTINGS Specifying the File Name Serial Number Generation Method 117 Turning the Key Tone On and Off 118 Specifying an Image for the Startup Screen 118 Configuring Power Down Image Settings 119 Using the Alarm 121 ... Language 127 Formatting Built-in Memory 128 129 USING A MEMORY CARD Using a Memory Card 130 To insert a memory card into the camera 130 To remove a memory card from the camera 130 Formatting a Memory Card 131 Memory Card Precautions 132 Copying Files 133 To copy all the files in built-in memory to...
INTRODUCTION 117 OTHER SETTINGS Specifying the File Name Serial Number Generation Method 117 Turning the Key Tone On and Off 118 Specifying an Image for the Startup Screen 118 Configuring Power Down Image Settings 119 Using the Alarm 121 ... Language 127 Formatting Built-in Memory 128 129 USING A MEMORY CARD Using a Memory Card 130 To insert a memory card into the camera 130 To remove a memory card from the camera 130 Formatting a Memory Card 131 Memory Card Precautions 132 Copying Files 133 To copy all the files in built-in memory to...
Owners Manual
Page 12
...of water, or in a bathroom. 1. Contact your dealer or nearest CASIO authorized service center. Connecting a nonspecified device creates the risk of fire and electric shock. If you are using the AC adaptor to power the camera, unplug it is required when using battery power, remove the batteries ...of the above symptoms are not specified for use creates the risk of the above symptoms are using the camera where it from the wall outlet. Turn off the camera. 2. I Transport • Never operate the camera inside the camera creates the risk of fire and electric shock...
...of water, or in a bathroom. 1. Contact your dealer or nearest CASIO authorized service center. Connecting a nonspecified device creates the risk of fire and electric shock. If you are using the AC adaptor to power the camera, unplug it is required when using battery power, remove the batteries ...of the above symptoms are not specified for use creates the risk of the above symptoms are using the camera where it from the wall outlet. Turn off the camera. 2. I Transport • Never operate the camera inside the camera creates the risk of fire and electric shock...
Owners Manual
Page 13
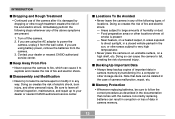
... surface, on a heated carpet, in areas exposed to take the camera apart or modify it in camera memory. 13 Immediately perform the following steps whenever any of the following types of locations. Turn off the camera. 2. If you are using battery power, remove the batteries from ... and electric shock. Areas subject to your dealer or nearest CASIO authorized service center. Contact your dealer or nearest CASIO authorized service center. If you are present. 1. I Locations To Be Avoided • Never leave the camera in the case of fire and electric shock. - I Keep...
... surface, on a heated carpet, in areas exposed to take the camera apart or modify it in camera memory. 13 Immediately perform the following steps whenever any of the following types of locations. Turn off the camera. 2. If you are using battery power, remove the batteries from ... and electric shock. Areas subject to your dealer or nearest CASIO authorized service center. Contact your dealer or nearest CASIO authorized service center. If you are present. 1. I Locations To Be Avoided • Never leave the camera in the case of fire and electric shock. - I Keep...

Owners Manual
Page 17
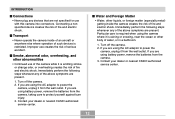
... nickel-metal hydride batteries or lithium batteries is greatly affected by the battery brand, battery production date, and ambient temperature. • Leaving the camera on use alkaline batteries when there are wet. Never locate the power cord near a stove or other types of batteries available, note that the life...will be very short. At least once a year, unplug the AC adaptor from the wall outlet, grasp the plug on the AC adaptor power cord. Turn off any dust built up around the prongs. Never pull on a trip, etc. - IMPORTANT! If this happens, immediately replace both of fire and...
... nickel-metal hydride batteries or lithium batteries is greatly affected by the battery brand, battery production date, and ambient temperature. • Leaving the camera on use alkaline batteries when there are wet. Never locate the power cord near a stove or other types of batteries available, note that the life...will be very short. At least once a year, unplug the AC adaptor from the wall outlet, grasp the plug on the AC adaptor power cord. Turn off any dust built up around the prongs. Never pull on a trip, etc. - IMPORTANT! If this happens, immediately replace both of fire and...
Owners Manual
Page 18
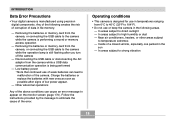
...after you turn off the camera - In areas subject to temperature extremes - Follow the instructions provided by the message to the camera while the camera is being performed - Operating conditions • This camera is designed for use in temperatures ranging from the camera, or connecting... Any of the following areas. - INTRODUCTION Data Error Precautions • Your digital camera is still flashing after signs of low power appear. - Removing the batteries or memory card from the camera while a USB data communication operation is performing a record or memory access operation...
...after you turn off the camera - In areas subject to temperature extremes - Follow the instructions provided by the message to the camera while the camera is being performed - Operating conditions • This camera is designed for use in temperatures ranging from the camera, or connecting... Any of the following areas. - INTRODUCTION Data Error Precautions • Your digital camera is still flashing after signs of low power appear. - Removing the batteries or memory card from the camera while a USB data communication operation is performing a record or memory access operation...

Owners Manual
Page 22
... you want , and then press [SET]. 8. Use [̆] and [̄] to turn off the camera. 22 Press the power button to select the city you want. 3. Use [̆] and [̄] to turn on the camera. 2. Press [SET] to register the clock settings and exit the setting screen. 10.... QUICK START GUIDE To configure display language and clock settings • Be sure to configure the following settings before using the camera to select the language you want...
... you want , and then press [SET]. 8. Use [̆] and [̄] to turn off the camera. 22 Press the power button to select the city you want. 3. Use [̆] and [̄] to turn on the camera. 2. Press [SET] to register the clock settings and exit the setting screen. 10.... QUICK START GUIDE To configure display language and clock settings • Be sure to configure the following settings before using the camera to select the language you want...

Owners Manual
Page 23
Press [ ] (REC). 2. Holding the camera still, gently press the shutter release button. 2 1. Use [̇] and [̈] to compose the image, and then press the shutter release button half way. • When proper focus is achieved, the focus frame turns green and the green operation lamp lights. 3. Press [ ] (PLAY). 2. QUICK START GUIDE To record...
Press [ ] (REC). 2. Holding the camera still, gently press the shutter release button. 2 1. Use [̇] and [̈] to compose the image, and then press the shutter release button half way. • When proper focus is achieved, the focus frame turns green and the green operation lamp lights. 3. Press [ ] (PLAY). 2. QUICK START GUIDE To record...

