

Basic Guide
Page 20
... and getting into contact with your eyes or mouth. When removing jammed paper or when inspecting the inside of the machine, do not allow the toner to come into your eyes or mouth, wash them with cold water and immediately consult a physician. • When loading paper or removing jammed...or paper, take care not to allow necklaces, bracelets, or other metal objects to touch the inside of the machine, do not touch the toner fixing unit and its surroundings inside the machine which has become hot during use. Washing them immediately with cold water. When removing jammed ...
... and getting into contact with your eyes or mouth. When removing jammed paper or when inspecting the inside of the machine, do not allow the toner to come into your eyes or mouth, wash them with cold water and immediately consult a physician. • When loading paper or removing jammed...or paper, take care not to allow necklaces, bracelets, or other metal objects to touch the inside of the machine, do not touch the toner fixing unit and its surroundings inside the machine which has become hot during use. Washing them immediately with cold water. When removing jammed ...

Basic Guide
Page 21
... immediately. If you use a cardiac pacemaker and feel abnormalities, please move away from open flames, as this may cause the toner remaining inside the cartridges from scattering, and dispose of small children. CAUTION Follow all warnings and instructions marked on the machine. Other Warnings... For cardiac pacemaker users: This product generates a low level magnetic field. CAUTION Keep toner and other consumables out of the reach of them in places exposed to prevent the toner remaining inside the cartridges to ignite, resulting in burns or a fire. • Do...
... immediately. If you use a cardiac pacemaker and feel abnormalities, please move away from open flames, as this may cause the toner remaining inside the cartridges from scattering, and dispose of small children. CAUTION Follow all warnings and instructions marked on the machine. Other Warnings... For cardiac pacemaker users: This product generates a low level magnetic field. CAUTION Keep toner and other consumables out of the reach of them in places exposed to prevent the toner remaining inside the cartridges to ignite, resulting in burns or a fire. • Do...

Basic Guide
Page 83
... to the components or generate static charges. This section describes the necessary cleaning procedures for cleaning; Use a soft cloth to clean the machine, replace the toner cartridge, and repack and transport the machine.
... to the components or generate static charges. This section describes the necessary cleaning procedures for cleaning; Use a soft cloth to clean the machine, replace the toner cartridge, and repack and transport the machine.

Basic Guide
Page 86
... shutter in any way. 2 Rock the cartridge five or six times to come into contact with warm water will set the toner, and make it 8 impossible to Replace the Cartridge When to Replace the Cartridge The cartridge is running low. Paper feeding direction Maintenance ...When handling the cartridge, take care not to allow the toner on the printouts, the toner is a consumable item and should be replaced when the toner runs out. Washing with your hands or clothing. Instructions 8-4 When to remove the toner stains. 1 Remove the cartridge from the machine. Always hold...
... shutter in any way. 2 Rock the cartridge five or six times to come into contact with warm water will set the toner, and make it 8 impossible to Replace the Cartridge When to Replace the Cartridge The cartridge is running low. Paper feeding direction Maintenance ...When handling the cartridge, take care not to allow the toner on the printouts, the toner is a consumable item and should be replaced when the toner runs out. Washing with your hands or clothing. Instructions 8-4 When to remove the toner stains. 1 Remove the cartridge from the machine. Always hold...

Basic Guide
Page 87
...exposure setting, room temperature, and humidity. • If you print a large number of documents which contain heavy print or many photographs, toner consumption will increase, and white streaks will be needed soon. ● If white streaks or light bands are still present: ❑ Replace... cartridge. However, dark bands might appear on printouts if you may be able to Replace the Cartridge 8-5 However, a new one . Approximate Print Yield Canon Cartridge X25: Approx. 2,500 printouts (A4 at 4% dot coverage*). * The term "A4 at 4% dot coverage" denotes a document on printouts sooner...
...exposure setting, room temperature, and humidity. • If you print a large number of documents which contain heavy print or many photographs, toner consumption will increase, and white streaks will be needed soon. ● If white streaks or light bands are still present: ❑ Replace... cartridge. However, dark bands might appear on printouts if you may be able to Replace the Cartridge 8-5 However, a new one . Approximate Print Yield Canon Cartridge X25: Approx. 2,500 printouts (A4 at 4% dot coverage*). * The term "A4 at 4% dot coverage" denotes a document on printouts sooner...

Basic Guide
Page 88
IMPORTANT Never attempt to disassemble the cartridge or open flames, as this may cause the toner or copy paper to open flames, as shown so that the side with the instructions faces up. This can adversely effect the quality of ... protective shutter. Handling Precautions WARNING • Do not throw the cartridge into a warm room, or if the room is rapidly heated, condensation may cause the toner to use a cardiac pacemaker and feel abnormalities, please move or push the drum protective shutter in any way. 8 Instructions Drum protective shutter Storage Precautions WARNING...
IMPORTANT Never attempt to disassemble the cartridge or open flames, as this may cause the toner or copy paper to open flames, as shown so that the side with the instructions faces up. This can adversely effect the quality of ... protective shutter. Handling Precautions WARNING • Do not throw the cartridge into a warm room, or if the room is rapidly heated, condensation may cause the toner to use a cardiac pacemaker and feel abnormalities, please move or push the drum protective shutter in any way. 8 Instructions Drum protective shutter Storage Precautions WARNING...

Basic Guide
Page 96
... the used cartridge and replace it impossible to Replace the Cartridge," on the jammed paper to come into contact with warm water will set the toner, and make it with cold water. If they become dirty, wash them immediately with a new one. Before replacing the cartridge, be sure... to read the section "When to remove the toner stains. 1 Open the front cover. 8 2 Remove the cartridge from the machine. 8-14 Replacing the Cartridge NOTE When handling the cartridge, take care ...
... the used cartridge and replace it impossible to Replace the Cartridge," on the jammed paper to come into contact with warm water will set the toner, and make it with cold water. If they become dirty, wash them immediately with a new one. Before replacing the cartridge, be sure... to read the section "When to remove the toner stains. 1 Open the front cover. 8 2 Remove the cartridge from the machine. 8-14 Replacing the Cartridge NOTE When handling the cartridge, take care ...

Basic Guide
Page 97
Instructions 8 5 Place the cartridge on a flat and stable surface. Maintenance 3 Remove the new cartridge from the cartridge. Tab Replacing the Cartridge 8-15 NOTE Save the protective bag. Make sure that the tab itself is detached from its protective bag. You may need it in the direction as shown below. Grip the sealing tape tab and snap it later when you remove the cartridge from the machine. 4 Rock the cartridge five or six times to distribute the toner evenly.
Instructions 8 5 Place the cartridge on a flat and stable surface. Maintenance 3 Remove the new cartridge from the cartridge. Tab Replacing the Cartridge 8-15 NOTE Save the protective bag. Make sure that the tab itself is detached from its protective bag. You may need it in the direction as shown below. Grip the sealing tape tab and snap it later when you remove the cartridge from the machine. 4 Rock the cartridge five or six times to distribute the toner evenly.

Basic Guide
Page 99
Replacing the Cartridge 8-17 NOTE If the LCD displays and alternately, reset the machine by opening the front cover and then closing it will go. 8 9 Close the front cover. Maintenance 8 Align the projections on both sides of the cartridge to the guides in the machine and gently slide the cartridge into the machine as far as it .
Replacing the Cartridge 8-17 NOTE If the LCD displays and alternately, reset the machine by opening the front cover and then closing it will go. 8 9 Close the front cover. Maintenance 8 Align the projections on both sides of the cartridge to the guides in the machine and gently slide the cartridge into the machine as far as it .

Basic Guide
Page 103
... machine and cartridge which are subject to avoid burns or electrical shock. If they become dirty, wash them immediately with warm water will set the toner, and make it impossible to come into contact with your hands or clothing. Take adequate precaution when performing internal inspections to high voltages and high...
... machine and cartridge which are subject to avoid burns or electrical shock. If they become dirty, wash them immediately with warm water will set the toner, and make it impossible to come into contact with your hands or clothing. Take adequate precaution when performing internal inspections to high voltages and high...

Basic Guide
Page 107
the toner on the paper will stain the printer and cause a permanent reduction in print quality. 10 Open the face up cover and push down the green paper release levers on both sides of the face up paper output. 11 Gently pull the jammed paper between the output rollers until the 9 leading edge emerges from the cassette. Troubleshooting Clearing Jams 9-5 It may cause a machine malfunction. • Do not pull the jammed paper upward; IMPORTANT • Do not pull the jammed paper forward from the machine.
the toner on the paper will stain the printer and cause a permanent reduction in print quality. 10 Open the face up cover and push down the green paper release levers on both sides of the face up paper output. 11 Gently pull the jammed paper between the output rollers until the 9 leading edge emerges from the cassette. Troubleshooting Clearing Jams 9-5 It may cause a machine malfunction. • Do not pull the jammed paper upward; IMPORTANT • Do not pull the jammed paper forward from the machine.

Basic Guide
Page 112
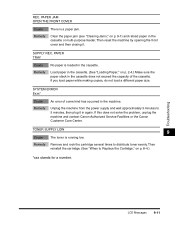
... reset the machine by opening the front cover and then closing it. PRINTER DATA ERROR Cause A problem has occurred in the ADF. INSTALL CARTRIDGE ↔ TONER SUPPLY LOW Cause The cartridge is loaded. 9 Remedy Divide the document and copy each part separately. Remedy Use System Monitor to make the document come...
... reset the machine by opening the front cover and then closing it. PRINTER DATA ERROR Cause A problem has occurred in the ADF. INSTALL CARTRIDGE ↔ TONER SUPPLY LOW Cause The cartridge is loaded. 9 Remedy Divide the document and copy each part separately. Remedy Use System Monitor to make the document come...
Basic Guide
Page 113
...Clearing Jams," on p. 8-4.) *xxx stands for a number. If this does not solve the problem, unplug the machine and contact Canon Authorized Service Facilities or the Canon Customer Care Center. Then reset the machine by opening the front cover and then closing it in the cassette or multi-purpose feeder... p. 2-4.) Make sure the paper stack in the cassette does not exceed the capacity of some kind has occurred in the cassette. TONER SUPPLY LOW 9 Cause The toner is loaded in the machine. Remedy Remove and rock the cartridge several times to 5 minutes, then plug it . REC. PAPER JAM...
...Clearing Jams," on p. 8-4.) *xxx stands for a number. If this does not solve the problem, unplug the machine and contact Canon Authorized Service Facilities or the Canon Customer Care Center. Then reset the machine by opening the front cover and then closing it in the cassette or multi-purpose feeder... p. 2-4.) Make sure the paper stack in the cassette does not exceed the capacity of some kind has occurred in the cassette. TONER SUPPLY LOW 9 Cause The toner is loaded in the machine. Remedy Remove and rock the cartridge several times to 5 minutes, then plug it . REC. PAPER JAM...

Basic Guide
Page 118
... you expect; Q Are the size, thickness and type of damage? print is installed correctly. (See "Install the cartridge," in the Set-Up Sheet.) Q Is any toner left in the cartridge? A Clean the platen glass or the platen glass cover. (See "Cleaning the Scanning Area," on p. 8-2.) Q Is the cartridge free of the...
... you expect; Q Are the size, thickness and type of damage? print is installed correctly. (See "Install the cartridge," in the Set-Up Sheet.) Q Is any toner left in the cartridge? A Clean the platen glass or the platen glass cover. (See "Cleaning the Scanning Area," on p. 8-2.) Q Is the cartridge free of the...

Basic Guide
Page 119
... in of copies are missing when you make copies on rough paper. Q Is the exposure adjusted correctly? A Specify the appropriate paper size in in the toner saver mode? A Install the machine in a proper location. (See "Installation," on p. 5-9.) Q Is the machine in of the Menu. (See "COMMON SETTINGS," on p. 10-3.) The printouts...
... in of copies are missing when you make copies on rough paper. Q Is the exposure adjusted correctly? A Specify the appropriate paper size in in the toner saver mode? A Install the machine in a proper location. (See "Installation," on p. 5-9.) Q Is the machine in of the Menu. (See "COMMON SETTINGS," on p. 10-3.) The printouts...

Basic Guide
Page 127
... mode. DATE/TIME SETTING 1. DEFAULT SETTINGS* COPY SCAN FAX Descriptions Sets the paper size and paper type. Machine Settings The toner saver mode is selected as default. month, day, year, hour, minute 10 Selects the format of the selected mode appears. MM/DD/YYYY, ...date/time, default, and auto clear. Menu Descriptions 10-3 When the power cord is turned off. Sets the date and time settings. PAPER SIZE 2. The toner saver mode is plugged in, or after the auto clear function activates, the standby display of the date displayed in millimeters.) Selects the paper type...
... mode. DATE/TIME SETTING 1. DEFAULT SETTINGS* COPY SCAN FAX Descriptions Sets the paper size and paper type. Machine Settings The toner saver mode is selected as default. month, day, year, hour, minute 10 Selects the format of the selected mode appears. MM/DD/YYYY, ...date/time, default, and auto clear. Menu Descriptions 10-3 When the power cord is turned off. Sets the date and time settings. PAPER SIZE 2. The toner saver mode is plugged in, or after the auto clear function activates, the standby display of the date displayed in millimeters.) Selects the paper type...

Basic Guide
Page 131
... sheets (temperature: 59°F to 81°F (15°C to 27°C), humidity: 20% to 80%) (reference) Organic Photosensitive Conductor Indirect Electrostatic Transfer System Toner Projection System Canon's RAPID Fusing System™ Approx. 600 dpi × 600 dpi 256 Up to LGL size Sheets, books, and three-dimensional objects (up to 4.4 lb...
... sheets (temperature: 59°F to 81°F (15°C to 27°C), humidity: 20% to 80%) (reference) Organic Photosensitive Conductor Indirect Electrostatic Transfer System Toner Projection System Canon's RAPID Fusing System™ Approx. 600 dpi × 600 dpi 256 Up to LGL size Sheets, books, and three-dimensional objects (up to 4.4 lb...

Basic Guide
Page 136
PAPER/TRAY: message, 9-11 SYSTEM ERROR message, 9-11 System monitor, 7-1 SYSTEM SETTINGS settings, 10-3 11 T Telephone line jack, 1-4 Toner in the cartridge, 8-4 TONER SAVER MODE setting, 10-3 TONER SUPPLY LOW message, 9-10, 9-11 Transparency, 10-3 Transporting, 8-18 Tray output, 1-2 Troubleshooting, 9-1 U USB port, 1-4 W Weight document, 3-2 machine, 11-2 print media, 2-2 Z Zoom, 5-7 ZOOM RATIO setting, 10-5 ...
PAPER/TRAY: message, 9-11 SYSTEM ERROR message, 9-11 System monitor, 7-1 SYSTEM SETTINGS settings, 10-3 11 T Telephone line jack, 1-4 Toner in the cartridge, 8-4 TONER SAVER MODE setting, 10-3 TONER SUPPLY LOW message, 9-10, 9-11 Transparency, 10-3 Transporting, 8-18 Tray output, 1-2 Troubleshooting, 9-1 U USB port, 1-4 W Weight document, 3-2 machine, 11-2 print media, 2-2 Z Zoom, 5-7 ZOOM RATIO setting, 10-5 ...


