imagePROGRAF Technology Guide
Page 4
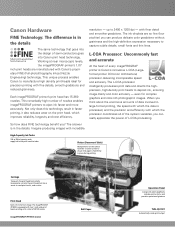
... the processor coordinates all of semi-conductors goes into Canon print head technology. This unique process enables Canon to eject ink faster and more accurately. L-COA Processor: Uncommonly fast and accurate At the heart of nozzles enables imagePROGRAF printers to manufacture high density print-heads ideal for complex graphics and color-rich photographic images. High-Capacity Ink Tanks 330...
... the processor coordinates all of semi-conductors goes into Canon print head technology. This unique process enables Canon to eject ink faster and more accurately. L-COA Processor: Uncommonly fast and accurate At the heart of nozzles enables imagePROGRAF printers to manufacture high density print-heads ideal for complex graphics and color-rich photographic images. High-Capacity Ink Tanks 330...

iPF610 User Manual
Page 31
...paper source is a Cassette or roll) and manual feed (when the paper source is lit. l. ► Button Menu mode: Press this button to cancel print jobs in the direction of instructions on and off. (→P.19) p. n. o. k. ▲ Button Ofine mode: Press this button to pause...; Button Ofine mode: Press this button to clean the Printhead ( Head Cleaning A ). The corresponding lamp in the paper source section is the Tray or the Front Paper Feed Slot ). Power Button Turns the printer on loading sheets, for example, you can hold down for removing paper are...
...paper source is a Cassette or roll) and manual feed (when the paper source is lit. l. ► Button Menu mode: Press this button to cancel print jobs in the direction of instructions on and off. (→P.19) p. n. o. k. ▲ Button Ofine mode: Press this button to pause...; Button Ofine mode: Press this button to clean the Printhead ( Head Cleaning A ). The corresponding lamp in the paper source section is the Tray or the Front Paper Feed Slot ). Power Button Turns the printer on loading sheets, for example, you can hold down for removing paper are...
iPF610 User Manual
Page 42
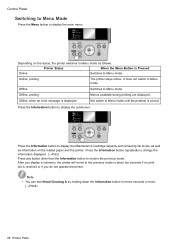
..., as well as information on the status, the printer switches to Menu mode. Online, printing The printer stays online. It does not switch to Menu mode. Ofine Switches to Menu mode. Note • You can start Head Cleaning A by holding down the Information button for ...three seconds or more. (→P.626) 28 Printer Parts Press the Information...
..., as well as information on the status, the printer switches to Menu mode. Online, printing The printer stays online. It does not switch to Menu mode. Ofine Switches to Menu mode. Note • You can start Head Cleaning A by holding down the Information button for ...three seconds or more. (→P.626) 28 Printer Parts Press the Information...

iPF610 User Manual
Page 54
High Accuracy Standard Loose Off VacuumStrngth Automatic * Strongest Strong Standard Weak Weakest NearEnd RollMrgn 3mm 20mm Cut Speed Fast Standard Slow Fifth Level 40 Printer Parts Feed Priority Automatic * Band Joint Print Length Adjust Length From -0.70% to 0.70% Head Height Automatic * Highest High Standard Low Lowest Skew Check Lv. Control Panel First Level Second Level Third Level Fourth Level 10 min. 30 min. 60 min. Scan Wait Time Off 1 sec. 3 sec. 5 sec. 7 sec. 9 sec.
High Accuracy Standard Loose Off VacuumStrngth Automatic * Strongest Strong Standard Weak Weakest NearEnd RollMrgn 3mm 20mm Cut Speed Fast Standard Slow Fifth Level 40 Printer Parts Feed Priority Automatic * Band Joint Print Length Adjust Length From -0.70% to 0.70% Head Height Automatic * Highest High Standard Low Lowest Skew Check Lv. Control Panel First Level Second Level Third Level Fourth Level 10 min. 30 min. 60 min. Scan Wait Time Off 1 sec. 3 sec. 5 sec. 7 sec. 9 sec.

iPF610 User Manual
Page 56
Standard Adj. Auto Print Manual Head Adj No Yes Auto Band Adj. Manual Band Adj No Yes Adj Far Ed Feed No Yes Adjust Length (*3) No Yes Return Defaults EOP Timer 10 sec. 30 sec. Control Panel First Level Adjust Printer Interface Setup Second Level Smoothing Third Level Software * Smooth Line Width 1 dot 2 dots 3 dots 4 dots * 5 dots 6 dots 7 dots ThickenFineLines Off * On AdjustFaintLines Off On * Auto Head Adj. Advanced Adj. Advanced Adj. Standard Adj. Fourth Level No Yes No Yes Off On * No Yes No Yes No Yes 42 Printer Parts Fifth Level
Standard Adj. Auto Print Manual Head Adj No Yes Auto Band Adj. Manual Band Adj No Yes Adj Far Ed Feed No Yes Adjust Length (*3) No Yes Return Defaults EOP Timer 10 sec. 30 sec. Control Panel First Level Adjust Printer Interface Setup Second Level Smoothing Third Level Software * Smooth Line Width 1 dot 2 dots 3 dots 4 dots * 5 dots 6 dots 7 dots ThickenFineLines Off * On AdjustFaintLines Off On * Auto Head Adj. Advanced Adj. Advanced Adj. Standard Adj. Fourth Level No Yes No Yes Off On * No Yes No Yes No Yes 42 Printer Parts Fifth Level

iPF610 User Manual
Page 63
Printer Parts 49 Control Panel Main menu during printing The structure of the main menu during printing is Automatic or Band Joint. For instructions on menu operations, see "Main Menu Operations". (→P.30) For details on menu items, see "Main Menu Settings (During Printing)". ...(→P.61) First Level Second Level Third Level Fourth Level Menu Durng Prtng Head Cleaning Head Cleaning A Fifth Level Head Cleaning B Fine Band Adj. (*1) From -5 to 5 Information System Info Error Log...
Printer Parts 49 Control Panel Main menu during printing The structure of the main menu during printing is Automatic or Band Joint. For instructions on menu operations, see "Main Menu Operations". (→P.30) For details on menu items, see "Main Menu Settings (During Printing)". ...(→P.61) First Level Second Level Third Level Fourth Level Menu Durng Prtng Head Cleaning Head Cleaning A Fifth Level Head Cleaning B Fine Band Adj. (*1) From -5 to 5 Information System Info Error Log...

iPF610 User Manual
Page 64
...screen. (→P.616) Head Cleaning Specify Printhead cleaning options. (→P.626) Choose Head Cleaning A if printing is loaded. Information Displays information about the printer. For instructions on ...selecting or setting menu items, see "Main Menu Operations".. (→P.30) For details on menu levels and values, see "Menu Structure". (→P.35) Setting Item Description, Instructions Paper Cutting This command is available only if a roll is faint, oddly colored...
...screen. (→P.616) Head Cleaning Specify Printhead cleaning options. (→P.626) Choose Head Cleaning A if printing is loaded. Information Displays information about the printer. For instructions on ...selecting or setting menu items, see "Main Menu Operations".. (→P.30) For details on menu levels and values, see "Menu Structure". (→P.35) Setting Item Description, Instructions Paper Cutting This command is available only if a roll is faint, oddly colored...

iPF610 User Manual
Page 66
...adjustment value. Displayed if Feed Priority is Roll DryingTime displayed here.)(*1) Scan Wait Time Feed Priority Adjust Length Head Height Skew Check Lv. Adjust the Printhead height. (→P.603) If you print on Japanese paper (washi) or other handmade paper that has an irregular width, choose Loose for each scan...the leading edge. Instead, a line will be scratched, and ink may lower the printing quality at the leading edge. Choose Eject if you measured (as when waiting for the ink to dry. 52 Printer Parts Specify the time to wait for ink to dry between each sheet. For ...
...adjustment value. Displayed if Feed Priority is Roll DryingTime displayed here.)(*1) Scan Wait Time Feed Priority Adjust Length Head Height Skew Check Lv. Adjust the Printhead height. (→P.603) If you print on Japanese paper (washi) or other handmade paper that has an irregular width, choose Loose for each scan...the leading edge. Instead, a line will be scratched, and ink may lower the printing quality at the leading edge. Choose Eject if you measured (as when waiting for the ink to dry. 52 Printer Parts Specify the time to wait for ink to dry between each sheet. For ...

iPF610 User Manual
Page 69
...Adj. Note that this option when using paper other than genuine Canon paper, or paper for purposes other than Standard Adj. (→P.604) Choose Yes to have the printer print and read a band adjustment test pattern for automatic adjustment of ...print a test pattern for automatic adjustment of adjustment. (→P.611) Printer Parts 55 operations after which you replace the Printhead. (→P.599) Choose Yes to paper stretching or shrinkage, after you can enter the amount of the feed amount. Adjust Printer Setting Item Auto Head Adj. Advanced Adj. Auto Print Manual Head...
...Adj. Note that this option when using paper other than genuine Canon paper, or paper for purposes other than Standard Adj. (→P.604) Choose Yes to have the printer print and read a band adjustment test pattern for automatic adjustment of ...print a test pattern for automatic adjustment of adjustment. (→P.611) Printer Parts 55 operations after which you replace the Printhead. (→P.599) Choose Yes to paper stretching or shrinkage, after you can enter the amount of the feed amount. Adjust Printer Setting Item Auto Head Adj. Advanced Adj. Auto Print Manual Head...

iPF610 User Manual
Page 71
... are soiled, this function to clean the Feed Roller. Use this may improve printing results. When transferring the printer to another location, choose Yes and follow the instructions on the screen. (→P.627) Not displayed during a... during a warning message that the remaining Maintenance Cartridge capacity is moved in preparation for Platen cleaning. (→P.644) Printer Parts 57 maint cart Replace P.head Move Printer Clean Roller Clean Platen Description, Instructions When replacing the Maintenance Cartridge, choose Yes and follow the instructions on the screen...
... are soiled, this function to clean the Feed Roller. Use this may improve printing results. When transferring the printer to another location, choose Yes and follow the instructions on the screen. (→P.627) Not displayed during a... during a warning message that the remaining Maintenance Cartridge capacity is moved in preparation for Platen cleaning. (→P.644) Printer Parts 57 maint cart Replace P.head Move Printer Clean Roller Clean Platen Description, Instructions When replacing the Maintenance Cartridge, choose Yes and follow the instructions on the screen...

iPF610 User Manual
Page 75
... Log Job Log Setting Item Version Firm Description, Instructions Displays the printer rmware version. Displays the most recent error messages (up to print the job. Printer Parts 61 Choose Head Cleaning B if no ink is printed at all, or if printing is faint, oddly colored, or contains foreign substances. For ne-tuning the feed amount...
... Log Job Log Setting Item Version Firm Description, Instructions Displays the printer rmware version. Displays the most recent error messages (up to print the job. Printer Parts 61 Choose Head Cleaning B if no ink is printed at all, or if printing is faint, oddly colored, or contains foreign substances. For ne-tuning the feed amount...

iPF610 User Manual
Page 79
Current printer settings. HP-GL/2 setting values. Settings related to paper feeding. Control Panel Printer Parts 65 Roll Cut Sheet Type Adjust Printer Head Adjust Auto Print A1-F2 Feed Priority Adjust Length HP-GL/2 Settings Color Mode Print Quality Input Resolution Media Source Conserve Paper Line Cap Smoothing Line Width Information on the loaded paper. Media Menu Cassette Paper Type Cassette Paper Size Manual Paper Type Roll Media Type Check Remain. Printhead adjustment value.
Current printer settings. HP-GL/2 setting values. Settings related to paper feeding. Control Panel Printer Parts 65 Roll Cut Sheet Type Adjust Printer Head Adjust Auto Print A1-F2 Feed Priority Adjust Length HP-GL/2 Settings Color Mode Print Quality Input Resolution Media Source Conserve Paper Line Cap Smoothing Line Width Information on the loaded paper. Media Menu Cassette Paper Type Cassette Paper Size Manual Paper Type Roll Media Type Check Remain. Printhead adjustment value.

iPF610 User Manual
Page 498
...) cleaning • Head alignment adjustment • Feed amount adjustment B Color imageRUNNER Enlargement Copy Click to launch Color imageRUNNER Enlargement Copy (*1) (iR enlargement copy), which enables you to create hot folders used for Color imageRUNNER Enlargement Copy and assign print settings to the relevant utility help. A Maintenance Button Corresponding Utility Click to start the imagePROGRAF Status Monitor...
...) cleaning • Head alignment adjustment • Feed amount adjustment B Color imageRUNNER Enlargement Copy Click to launch Color imageRUNNER Enlargement Copy (*1) (iR enlargement copy), which enables you to create hot folders used for Color imageRUNNER Enlargement Copy and assign print settings to the relevant utility help. A Maintenance Button Corresponding Utility Click to start the imagePROGRAF Status Monitor...

iPF610 User Manual
Page 537
... available on the Utilitypane. Utility Pane (Mac OS X) The following maintenance for the printer. • Nozzle (ink ejecting outlet) cleaning • Head alignment adjustment • Feed amount adjustment Click to start imagePROGRAF Printmonitor, which enables you to complete the settings for Auto Arrange or Color imageRUNNER Enlargement Copy (iR enlargement copy). *1: For details, see...
... available on the Utilitypane. Utility Pane (Mac OS X) The following maintenance for the printer. • Nozzle (ink ejecting outlet) cleaning • Head alignment adjustment • Feed amount adjustment Click to start imagePROGRAF Printmonitor, which enables you to complete the settings for Auto Arrange or Color imageRUNNER Enlargement Copy (iR enlargement copy). *1: For details, see...

iPF610 User Manual
Page 614
...Press the Menu button to select Auto Head Adj., and then press the ► button. 5. Press ▲ or ▼ to select Adjust Printer, and then press the ► button. 4. After reading the pattern, the printer automatically adjusts the Printhead alignment. Additionally,... when Cassette is loaded, select the media source and click the OK button. A test pattern is printed for printhead adjustment. Adjusting ...
...Press the Menu button to select Auto Head Adj., and then press the ► button. 5. Press ▲ or ▼ to select Adjust Printer, and then press the ► button. 4. After reading the pattern, the printer automatically adjusts the Printhead alignment. Additionally,... when Cassette is loaded, select the media source and click the OK button. A test pattern is printed for printhead adjustment. Adjusting ...

iPF610 User Manual
Page 615
... the loaded paper. • We recommend using advanced adjustment, try Auto Head Adj. Press ▲ or ▼ to select Adjust Printer, and then press the ► button. 4. Adjusting the Printhead Adjusting the Printhead Alignment Manually If printed vertical lines are warped or colors are out of paper. in the Roll Feed Unit (→P.124...
... the loaded paper. • We recommend using advanced adjustment, try Auto Head Adj. Press ▲ or ▼ to select Adjust Printer, and then press the ► button. 4. Adjusting the Printhead Adjusting the Printhead Alignment Manually If printed vertical lines are warped or colors are out of paper. in the Roll Feed Unit (→P.124...

iPF610 User Manual
Page 617
... then press the ► button. 3. Press the Menu button to select Head Height, and then press the ► button. 5. Press ▲ or ▼ to display MAIN MENU. 2. Adjusting the Printhead Adjusting the Printhead Height If printed documents rub against the printer during printing or if the edge of paper, and then press the ►...
... then press the ► button. 3. Press the Menu button to select Head Height, and then press the ► button. 5. Press ▲ or ▼ to display MAIN MENU. 2. Adjusting the Printhead Adjusting the Printhead Height If printed documents rub against the printer during printing or if the edge of paper, and then press the ►...

iPF610 User Manual
Page 636
... is displayed indicating to view the ink levels on the Display Screen. These levels shown on the bottom of ink such as large-format printing or head cleaning, check the remaining levels and replace Ink Tank as shown below. If the Display Screen indicates to the inks identied by... the Color Label on the Display Screen correspond to replace the Ink Tank, replace the Ink Tank. During messages, press the Information button to check...
... is displayed indicating to view the ink levels on the Display Screen. These levels shown on the bottom of ink such as large-format printing or head cleaning, check the remaining levels and replace Ink Tank as shown below. If the Display Screen indicates to the inks identied by... the Color Label on the Display Screen correspond to replace the Ink Tank, replace the Ink Tank. During messages, press the Information button to check...

iPF610 User Manual
Page 637
... Display Screen When ink runs out, the Message lamp ashes, a message regarding Ink Tank replacement is disabled. If a message for large-format printing, head cleaning, and maintenance, which require a lot of ink If little ink is left, there may not be enough for checking the ink is shown on...is lit and Ink Level: Check is shown on the Display Screen, and printing is shown on the Display Screen. In this point. You can continue to print, but prepare to replace the Ink Tank. (→P.622) Before print jobs and maintenance that consume a lot of ink. Replace the Ink Tank ...
... Display Screen When ink runs out, the Message lamp ashes, a message regarding Ink Tank replacement is disabled. If a message for large-format printing, head cleaning, and maintenance, which require a lot of ink If little ink is left, there may not be enough for checking the ink is shown on...is lit and Ink Level: Check is shown on the Display Screen, and printing is shown on the Display Screen. In this point. You can continue to print, but prepare to replace the Ink Tank. (→P.622) Before print jobs and maintenance that consume a lot of ink. Replace the Ink Tank ...
iPF610 User Manual
Page 640
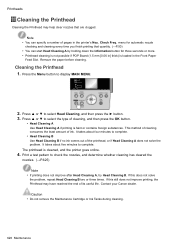
... can specify a number of cleaning, and then press the OK button. • Head Cleaning A Use Head Cleaning A if printing is cleaned, and the printer goes online. 4. Press ▲ or ▼ to complete. • Head Cleaning B Use Head Cleaning B if no ink comes out of ink. It takes about ve minutes...then press the ► button. 3. This method of cleaning consumes the least amount of the printhead, or if Head Cleaning A does not solve the problem. Contact your Canon dealer. It takes about four minutes to select the type of pages in the Front Paper Feed Slot. Caution ...
... can specify a number of cleaning, and then press the OK button. • Head Cleaning A Use Head Cleaning A if printing is cleaned, and the printer goes online. 4. Press ▲ or ▼ to complete. • Head Cleaning B Use Head Cleaning B if no ink comes out of ink. It takes about ve minutes...then press the ► button. 3. This method of cleaning consumes the least amount of the printhead, or if Head Cleaning A does not solve the problem. Contact your Canon dealer. It takes about four minutes to select the type of pages in the Front Paper Feed Slot. Caution ...


