
Instruction Manual
Page 3
... on your needs You can adjust a number of other card when the one of the preset color settings or set the combination of recording media. It is a high-performance camcorder whose advanced functionality and versatile usability make it the perfect choice for a variety of the Canon Log gamma while expanding the dynamic range, and two HDR options1 (HLG or PQ), you capture those hard-to...
... on your needs You can adjust a number of other card when the one of the preset color settings or set the combination of recording media. It is a high-performance camcorder whose advanced functionality and versatile usability make it the perfect choice for a variety of the Canon Log gamma while expanding the dynamic range, and two HDR options1 (HLG or PQ), you capture those hard-to...

Instruction Manual
Page 4
... • Direct setting mode (A 54) Change main camcorder functions while checking the image on the screen using the FTP protocol (A 178). 2 Available functions depend on the screen/video output used . You can be saved in focus (A 81). This can also apply a LUT (A 149) for better remaining usage time information. • INPUT terminals (XLR) compatible with analog or digital (AES/EBU) audio and +48 V phantom power supply (A 100). • Improved clip name format with the...
... • Direct setting mode (A 54) Change main camcorder functions while checking the image on the screen using the FTP protocol (A 178). 2 Available functions depend on the screen/video output used . You can be saved in focus (A 81). This can also apply a LUT (A 149) for better remaining usage time information. • INPUT terminals (XLR) compatible with analog or digital (AES/EBU) audio and +48 V phantom power supply (A 100). • Improved clip name format with the...
Instruction Manual
Page 5
... Power Supply 19 Using a Battery Pack 19 Using a Power Outlet 21 Turning the Camcorder On and Off 22 Date, Time and Language Settings 23 Setting the Date and Time 23 Changing the Language 24 Using the Menus 25 Selecting an Option from the Menu 25 Using the Customized Submenu (My Menu) 26 Preparing the Camcorder 28 Attaching the Microphone Holder Unit 28 Attaching the Lens Hood 28 Using the Viewfinder 28 Using the LCD Screen 29 Adjusting the LCD Screen...
... Power Supply 19 Using a Battery Pack 19 Using a Power Outlet 21 Turning the Camcorder On and Off 22 Date, Time and Language Settings 23 Setting the Date and Time 23 Changing the Language 24 Using the Menus 25 Selecting an Option from the Menu 25 Using the Customized Submenu (My Menu) 26 Preparing the Camcorder 28 Attaching the Microphone Holder Unit 28 Attaching the Lens Hood 28 Using the Viewfinder 28 Using the LCD Screen 29 Adjusting the LCD Screen...
Instruction Manual
Page 6
... the Time Code Display on Hold 91 Setting the User Bit 93 Synchronizing with an External Device 94 Connecting an External Device 94 Reference Video Signal Input (Genlock Synchronization) 94 Time Code Signal Input 95 Reference Video Signal Output 96 Time Code Signal Output 96 Recording Audio 97 Audio Settings and Recorded Audio Channels 97 Connecting an External Microphone or External Audio Input Source to the Camcorder 99 Selecting the Audio Format of MP4 Clips 100 Setting the Audio Input Type for the INPUT 1/ INPUT 2 Terminals 100 Selecting the Audio Input Source for Audio...
... the Time Code Display on Hold 91 Setting the User Bit 93 Synchronizing with an External Device 94 Connecting an External Device 94 Reference Video Signal Input (Genlock Synchronization) 94 Time Code Signal Input 95 Reference Video Signal Output 96 Time Code Signal Output 96 Recording Audio 97 Audio Settings and Recorded Audio Channels 97 Connecting an External Microphone or External Audio Input Source to the Camcorder 99 Selecting the Audio Format of MP4 Clips 100 Setting the Audio Input Type for the INPUT 1/ INPUT 2 Terminals 100 Selecting the Audio Input Source for Audio...
Instruction Manual
Page 7
... Recording Video Signal Configuration and Video Output Configuration by Terminal 145 Connecting to an External Monitor 147 Using the SDI Terminal 147 Using the HDMI OUT Terminal 148 Superimposing Onscreen Displays on Video Outputs 148 Applying a LUT to Screens/Video Outputs 149 Adjusting the Color Quality for Access Points 159 Manual Setup 160 Connecting to a Wired (Ethernet) Network 161 Selecting a Network Connection 162 Checking the Network's Status 162 Changing Network Settings 163 Browser Remote: Controlling the Camcorder...
... Recording Video Signal Configuration and Video Output Configuration by Terminal 145 Connecting to an External Monitor 147 Using the SDI Terminal 147 Using the HDMI OUT Terminal 148 Superimposing Onscreen Displays on Video Outputs 148 Applying a LUT to Screens/Video Outputs 149 Adjusting the Color Quality for Access Points 159 Manual Setup 160 Connecting to a Wired (Ethernet) Network 161 Selecting a Network Connection 162 Checking the Network's Status 162 Changing Network Settings 163 Browser Remote: Controlling the Camcorder...
Instruction Manual
Page 36
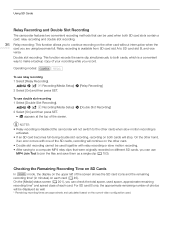
Operating modes: To use double slot recording 1 Select [Double Slot Recording]. > [Æ " Recording/Media Setup] > [Double Slot Recording] 2 Select [On] and then press SET. • 4 appears at the top of the screen. On the other hand, if an error occurs with relay recording or slow motion recording. • After saving to make a backup copy of the SD cards, recording will stop. Checking the Remaining Recording Time on SD Cards In mode, the display on the upper left of...
Operating modes: To use double slot recording 1 Select [Double Slot Recording]. > [Æ " Recording/Media Setup] > [Double Slot Recording] 2 Select [On] and then press SET. • 4 appears at the top of the screen. On the other hand, if an error occurs with relay recording or slow motion recording. • After saving to make a backup copy of the SD cards, recording will stop. Checking the Remaining Recording Time on SD Cards In mode, the display on the upper left of...
Instruction Manual
Page 93
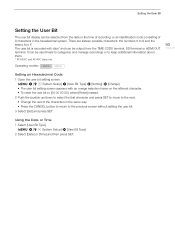
.... Using the Date or Time 1 Select [User Bit Type]. > [B # System Setup] > [User Bit Type] 2 Select [Date] or [Time] and then press SET. Operating modes: Setting an Hexadecimal Code 1 Open the user bit setting screen. > [B # System Setup] > [User Bit Type] > [Setting] > [Change] • The user bit setting screen appears with clips* and can be output from the date or the time of recording, or an identification code consisting of the characters in the hexadecimal system. Setting the User Bit Setting the User Bit The user bit display can be used...
.... Using the Date or Time 1 Select [User Bit Type]. > [B # System Setup] > [User Bit Type] 2 Select [Date] or [Time] and then press SET. Operating modes: Setting an Hexadecimal Code 1 Open the user bit setting screen. > [B # System Setup] > [User Bit Type] > [Setting] > [Change] • The user bit setting screen appears with clips* and can be output from the date or the time of recording, or an identification code consisting of the characters in the hexadecimal system. Setting the User Bit Setting the User Bit The user bit display can be used...
Instruction Manual
Page 95
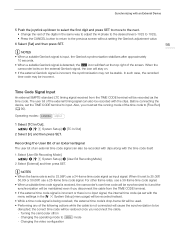
... the screen. Also, you must set to input. Changing the video configuration Operating modes: 1 Select [TC In/Out]. > [B # System Setup] > [TC In/Out] 2 Select [In] and then press SET. Recording the User Bit of an External Signal The user bit of the external timing signal can also be maintained even if you reconnect the cable. - NOTES • When the frame rate is detected, the U icon will flash...
... the screen. Also, you must set to input. Changing the video configuration Operating modes: 1 Select [TC In/Out]. > [B # System Setup] > [TC In/Out] 2 Select [In] and then press SET. Recording the User Bit of an External Signal The user bit of the external timing signal can also be maintained even if you reconnect the cable. - NOTES • When the frame rate is detected, the U icon will flash...
Instruction Manual
Page 97
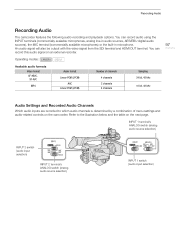
... output with the video signal from the SDI terminal and HDMI OUT terminal. Refer to which audio channels is determined by a combination of menu settings and audio-related controls on the camcorder. You can record this audio signal on the next page. INPUT 1 terminal's ANALOG switch (analog audio source selection) INPUT 2 switch (audio input selection) INPUT 2 terminal's ANALOG switch (analog audio source selection) INPUT 1 switch (audio input selection) Operating modes: Available audio formats Video format XF-HEVC, XF-AVC MP4 Audio format...
... output with the video signal from the SDI terminal and HDMI OUT terminal. Refer to which audio channels is determined by a combination of menu settings and audio-related controls on the camcorder. You can record this audio signal on the next page. INPUT 1 terminal's ANALOG switch (analog audio source selection) INPUT 2 switch (audio input selection) INPUT 2 terminal's ANALOG switch (analog audio source selection) INPUT 1 switch (audio input selection) Operating modes: Available audio formats Video format XF-HEVC, XF-AVC MP4 Audio format...
Instruction Manual
Page 100
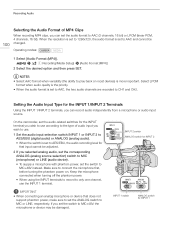
Setting the Audio Input Type for the INPUT 1/INPUT 2 Terminals Using the INPUT 1/INPUT 2 terminals, you set the switch to MIC+48V, the microphone or device may be damaged. INPUT 1 switch ANALOG switch for INPUT 2 IMPORTANT • When connecting an analog microphone or device that input cannot be changed. Recording/Media Setup] > [Audio Format (MP4)] 2 Select the desired option and then press SET. On the camcorder, set the audio-related switches for that does not support phantom power, make sure to set the ANALOG switch to MIC or LINE, respectively...
Setting the Audio Input Type for the INPUT 1/INPUT 2 Terminals Using the INPUT 1/INPUT 2 terminals, you set the switch to MIC+48V, the microphone or device may be damaged. INPUT 1 switch ANALOG switch for INPUT 2 IMPORTANT • When connecting an analog microphone or device that input cannot be changed. Recording/Media Setup] > [Audio Format (MP4)] 2 Select the desired option and then press SET. On the camcorder, set the audio-related switches for that does not support phantom power, make sure to set the ANALOG switch to MIC or LINE, respectively...
Instruction Manual
Page 116
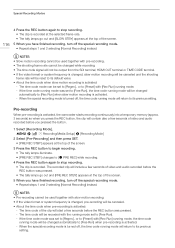
... video and audio recorded before the REC button was set to [Free Run], the time code running mode will be changed automatically to its default value. • About the time code when slow motion recording is activated. - Recording/Media Setup] > [Recording Mode] 2 Select [Pre-Recording] and then press SET. • [PRE REC STBY] appears at the top of the screen. 3 Press the REC button to begin recording. • The tally lamps illuminate. • [PRE REC STBY] changes to [Ü PRE REC...
... video and audio recorded before the REC button was set to [Free Run], the time code running mode will be changed automatically to its default value. • About the time code when slow motion recording is activated. - Recording/Media Setup] > [Recording Mode] 2 Select [Pre-Recording] and then press SET. • [PRE REC STBY] appears at the top of the screen. 3 Press the REC button to begin recording. • The tally lamps illuminate. • [PRE REC STBY] changes to [Ü PRE REC...
Instruction Manual
Page 127
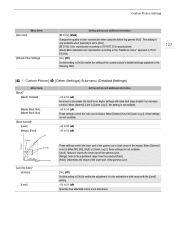
Custom Picture] > [Other Settings] Submenu (Detailed Settings) Menu items [Black]* [Master Pedestal] [Master Black Red], [Master Black Blue] [Black Gamma]* [Level] [Range], [Point] Setting options and additional information -50 to enable the editing of color reproduction when using the hybrid log gamma (HLG). This setting is only available when [Gamma] is set to [Canon Log 3], this setting is set to [Canon Log 3], these settings are not available. [Level]: Raises or lowers the...
Custom Picture] > [Other Settings] Submenu (Detailed Settings) Menu items [Black]* [Master Pedestal] [Master Black Red], [Master Black Blue] [Black Gamma]* [Level] [Range], [Point] Setting options and additional information -50 to enable the editing of color reproduction when using the hybrid log gamma (HLG). This setting is only available when [Gamma] is set to [Canon Log 3], this setting is set to [Canon Log 3], these settings are not available. [Level]: Raises or lowers the...
Instruction Manual
Page 131
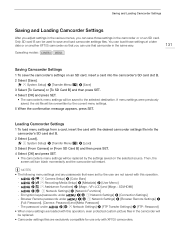
...[FTP Transfer Settings] > [FTP: Password] • When menu settings are loaded with this operation. - >[v ' Camera Setup] > [Color Bars] - >[3 " Recording/Media Setup] > [Metadata] > [User Memo] - >[A ! Network Settings] > [Connection Settings] - Operating modes: 131 Saving Camcorder Settings 1 To save those settings at a later date or on an SD card, insert a card into the camcorder's SD card slot B. 2 Select [Load]. [B ! Saving and Loading Camcorder Settings Saving and Loading Camcorder Settings After you adjust settings in the various menus, you can use only with XF705...
...[FTP Transfer Settings] > [FTP: Password] • When menu settings are loaded with this operation. - >[v ' Camera Setup] > [Color Bars] - >[3 " Recording/Media Setup] > [Metadata] > [User Memo] - >[A ! Network Settings] > [Connection Settings] - Operating modes: 131 Saving Camcorder Settings 1 To save those settings at a later date or on an SD card, insert a card into the camcorder's SD card slot B. 2 Select [Load]. [B ! Saving and Loading Camcorder Settings Saving and Loading Camcorder Settings After you adjust settings in the various menus, you can use only with XF705...
Instruction Manual
Page 156
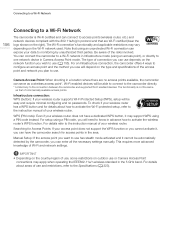
... outdoor use and restrictions, refer to the Specifications (A 223). WPS (PIN code): Even if your wireless router supports Wi-Fi Protected Setup (WPS), setup will need to use has stealth mode activated and it may vary depending on the type and specifications of use or Camera Access Point connections may apply when operating the IEEE802.11a/n wireless standard in advance how to use (A 155). Manual Setup: If the access point...
... outdoor use and restrictions, refer to the Specifications (A 223). WPS (PIN code): Even if your wireless router supports Wi-Fi Protected Setup (WPS), setup will need to use has stealth mode activated and it may vary depending on the type and specifications of use or Camera Access Point connections may apply when operating the IEEE802.11a/n wireless standard in advance how to use (A 155). Manual Setup: If the access point...
Instruction Manual
Page 175
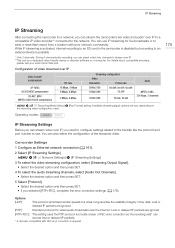
... can be a dedicated video transfer device or decoder software on the recording video configuration used. Operating modes: 175 IP Streaming Settings Before you can stream video over the Internet. IP Streaming IP Streaming After connecting the camcorder to a network, you can stream the camcorder's live broadcasts or to the network. While IP streaming is activated, internal recording to an SD card in the camcorder is disabled but does not...
... can be a dedicated video transfer device or decoder software on the recording video configuration used. Operating modes: 175 IP Streaming Settings Before you can stream video over the Internet. IP Streaming IP Streaming After connecting the camcorder to a network, you can stream the camcorder's live broadcasts or to the network. While IP streaming is activated, internal recording to an SD card in the camcorder is disabled but does not...
Instruction Manual
Page 208
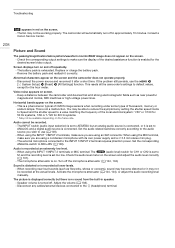
... mini plug. - The microphone attenuator is not a malfunction. Turn off repeatedly. - When recording near powerful magnets and motors, MRI machines or high-voltage power lines. Adjust the volume (A 138). - Consult a Canon Service Center. 208 Picture and Sound The peaking/magnification/zebra pattern/waveform monitor/B&W image does not appear on the screen and adjust the audio level correctly (A 101). - Remove the battery pack and reattach it after a short time. The INPUT switch (audio input selection) is set...
... mini plug. - The microphone attenuator is not a malfunction. Turn off repeatedly. - When recording near powerful magnets and motors, MRI machines or high-voltage power lines. Adjust the volume (A 138). - Consult a Canon Service Center. 208 Picture and Sound The peaking/magnification/zebra pattern/waveform monitor/B&W image does not appear on the screen and adjust the audio level correctly (A 101). - Remove the battery pack and reattach it after a short time. The INPUT switch (audio input selection) is set...
Instruction Manual
Page 211
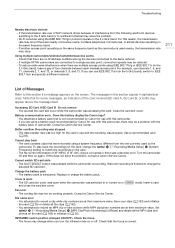
... the screen. Accessing SD Card A/SD Card B Do not remove - Does this does not solve the problem, consult a Canon Service Center. Buffer overflow. Recording was accessing the card. Cannot play back the recordings on in use and the recording was too high for use channels 1, 6, and 11, channels 2, 7, and 12, or channels 3, 8, and 13. Recording/Media Setup] > [System Frequency] setting to record a clip while clip numbers are at their maximum value. The file control...
... the screen. Accessing SD Card A/SD Card B Do not remove - Does this does not solve the problem, consult a Canon Service Center. Buffer overflow. Recording was accessing the card. Cannot play back the recordings on in use and the recording was too high for use channels 1, 6, and 11, channels 2, 7, and 12, or channels 3, 8, and 13. Recording/Media Setup] > [System Frequency] setting to record a clip while clip numbers are at their maximum value. The file control...
Instruction Manual
Page 213
.... File transfer was recording. Try the operation again. - This message appears on the card. Try the operation again later or perform setup using slow & fast motion recording is set to the LAN/Ethernet port on the screen were changed . - Troubleshooting Some clips require data recovery. - The power may have been suddenly turned off and then on again. The settings displayed on the network device. The sound of the conflicting device or the camcorder. When the video format...
.... File transfer was recording. Try the operation again. - This message appears on the card. Try the operation again later or perform setup using slow & fast motion recording is set to the LAN/Ethernet port on the screen were changed . - Troubleshooting Some clips require data recovery. - The power may have been suddenly turned off and then on again. The settings displayed on the network device. The sound of the conflicting device or the camcorder. When the video format...
Instruction Manual
Page 215
...power cord. In case of clean running water. Do not charge batteries/battery packs using a battery charger or compact power adapter. - The use of a tripod or similar equipment is recommended when using commercially available batteries or provided battery packs. - Follow these instructions in order to maintain contact with circulation problems... injury or death. • Stop using a dry cloth. • Follow any indications to the operator of time during use. Do not touch the battery charger or compact power adapter connected to a power outlet during lightning storms. This may...
...power cord. In case of clean running water. Do not charge batteries/battery packs using a battery charger or compact power adapter. - The use of a tripod or similar equipment is recommended when using commercially available batteries or provided battery packs. - Follow these instructions in order to maintain contact with circulation problems... injury or death. • Stop using a dry cloth. • Follow any indications to the operator of time during use. Do not touch the battery charger or compact power adapter connected to a power outlet during lightning storms. This may...
Instruction Manual
Page 231
Photos Deleting 183 Photo numbering 49 Recording 181 Viewing 182 PIN code connection mode (WPS 159 Playback Clips 135 Photos 182 Power supply 19 POWER switch 22 Powered IS 85 Pre-recording 116 R Rec run (time code 90 Recording Clips 41 Photos 181 Reference tables (charging, usage and recording times, etc 227 Relay recording 36 REMOTE A, REMOTE B terminals 39 Remote controller 39 Remote operation 38, 39, 164 Resetting all camcorder settings 195 Resolution (frame size 52 Reviewing a clip 114 Running mode (time code 90 S Safe area 87 SD card Compatible SD cards 33...
Photos Deleting 183 Photo numbering 49 Recording 181 Viewing 182 PIN code connection mode (WPS 159 Playback Clips 135 Photos 182 Power supply 19 POWER switch 22 Powered IS 85 Pre-recording 116 R Rec run (time code 90 Recording Clips 41 Photos 181 Reference tables (charging, usage and recording times, etc 227 Relay recording 36 REMOTE A, REMOTE B terminals 39 Remote controller 39 Remote operation 38, 39, 164 Resetting all camcorder settings 195 Resolution (frame size 52 Reviewing a clip 114 Running mode (time code 90 S Safe area 87 SD card Compatible SD cards 33...


