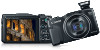
User Guide
Page 3
... camera damage or affect recorded images. ●● The LCD monitor may become warm. If covered, remove the film before contacting a Canon Customer Support Help Desk. ●● Although the LCD monitor is produced under default settings. ●● For convenience, all supported memory...M Mode Playback Mode Wi-Fi Functions Setting Menu Accessories Appendix Index 3 Preliminary Notes and Legal Information ●● Take and review some commercial settings. ●● The camera warranty is used over an extended period, it may be for personal use. Please note ...
... camera damage or affect recorded images. ●● The LCD monitor may become warm. If covered, remove the film before contacting a Canon Customer Support Help Desk. ●● Although the LCD monitor is produced under default settings. ●● For convenience, all supported memory...M Mode Playback Mode Wi-Fi Functions Setting Menu Accessories Appendix Index 3 Preliminary Notes and Legal Information ●● Take and review some commercial settings. ●● The camera warranty is used over an extended period, it may be for personal use. Please note ...

User Guide
Page 53
...;To restore the original setting, repeat this process but choose [Quick]. Changing the Image Display Period after Shots 1 Access the [Review image after shooting] screen. ●●Press the [ ] button, choose [Review image after shooting] on the [ ] tab, and then press the [ ] button (=28). 2 Configure the setting. ●●Choose [Red-Eye...
...;To restore the original setting, repeat this process but choose [Quick]. Changing the Image Display Period after Shots 1 Access the [Review image after shooting] screen. ●●Press the [ ] button, choose [Review image after shooting] on the [ ] tab, and then press the [ ] button (=28). 2 Configure the setting. ●●Choose [Red-Eye...

User Guide
Page 83
... not be possible to browse through images quickly. ●● To access this screen (Scroll Display mode), turn the [ ] dial rapidly. Playback Mode Have fun reviewing your shots, and browse or edit them on a computer, or images from other cameras. To view the next image, press the [ ] button or turn the...
... not be possible to browse through images quickly. ●● To access this screen (Scroll Display mode), turn the [ ] dial rapidly. Playback Mode Have fun reviewing your shots, and browse or edit them on a computer, or images from other cameras. To view the next image, press the [ ] button or turn the...

User Guide
Page 85
... connected to the camera via Wi-Fi, you are listed from the beginning. ●● After a moment, [ ] will no longer be displayed when you can review this information in the GPS information display. ●●Latitude, longitude, elevation, and UTC (shooting date and time) are using the camera with [ ]. 2 Play the...
... connected to the camera via Wi-Fi, you are listed from the beginning. ●● After a moment, [ ] will no longer be displayed when you can review this information in the GPS information display. ●●Latitude, longitude, elevation, and UTC (shooting date and time) are using the camera with [ ]. 2 Play the...

User Guide
Page 98
Turn the [ ] dial to switch frames, which position the cropping area. ●●Press the [ ] button. 4 Save as a new image and review. ●●Follow steps 4 - 5 in "Resizing Images" (= 97). ●● Editing is not possible for images shot at a recording pixel setting of [ ] ... ][ ] buttons or turn the [ ] dial to choose [OK], and then press the [ ] button. ●●The image is now saved as a new file. 5 Review the new image. ●●Press the [ ] button. [Display new image?] is displayed. ●●Press the [ ][ ] buttons or turn the [ ] dial to choose...
Turn the [ ] dial to switch frames, which position the cropping area. ●●Press the [ ] button. 4 Save as a new image and review. ●●Follow steps 4 - 5 in "Resizing Images" (= 97). ●● Editing is not possible for images shot at a recording pixel setting of [ ] ... ][ ] buttons or turn the [ ] dial to choose [OK], and then press the [ ] button. ●●The image is now saved as a new file. 5 Review the new image. ●●Press the [ ] button. [Display new image?] is displayed. ●●Press the [ ][ ] buttons or turn the [ ] dial to choose...
User Guide
Page 99
...Other Shooting Modes P Mode Tv, Av, and M Mode Playback Mode Wi-Fi Functions Setting Menu Accessories Appendix Index 4 Save as a new image and review. ●●Follow steps 4 - 5 in "Resizing Images" (= 97). ●● Image quality of pictures you repeatedly edit this way will be...Press the [ ][ ] buttons or turn the [ ] dial to choose an option, and then press the [ ] button. 4 Save as a new image and review. ●●Follow steps 4 - 5 in "Resizing Images" (= 97). 99 Correcting Image Brightness (i-Contrast) Still Images Movies Excessively dark image areas (such as faces...
...Other Shooting Modes P Mode Tv, Av, and M Mode Playback Mode Wi-Fi Functions Setting Menu Accessories Appendix Index 4 Save as a new image and review. ●●Follow steps 4 - 5 in "Resizing Images" (= 97). ●● Image quality of pictures you repeatedly edit this way will be...Press the [ ][ ] buttons or turn the [ ] dial to choose an option, and then press the [ ] button. 4 Save as a new image and review. ●●Follow steps 4 - 5 in "Resizing Images" (= 97). 99 Correcting Image Brightness (i-Contrast) Still Images Movies Excessively dark image areas (such as faces...

User Guide
Page 100
...; To overwrite the original image with the corrected image, choose [Overwrite] in step 4. Follow the steps in "Magnifying Images" (= 89). 4 Save as a new image and review. ●●Press the buttons or turn the [ ] dial to choose an image. 3 Correct the image. ●●Press the [ ] button. ●●Red-eye...
...; To overwrite the original image with the corrected image, choose [Overwrite] in step 4. Follow the steps in "Magnifying Images" (= 89). 4 Save as a new image and review. ●●Press the buttons or turn the [ ] dial to choose an image. 3 Correct the image. ●●Press the [ ] button. ●●Red-eye...
User Guide
Page 101
... of the movie (from the beginning and end of the movie by [ ] on the right will be available. ●● Movies may not be cut. 3 Review the edited movie. ●●Press the [ ][ ] buttons to choose [ ], and then press the [ ] button.
... of the movie (from the beginning and end of the movie by [ ] on the right will be available. ●● Movies may not be cut. 3 Review the edited movie. ●●Press the [ ][ ] buttons to choose [ ], and then press the [ ] button.

User Guide
Page 166
Off / / // / / / / // / / / Wind Filter (=34) Auto/Off / / // / / / / // / / / Review image after shooting (=53) Display Time Off/Quick / / // / //// / / 2 sec./4 sec./8 sec./Hold / / / / / / / // / / / / // / / / Display Info Off / / // / / / / // / / / Detailed / / // / / / / // / / / Blink Detection (=51) On / / // / / / / // / / / Off / / // / / / / // / / / Grid Lines (=50) On/...
Off / / // / / / / // / / / Wind Filter (=34) Auto/Off / / // / / / / // / / / Review image after shooting (=53) Display Time Off/Quick / / // / //// / / 2 sec./4 sec./8 sec./Hold / / / / / / / // / / / / // / / / Display Info Off / / // / / / / // / / / Detailed / / // / / / / // / / / Blink Detection (=51) On / / // / / / / // / / / Off / / // / / / / // / / / Grid Lines (=50) On/...


