User Manual
Page 8
... NFC-Compatible Smartphone 112 Connecting via NFC When Camera Is Off or in Shooting Mode 112 Connecting via NFC When Camera Is in Playback Mode.... 114 Adding a Smartphone 115 Using Another Access Point 117 Previous Access Points 117 Saving Images to a Computer 118 Preparing ...to Register a Computer 118 Installing the Software 118 Before Use Basic Guide Advanced Guide 1 Camera Basics 2 Auto Mode / Hybrid Auto Mode 3 Other Shooting Modes 4 P Mode 5 Tv, Av, ...
... NFC-Compatible Smartphone 112 Connecting via NFC When Camera Is Off or in Shooting Mode 112 Connecting via NFC When Camera Is in Playback Mode.... 114 Adding a Smartphone 115 Using Another Access Point 117 Previous Access Points 117 Saving Images to a Computer 118 Preparing ...to Register a Computer 118 Installing the Software 118 Before Use Basic Guide Advanced Guide 1 Camera Basics 2 Auto Mode / Hybrid Auto Mode 3 Other Shooting Modes 4 P Mode 5 Tv, Av, ...
User Manual
Page 9
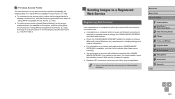
...Points 120 Connecting to Listed Access Points 122 Previous Access Points 123 Sending Images to a Registered Web Service 123 Registering Web Services 123 Registering CANON iMAGE GATEWAY 124 Registering Other Web Services 125 Uploading Images to Web Services 126 Printing Images Wirelessly from a Connected Printer........... 127 Sending Images to Another Camera...via Image Sync on Your Smartphone 133 Using a Smartphone to View Camera Images and Control the Camera 134 Geotagging Images on the Camera 134 Shooting Remotely 134 Editing or Erasing Wi-Fi Settings 135 Editing Connection ...
...Points 120 Connecting to Listed Access Points 122 Previous Access Points 123 Sending Images to a Registered Web Service 123 Registering Web Services 123 Registering CANON iMAGE GATEWAY 124 Registering Other Web Services 125 Uploading Images to Web Services 126 Printing Images Wirelessly from a Connected Printer........... 127 Sending Images to Another Camera...via Image Sync on Your Smartphone 133 Using a Smartphone to View Camera Images and Control the Camera 134 Geotagging Images on the Camera 134 Shooting Remotely 134 Editing or Erasing Wi-Fi Settings 135 Editing Connection ...
User Manual
Page 47
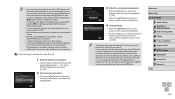
... to choose the person whose information you have not filled all five face info slots (=46). Before Use Basic Guide Advanced Guide 1 Camera Basics 2 Auto Mode / Hybrid Auto Mode 3 Other Shooting Modes 4 P Mode 5 Tv, Av, and M Mode 6 Playback Mode 7 Wi-Fi Functions 8 Setting Menu 9 Accessories 10 Appendix Index 2 Choose a... prioritize them as the main subject, and optimize focus, brightness, and color for them when shooting. ●● When you point the camera toward a subject, the names of up to five people) will be recorded in the image. ●● People other than those registered ...
... to choose the person whose information you have not filled all five face info slots (=46). Before Use Basic Guide Advanced Guide 1 Camera Basics 2 Auto Mode / Hybrid Auto Mode 3 Other Shooting Modes 4 P Mode 5 Tv, Av, and M Mode 6 Playback Mode 7 Wi-Fi Functions 8 Setting Menu 9 Accessories 10 Appendix Index 2 Choose a... prioritize them as the main subject, and optimize focus, brightness, and color for them when shooting. ●● When you point the camera toward a subject, the names of up to five people) will be recorded in the image. ●● People other than those registered ...
User Manual
Page 52
...in the AF frame. 1 Configure the setting. ●●Press the [ ] button, choose [AF- Before Use Basic Guide Advanced Guide 1 Camera Basics 2 Auto Mode / Hybrid Auto Mode 3 Other Shooting Modes 4 P Mode 5 Tv, Av, and M Mode 6 Playback Mode 7 Wi-Fi Functions 8 Setting Menu 9 Accessories 10 Appendix Index 52...) -- If a face was not detected, if the person is too close to the camera and their face is used (=38) -- When Tracking AF is too large for the screen, or if the camera detects subject movement -- Point Zoom] on the [ ] tab, and then choose [Disable] (=29). ●●...
...in the AF frame. 1 Configure the setting. ●●Press the [ ] button, choose [AF- Before Use Basic Guide Advanced Guide 1 Camera Basics 2 Auto Mode / Hybrid Auto Mode 3 Other Shooting Modes 4 P Mode 5 Tv, Av, and M Mode 6 Playback Mode 7 Wi-Fi Functions 8 Setting Menu 9 Accessories 10 Appendix Index 52...) -- If a face was not detected, if the person is too close to the camera and their face is used (=38) -- When Tracking AF is too large for the screen, or if the camera detects subject movement -- Point Zoom] on the [ ] tab, and then choose [Disable] (=29). ●●...
User Manual
Page 69
Evaluative Center Weighted Avg. Automatically adjusts exposure to within the [ ] (Spot AE Point frame), displayed in the menu, and choose the desired option (= 28). ●●The option you watch the screen, turn the [ ] dial to +2. ●●... can lock the exposure, or you can specify focus and exposure separately. 1 Lock the exposure. ●●Aim the camera at the subject to shoot with the exposure locked, and then, with the shutter button pressed halfway, press the [ ] button. ●●[ ] is displayed, and the exposure is locked. ●&#...
Evaluative Center Weighted Avg. Automatically adjusts exposure to within the [ ] (Spot AE Point frame), displayed in the menu, and choose the desired option (= 28). ●●The option you watch the screen, turn the [ ] dial to +2. ●●... can lock the exposure, or you can specify focus and exposure separately. 1 Lock the exposure. ●●Aim the camera at the subject to shoot with the exposure locked, and then, with the shutter button pressed halfway, press the [ ] button. ●●[ ] is displayed, and the exposure is locked. ●&#...
User Manual
Page 74
... (=75) is locked to [Center] and AF frame size is locked to make manual focusing easier. Before Use Basic Guide Advanced Guide 1 Camera Basics 2 Auto Mode / Hybrid Auto Mode 3 Other Shooting Modes 4 P Mode 5 Tv, Av, and M Mode 6 Playback Mode 7 Wi-Fi Functions 8 Setting Menu 9 Accessories 10 Appendix Index 74 ... the shutter speed is faster than it . ●● To hide the magnified display area, choose MENU (=29) > [ ] tab > [MF-Point Zoom] > [Off]. ●● To deactivate automatic focus fine-tuning when the shutter button is possible when using the digital zoom (=38) or digital...
... (=75) is locked to [Center] and AF frame size is locked to make manual focusing easier. Before Use Basic Guide Advanced Guide 1 Camera Basics 2 Auto Mode / Hybrid Auto Mode 3 Other Shooting Modes 4 P Mode 5 Tv, Av, and M Mode 6 Playback Mode 7 Wi-Fi Functions 8 Setting Menu 9 Accessories 10 Appendix Index 74 ... the shutter speed is faster than it . ●● To hide the magnified display area, choose MENU (=29) > [ ] tab > [MF-Point Zoom] > [Off]. ●● To deactivate automatic focus fine-tuning when the shutter button is possible when using the digital zoom (=38) or digital...
User Manual
Page 75
...; The AF frame size is set to focus on as follows. Faces in profile, at the edge or in a corner, first aim the camera to suit the shooting conditions as follows. ●●Press the [ ] button, choose [AF Frame] on the [ ] tab, and then choose the desired ... reliable focusing. ●● A yellow AF frame is displayed with [AF-Point Zoom] (=52) set to choose [Tracking AF]. ●●[ ] is displayed in the center. Before Use Basic Guide Advanced Guide 1 Camera Basics 2 Auto Mode / Hybrid Auto Mode 3 Other Shooting Modes 4 P Mode 5 Tv, Av, and M Mode 6 Playback Mode...
...; The AF frame size is set to focus on as follows. Faces in profile, at the edge or in a corner, first aim the camera to suit the shooting conditions as follows. ●●Press the [ ] button, choose [AF Frame] on the [ ] tab, and then choose the desired ... reliable focusing. ●● A yellow AF frame is displayed with [AF-Point Zoom] (=52) set to choose [Tracking AF]. ●●[ ] is displayed in the center. Before Use Basic Guide Advanced Guide 1 Camera Basics 2 Auto Mode / Hybrid Auto Mode 3 Other Shooting Modes 4 P Mode 5 Tv, Av, and M Mode 6 Playback Mode...
User Manual
Page 76
... ] is displayed. ●●To cancel tracking, press the [ ] button again. 3 Shoot. ●●Pressing the shutter button halfway changes [ ] to a blue [ ], which follows the subject as the camera continues to adjust the focus and exposure (Servo AF) (= 76). ●●Press the ...is displayed in the center of the background too closely. ●● [AF-Point Zoom] on the [ ] tab is not available is selected as a subject. Before Use Basic Guide Advanced Guide 1 Camera Basics 2 Auto Mode / Hybrid Auto Mode 3 Other Shooting Modes 4 P Mode 5 Tv, Av, and M Mode 6 Playback Mode ...
... ] is displayed. ●●To cancel tracking, press the [ ] button again. 3 Shoot. ●●Pressing the shutter button halfway changes [ ] to a blue [ ], which follows the subject as the camera continues to adjust the focus and exposure (Servo AF) (= 76). ●●Press the ...is displayed in the center of the background too closely. ●● [AF-Point Zoom] on the [ ] tab is not available is selected as a subject. Before Use Basic Guide Advanced Guide 1 Camera Basics 2 Auto Mode / Hybrid Auto Mode 3 Other Shooting Modes 4 P Mode 5 Tv, Av, and M Mode 6 Playback Mode ...
User Manual
Page 77
...press it halfway again. ●● AF lock shooting is not available. ●● [AF-Point Zoom] on subjects it is aimed at, even when the shutter button is not pressed; Off Conserves battery power, because the camera does not focus constantly. Changing the Focus Setting Still... the focus, hold the shutter button halfway down and press the [ ] button again. 2 Compose the shot and shoot. Before Use Basic Guide Advanced Guide 1 Camera Basics 2 Auto Mode / Hybrid Auto Mode 3 Other Shooting Modes 4 P Mode 5 Tv, Av, and M Mode 6 Playback Mode 7 Wi-Fi Functions 8 Setting Menu ...
...press it halfway again. ●● AF lock shooting is not available. ●● [AF-Point Zoom] on subjects it is aimed at, even when the shutter button is not pressed; Off Conserves battery power, because the camera does not focus constantly. Changing the Focus Setting Still... the focus, hold the shutter button halfway down and press the [ ] button again. 2 Compose the shot and shoot. Before Use Basic Guide Advanced Guide 1 Camera Basics 2 Auto Mode / Hybrid Auto Mode 3 Other Shooting Modes 4 P Mode 5 Tv, Av, and M Mode 6 Playback Mode 7 Wi-Fi Functions 8 Setting Menu ...
User Manual
Page 114
... 3. ●● Once you have registered a smartphone, you choose [Yes] in step 3. Before Use Basic Guide Advanced Guide 1 Camera Basics 2 Auto Mode / Hybrid Auto Mode 3 Other Shooting Modes 4 P Mode 5 Tv, Av, and M Mode 6 Playback Mode 7 Wi-Fi Functions 8 Setting Menu 9 Accessories 10 Appendix... is not established, keep the devices together until the camera screen is turned on the smartphone, the devices may not recognize each other objects between the camera and smartphone. ●● When using NFC, keep the following points in slightly different positions. Depending on . --
... 3. ●● Once you have registered a smartphone, you choose [Yes] in step 3. Before Use Basic Guide Advanced Guide 1 Camera Basics 2 Auto Mode / Hybrid Auto Mode 3 Other Shooting Modes 4 P Mode 5 Tv, Av, and M Mode 6 Playback Mode 7 Wi-Fi Functions 8 Setting Menu 9 Accessories 10 Appendix... is not established, keep the devices together until the camera screen is turned on the smartphone, the devices may not recognize each other objects between the camera and smartphone. ●● When using NFC, keep the following points in slightly different positions. Depending on . --
User Manual
Page 115
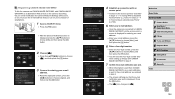
... displayed on the camera. 6 Start Camera Connect. ●●Start Camera Connect on the smartphone. 7 Choose the camera to connect. ●●When the screen for choosing the target camera is displayed on your smartphone, choose the camera to pair them. Before Use Basic Guide Advanced Guide 1 Camera Basics 2 Auto Mode / Hybrid Auto Mode 3 Other Shooting Modes 4 P Mode...
... displayed on the camera. 6 Start Camera Connect. ●●Start Camera Connect on the smartphone. 7 Choose the camera to connect. ●●When the screen for choosing the target camera is displayed on your smartphone, choose the camera to pair them. Before Use Basic Guide Advanced Guide 1 Camera Basics 2 Auto Mode / Hybrid Auto Mode 3 Other Shooting Modes 4 P Mode...
User Manual
Page 117
... the smartphone. 6 Configure the privacy settings and send images. ●●Follow steps 8 - 9 in "Using Another Access Point" (= 117) from step 4. Before Use Basic Guide Advanced Guide 1 Camera Basics 2 Auto Mode / Hybrid Auto Mode 3 Other Shooting Modes 4 P Mode 5 Tv, Av, and M Mode 6 Playback Mode 7 Wi-Fi Functions 8 Setting Menu 9 Accessories 10 Appendix Index...
... the smartphone. 6 Configure the privacy settings and send images. ●●Follow steps 8 - 9 in "Using Another Access Point" (= 117) from step 4. Before Use Basic Guide Advanced Guide 1 Camera Basics 2 Auto Mode / Hybrid Auto Mode 3 Other Shooting Modes 4 P Mode 5 Tv, Av, and M Mode 6 Playback Mode 7 Wi-Fi Functions 8 Setting Menu 9 Accessories 10 Appendix Index...
User Manual
Page 119
...Before Use Basic Guide Advanced Guide 1 Camera Basics 2 Auto Mode / Hybrid Auto Mode 3 Other Shooting Modes 4 P Mode 5 Tv, Av, and M Mode 6 Playback Mode 7 Wi-Fi Functions 8 Setting Menu 9 Accessories 10 Appendix Index 119 For non-WPS access points, check the following information. ●... computer is connected to an access point. ●●For instructions on checking your network connection, refer to the computer user manual. 2 Configure the setting. ●●Click in the following order: [Start] menu ► [All Programs] ► [Canon Utilities] ► [CameraWindow] ►...
...Before Use Basic Guide Advanced Guide 1 Camera Basics 2 Auto Mode / Hybrid Auto Mode 3 Other Shooting Modes 4 P Mode 5 Tv, Av, and M Mode 6 Playback Mode 7 Wi-Fi Functions 8 Setting Menu 9 Accessories 10 Appendix Index 119 For non-WPS access points, check the following information. ●... computer is connected to an access point. ●●For instructions on checking your network connection, refer to the computer user manual. 2 Configure the setting. ●●Click in the following order: [Start] menu ► [All Programs] ► [Canon Utilities] ► [CameraWindow] ►...
User Manual
Page 120
... you use either Push Button Configuration Method or PIN Method for connecting multiple computers. You can check your access point. Before Use Basic Guide Advanced Guide 1 Camera Basics 2 Auto Mode / Hybrid Auto Mode 3 Other Shooting Modes 4 P Mode 5 Tv, Av, and M Mode 6 Playback Mode 7 Wi-Fi Functions 8 Setting Menu 9 Accessories 10 Appendix Index 120...
... you use either Push Button Configuration Method or PIN Method for connecting multiple computers. You can check your access point. Before Use Basic Guide Advanced Guide 1 Camera Basics 2 Auto Mode / Hybrid Auto Mode 3 Other Shooting Modes 4 P Mode 5 Tv, Av, and M Mode 6 Playback Mode 7 Wi-Fi Functions 8 Setting Menu 9 Accessories 10 Appendix Index 120...
User Manual
Page 121
... Mode 3 Other Shooting Modes 4 P Mode 5 Tv, Av, and M Mode 6 Playback Mode 7 Wi-Fi Functions 8 Setting Menu 9 Accessories 10 Appendix Index 121 Nothing will be displayed on the camera screen. 10 Display CameraWindow. ●●Windows: Access CameraWindow by clicking [Downloads Images From Canon Camera]. ●●...the connection. ●●On the access point, hold down the WPS connection button for a few seconds. ●●On the camera, press the [ ] button to go to the next step. ●●The camera connects to the access point and lists devices connected to it on the...
... Mode 3 Other Shooting Modes 4 P Mode 5 Tv, Av, and M Mode 6 Playback Mode 7 Wi-Fi Functions 8 Setting Menu 9 Accessories 10 Appendix Index 121 Nothing will be displayed on the camera screen. 10 Display CameraWindow. ●●Windows: Access CameraWindow by clicking [Downloads Images From Canon Camera]. ●●...the connection. ●●On the access point, hold down the WPS connection button for a few seconds. ●●On the camera, press the [ ] button to go to the next step. ●●The camera connects to the access point and lists devices connected to it on the...
User Manual
Page 122
... the password in step 3. Before Use Basic Guide Advanced Guide 1 Camera Basics 2 Auto Mode / Hybrid Auto Mode 3 Other Shooting Modes 4 P Mode 5 Tv, Av, and M Mode 6 Playback Mode 7 Wi-Fi Functions 8 Setting Menu 9 Accessories 10 Appendix Index 122 Choose a device in the access point. Follow on-screen instructions and enter an SSID, security settings...
... the password in step 3. Before Use Basic Guide Advanced Guide 1 Camera Basics 2 Auto Mode / Hybrid Auto Mode 3 Other Shooting Modes 4 P Mode 5 Tv, Av, and M Mode 6 Playback Mode 7 Wi-Fi Functions 8 Setting Menu 9 Accessories 10 Appendix Index 122 Choose a device in the access point. Follow on-screen instructions and enter an SSID, security settings...
User Manual
Page 123
.... ●● Separate ISP connection and access point fees may be applicable. ●● You can also download the user manual from CANON iMAGE GATEWAY. Before Use Basic Guide Advanced Guide 1 Camera Basics 2 Auto Mode / Hybrid Auto Mode 3 Other Shooting Modes 4 P Mode 5 Tv, Av, and..."Using WPS-Compatible Access Points" (= 120) from step 5 or the procedure in "Using WPS-Compatible Access Points" (= 120). ●● To switch access points, choose [Switch Network] on countries and regions where CANON iMAGE GATEWAY is required to complete camera settings for details on browser...
.... ●● Separate ISP connection and access point fees may be applicable. ●● You can also download the user manual from CANON iMAGE GATEWAY. Before Use Basic Guide Advanced Guide 1 Camera Basics 2 Auto Mode / Hybrid Auto Mode 3 Other Shooting Modes 4 P Mode 5 Tv, Av, and..."Using WPS-Compatible Access Points" (= 120) from step 5 or the procedure in "Using WPS-Compatible Access Points" (= 120). ●● To switch access points, choose [Switch Network] on countries and regions where CANON iMAGE GATEWAY is required to complete camera settings for details on browser...
User Manual
Page 124
... Mode 3 Other Shooting Modes 4 P Mode 5 Tv, Av, and M Mode 6 Playback Mode 7 Wi-Fi Functions 8 Setting Menu 9 Accessories 10 Appendix Index 124 Registering CANON iMAGE GATEWAY To link the camera and CANON iMAGE GATEWAY, add CANON iMAGE GATEWAY as described in steps 5 - 7 in "Using WPS-Compatible Access Points" (= 120) ... sent to the e-mail address you entered in "Connecting to Listed Access Points" (= 122). 5 Enter your e-mail address. ●●Once the camera is connected to CANON iMAGE GATEWAY via the access point, a screen is displayed for entering an e-mail address. ●●...
... Mode 3 Other Shooting Modes 4 P Mode 5 Tv, Av, and M Mode 6 Playback Mode 7 Wi-Fi Functions 8 Setting Menu 9 Accessories 10 Appendix Index 124 Registering CANON iMAGE GATEWAY To link the camera and CANON iMAGE GATEWAY, add CANON iMAGE GATEWAY as described in steps 5 - 7 in "Using WPS-Compatible Access Points" (= 120) ... sent to the e-mail address you entered in "Connecting to Listed Access Points" (= 122). 5 Enter your e-mail address. ●●Once the camera is connected to CANON iMAGE GATEWAY via the access point, a screen is displayed for entering an e-mail address. ●●...
User Manual
Page 127
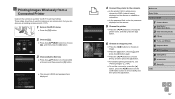
Printing Images Wirelessly from a Connected Printer Connect the camera to a printer via Wi-Fi to print as an access point, but you can also use an existing access point (=127). 1 Access the Wi-Fi menu. ●●Press the [ ] button. 2 Choose [ ]. ●●Press the buttons to choose [ ... connection, press the [ ] button, press the [ ][ ] buttons on the confirmation screen to use the camera as follows. Before Use Basic Guide Advanced Guide 1 Camera Basics 2 Auto Mode / Hybrid Auto Mode 3 Other Shooting Modes 4 P Mode 5 Tv, Av, and M Mode 6 Playback Mode 7 Wi-Fi Functions 8 Setting ...
Printing Images Wirelessly from a Connected Printer Connect the camera to a printer via Wi-Fi to print as an access point, but you can also use an existing access point (=127). 1 Access the Wi-Fi menu. ●●Press the [ ] button. 2 Choose [ ]. ●●Press the buttons to choose [ ... connection, press the [ ] button, press the [ ][ ] buttons on the confirmation screen to use the camera as follows. Before Use Basic Guide Advanced Guide 1 Camera Basics 2 Auto Mode / Hybrid Auto Mode 3 Other Shooting Modes 4 P Mode 5 Tv, Av, and M Mode 6 Playback Mode 7 Wi-Fi Functions 8 Setting ...
User Manual
Page 128
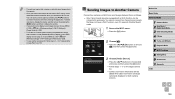
... and then pressing the [ ] button. You cannot connect to a Canon-brand camera that [Password] does not display on both camera screens. Before Use Basic Guide Advanced Guide 1 Camera Basics 2 Auto Mode / Hybrid Auto Mode 3 Other Shooting Modes 4 P Mode 5 Tv, Av, and M Mode 6 Playback... the device selection screen by pressing the [ ][ ]] buttons to connect without entering the password in "Using Another Access Point" (= 117). You can be added when [Start connection on target camera] is displayed on the SSID display screen (step 3), choose MENU (=29) > [ ] tab > [Wireless settings]...
... and then pressing the [ ] button. You cannot connect to a Canon-brand camera that [Password] does not display on both camera screens. Before Use Basic Guide Advanced Guide 1 Camera Basics 2 Auto Mode / Hybrid Auto Mode 3 Other Shooting Modes 4 P Mode 5 Tv, Av, and M Mode 6 Playback... the device selection screen by pressing the [ ][ ]] buttons to connect without entering the password in "Using Another Access Point" (= 117). You can be added when [Start connection on target camera] is displayed on the SSID display screen (step 3), choose MENU (=29) > [ ] tab > [Wireless settings]...