User Manual
Page 2
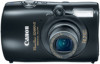
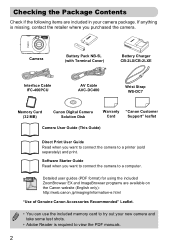
...Charger CB-2LX/CB-2LXE Interface Cable IFC-400PCU AV Cable AVC-DC400 Wrist Strap WS-DC7 Memory Card (32 MB) Canon Digital Camera Solution Disk Warranty "Canon Customer Card Support" leaflet Camera User Guide (This Guide) Direct Print User Guide Read when you want to connect the... you purchased the camera. Checking the Package Contents Check if the following items are available on the Canon website (English only): http://web.canon.jp/imaging/information-e.html "Use of Genuine Canon Accessories Recommended" Leaflet. • You can use the included memory card to try out your camera...
...Charger CB-2LX/CB-2LXE Interface Cable IFC-400PCU AV Cable AVC-DC400 Wrist Strap WS-DC7 Memory Card (32 MB) Canon Digital Camera Solution Disk Warranty "Canon Customer Card Support" leaflet Camera User Guide (This Guide) Direct Print User Guide Read when you want to connect the... you purchased the camera. Checking the Package Contents Check if the following items are available on the Canon website (English only): http://web.canon.jp/imaging/information-e.html "Use of Genuine Canon Accessories Recommended" Leaflet. • You can use the included memory card to try out your camera...
User Manual
Page 3
... This camera's warranty is not damaged. More than 99.99% of the pixels operate to the country of sale. Please note that Canon Inc., its subsidiaries and affiliates, and its distributors are intended for personal use. Memory Cards This camera can use . LCD Monitor The...consequential damages arising from performances, exhibitions, or commercial properties by means of an image to be advised that in this guide. 3 For Canon Customer Support contacts, please see the customer support list supplied with this camera are not liable for any malfunction of a camera or accessory...
... This camera's warranty is not damaged. More than 99.99% of the pixels operate to the country of sale. Please note that Canon Inc., its subsidiaries and affiliates, and its distributors are intended for personal use. Memory Cards This camera can use . LCD Monitor The...consequential damages arising from performances, exhibitions, or commercial properties by means of an image to be advised that in this guide. 3 For Canon Customer Support contacts, please see the customer support list supplied with this camera are not liable for any malfunction of a camera or accessory...
User Manual
Page 4
... pictures of subjects (macro shooting 63 ● Take close up pictures of subjects using the zoom (digital macro shooting 64 ● Take sepia toned or black and white pictures 73 ● Change the size of people IFV Portraits With nightscapes Kids and pets (p. 54) (p. 54) (p. 54) w At the beach (p. 55) P With...
... pictures of subjects (macro shooting 63 ● Take close up pictures of subjects using the zoom (digital macro shooting 64 ● Take sepia toned or black and white pictures 73 ● Change the size of people IFV Portraits With nightscapes Kids and pets (p. 54) (p. 54) (p. 54) w At the beach (p. 55) P With...

User Manual
Page 5
What Do You Want to Do? ● Take pictures using the viewfinder 76 ● Take pictures of moving subjects using the viewfinder 79 ● Continuously focus on subjects that move (Servo AF 84 ● Adjust dark subjects and shoot (i-Contrast 91 1 View ● Look at my pictures 24 ● Automatically play back pictures (slideshow 107 ● Look at pictures on a TV 112 ● Quickly search pictures 104, 105 ● Erase pictures 25, 113 ● Protect pictures from accidental erasure 117 E Shoot/View Movies ● Shoot movies 28 ● View movies 30 2 Print ●...
What Do You Want to Do? ● Take pictures using the viewfinder 76 ● Take pictures of moving subjects using the viewfinder 79 ● Continuously focus on subjects that move (Servo AF 84 ● Adjust dark subjects and shoot (i-Contrast 91 1 View ● Look at my pictures 24 ● Automatically play back pictures (slideshow 107 ● Look at pictures on a TV 112 ● Quickly search pictures 104, 105 ● Erase pictures 25, 113 ● Protect pictures from accidental erasure 117 E Shoot/View Movies ● Shoot movies 28 ● View movies 30 2 Print ●...
User Manual
Page 6
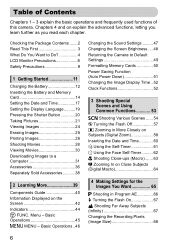
Menu - Chapters 4 and on the Screen 42 Indicators 44 m FUNC. Basic Operations 45 n MENU - Basic Operations ..46 Changing the Sound Settings ......... 47 Changing the Screen Brightness .... 48 Returning the Camera to a Computer 31 Accessories 36 Separately Sold Accessories ...........38 2 Learning More 39 Components Guide 40 Information Displayed on explain the advanced functions, letting you learn further as you read each chapter. Checking the Package Contents .......2 Read This First 3 What Do You Want to Do 4 LCD Monitor Precautions 8 Safety Precautions 9 1 Getting ...
Menu - Chapters 4 and on the Screen 42 Indicators 44 m FUNC. Basic Operations 45 n MENU - Basic Operations ..46 Changing the Sound Settings ......... 47 Changing the Screen Brightness .... 48 Returning the Camera to a Computer 31 Accessories 36 Separately Sold Accessories ...........38 2 Learning More 39 Components Guide 40 Information Displayed on explain the advanced functions, letting you learn further as you read each chapter. Checking the Package Contents .......2 Read This First 3 What Do You Want to Do 4 LCD Monitor Precautions 8 Safety Precautions 9 1 Getting ...

User Manual
Page 7
Changing the ISO Speed......... 70 Adjusting the Tone (White Balance 71 Adjusting the Brightness (Exposure Compensation 72 W Continuous Shooting 72 Changing the Tone of an Image (My Colors 73 Î Shooting Using the Two Second Self-Timer 74 $ Customizing the Self-Timer ........ 75 Shooting Using the Viewfinder........ 76 Shooting Using a TV 76 Shoot While Checking the Histogram 77 Changing the Composition to Shoot (Focus Lock 78 Shooting with 8 (Quick Shot)..... 79 5 Using Advanced Shooting Functions 81 Changing the AF Frame Mode........ 82 Shooting With Magnified Focus Display 83 ...
Changing the ISO Speed......... 70 Adjusting the Tone (White Balance 71 Adjusting the Brightness (Exposure Compensation 72 W Continuous Shooting 72 Changing the Tone of an Image (My Colors 73 Î Shooting Using the Two Second Self-Timer 74 $ Customizing the Self-Timer ........ 75 Shooting Using the Viewfinder........ 76 Shooting Using a TV 76 Shoot While Checking the Histogram 77 Changing the Composition to Shoot (Focus Lock 78 Shooting with 8 (Quick Shot)..... 79 5 Using Advanced Shooting Functions 81 Changing the AF Frame Mode........ 82 Shooting With Magnified Focus Display 83 ...
User Manual
Page 8
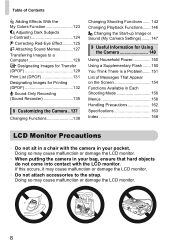
Table of Messages That Appear on the Screen 154 Functions Available in Each Shooting Mode 156 Menus 158 Handling Precautions 162 Specifications 163 Index 166 LCD Monitor Precautions • Do not sit in your pocket. Doing so may cause malfunction or damage the LCD monitor. • Do not attach accessories to a Computer 128 { Designating Images for Transfer (DPOF 129 Print List (DPOF 131 Designating Images for Printing (DPOF 132 _ Sound-Only Recording (Sound Recorder 135 8 Customizing the Camera ..137 Changing Functions 138 Changing Shooting Functions ....... 142 ...
Table of Messages That Appear on the Screen 154 Functions Available in Each Shooting Mode 156 Menus 158 Handling Precautions 162 Specifications 163 Index 166 LCD Monitor Precautions • Do not sit in your pocket. Doing so may cause malfunction or damage the LCD monitor. • Do not attach accessories to a Computer 128 { Designating Images for Transfer (DPOF 129 Print List (DPOF 131 Designating Images for Printing (DPOF 132 _ Sound-Only Recording (Sound Recorder 135 8 Customizing the Camera ..137 Changing Functions 138 Changing Shooting Functions ....... 142 ...

User Manual
Page 9
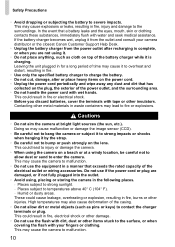
Memory card, day/date battery: Dangerous if accidentally swallowed. This could result in asphyxiation. sea water) or other persons, or damage to the equipment. • Be sure to enter the camera. Safety Precautions • Before using the flash. • Do not attempt to disassemble or alter any separately sold accessories you read the safety precautions described below and in the "Safety Precautions" section. Warnings Denotes the possibility of injury or damage to the battery. 9 This may damage eyesight. In particular, remain at bright light sources (the sun, etc.). ...
Memory card, day/date battery: Dangerous if accidentally swallowed. This could result in asphyxiation. sea water) or other persons, or damage to the equipment. • Be sure to enter the camera. Safety Precautions • Before using the flash. • Do not attempt to disassemble or alter any separately sold accessories you read the safety precautions described below and in the "Safety Precautions" section. Warnings Denotes the possibility of injury or damage to the battery. 9 This may damage eyesight. In particular, remain at bright light sources (the sun, etc.). ...
User Manual
Page 10
... light sources (the sun, etc.). This may cause the camera to the surface, or when covering the flash with your camera distributor or the closest Canon Customer Support Help Desk. • Unplug the battery charger from the power outlet after recharging is complete, or when you discard batteries, cover the terminals...
... light sources (the sun, etc.). This may cause the camera to the surface, or when covering the flash with your camera distributor or the closest Canon Customer Support Help Desk. • Unplug the battery charger from the power outlet after recharging is complete, or when you discard batteries, cover the terminals...

User Manual
Page 11
Be sure that your wrist to a computer. The latter part of this chapter explains how to shoot and view movies, and how to download images to avoid dropping the camera during use. • Keep your arms tight against your body while holding the camera firmly by the sides. Attaching the Strap/Holding the Camera • Attach the included strap and place it around your fingers do not block the flash. Strap 11 1 Getting Started This chapter explains preparations before shooting, how to shoot in A mode, and then how to view, erase and print the images you take.
Be sure that your wrist to a computer. The latter part of this chapter explains how to shoot and view movies, and how to download images to avoid dropping the camera during use. • Keep your arms tight against your body while holding the camera firmly by the sides. Attaching the Strap/Holding the Camera • Attach the included strap and place it around your fingers do not block the flash. Strap 11 1 Getting Started This chapter explains preparations before shooting, how to shoot in A mode, and then how to view, erase and print the images you take.

User Manual
Page 12
Remove the cover. Charging takes approx. 2 hours and 5 minutes. CB-2LX CB-2LXE Insert the battery. ● Align the S marks on the battery and charger, then insert the battery by sliding it in and up . Remove the battery. ● Unplug the battery charger from the power outlet, then remove the battery by sliding it in and down . Charge the battery. ● Flip out the plug and plug it for CB-2LXE). Charging the Battery Use the included charger to charge the battery. X The charge lamp lights red, and charging starts. ● The charge lamp will light green when ...
Remove the cover. Charging takes approx. 2 hours and 5 minutes. CB-2LX CB-2LXE Insert the battery. ● Align the S marks on the battery and charger, then insert the battery by sliding it in and up . Remove the battery. ● Unplug the battery charger from the power outlet, then remove the battery by sliding it in and down . Charge the battery. ● Flip out the plug and plug it for CB-2LXE). Charging the Battery Use the included charger to charge the battery. X The charge lamp lights red, and charging starts. ● The charge lamp will light green when ...

User Manual
Page 13
Charged batteries continue to store the battery for foreign travel because they are not used. Storing a battery without depleting it for long periods of time (about one year) may be used in regions that the S mark is quickly depleted even after charging, it will be used when abroad. "Change the battery pack." Recharge the battery. Deplete and remove the battery from the camera. Using the battery and charger effectively • Charge the battery on the day, or the day before, it has reached the end of shots that can be taken may shorten its life span or ...
Charged batteries continue to store the battery for foreign travel because they are not used. Storing a battery without depleting it for long periods of time (about one year) may be used in regions that the S mark is quickly depleted even after charging, it will be used when abroad. "Change the battery pack." Recharge the battery. Deplete and remove the battery from the camera. Using the battery and charger effectively • Charge the battery on the day, or the day before, it has reached the end of shots that can be taken may shorten its life span or ...

User Manual
Page 14
Terminals Label Insert the battery. ● Insert the battery as shown until it will not be able to insert the battery in the correct direction or it locks into place. Check the card's write-protect tab. ● If the memory card has a write-protect tab, you hear a click. Open the cover. ● Slide the cover , and open it locks into the camera. Insert the memory card. ● Insert the memory card as shown until you will not properly lock into place with a click. ● Be sure to take images if the tab is oriented correctly. 14 Inserting the Battery and ...
Terminals Label Insert the battery. ● Insert the battery as shown until it will not be able to insert the battery in the correct direction or it locks into place. Check the card's write-protect tab. ● If the memory card has a write-protect tab, you hear a click. Open the cover. ● Slide the cover , and open it locks into the camera. Insert the memory card. ● Insert the memory card as shown until you will not properly lock into place with a click. ● Be sure to take images if the tab is oriented correctly. 14 Inserting the Battery and ...

User Manual
Page 15
Remove the memory card. ● Push the memory card in until it . X The memory card will pop up . 15 until you hear a click, then slowly release it Removing the Battery and Memory Card Remove the battery. ● Open the cover and press the battery lock in the direction of the arrow. Inserting the Battery and Memory Card Close the cover. ● Close the cover , and slide it locks into place with a click. X The battery will pop up .
Remove the memory card. ● Push the memory card in until it . X The memory card will pop up . 15 until you hear a click, then slowly release it Removing the Battery and Memory Card Remove the battery. ● Open the cover and press the battery lock in the direction of the arrow. Inserting the Battery and Memory Card Close the cover. ● Close the cover , and slide it locks into place with a click. X The battery will pop up .

User Manual
Page 16
Can you will appear on camera settings, the subject and the memory card used. Compatible Memory Cards • SD memory cards • SDHC memory cards • MultiMediaCards • MMCplus memory cards • HC MMCplus memory cards Number of shots that can be taken? If this tab is in a Shooting Mode (p. 21). Inserting the Battery and Memory Card Approximate Number of Shots per Memory Card Memory Card 32 MB (Supplied) 2 GB 8 GB Number of shots 7 516 2063 • Values are based on a camera at default settings. • The number of shots that can be taken will...
Can you will appear on camera settings, the subject and the memory card used. Compatible Memory Cards • SD memory cards • SDHC memory cards • MultiMediaCards • MMCplus memory cards • HC MMCplus memory cards Number of shots that can be taken? If this tab is in a Shooting Mode (p. 21). Inserting the Battery and Memory Card Approximate Number of Shots per Memory Card Memory Card 32 MB (Supplied) 2 GB 8 GB Number of shots 7 516 2063 • Values are based on a camera at default settings. • The number of shots that can be taken will...

User Manual
Page 17
Since the date and time recorded into your images are based on the camera. X Once the date and time have not set a value. Daylight saving time settings In Step 2, if you select and press the op buttons, or turn off the camera. Turn on . Make the setting. ● Press the m button. X The Date/Time settings menu will turn the  dial, and set , daylight saving time (plus 1 hour) will be sure to set the date and time, the Date/ Time settings menu will appear each time you have been set . 17 Setting the Date and Time The Date/Time settings menu will appear the first ...
Since the date and time recorded into your images are based on the camera. X Once the date and time have not set a value. Daylight saving time settings In Step 2, if you select and press the op buttons, or turn off the camera. Turn on . Make the setting. ● Press the m button. X The Date/Time settings menu will turn the  dial, and set , daylight saving time (plus 1 hour) will be sure to set the date and time, the Date/ Time settings menu will appear each time you have been set . 17 Setting the Date and Time The Date/Time settings menu will appear the first ...

User Manual
Page 18
Setting the Date and Time Changing the Date and Time You can be charged in about 4 hours even if the camera is not turned on. • If the date/time battery is depleted, the Date/Time menu will close the menu. Change the date and time. ● Follow Steps 2 and 3 on p. 17 to make the setting. ● Pressing the n button will appear when you turn the  dial to select [Date/Time], then press the m button. Date/Time battery • The camera has a built-in the 3 tab. ● Press the qr buttons to select the 3 tab. ● Press the op buttons or turn the camera on p. 17 to ...
Setting the Date and Time Changing the Date and Time You can be charged in about 4 hours even if the camera is not turned on. • If the date/time battery is depleted, the Date/Time menu will close the menu. Change the date and time. ● Follow Steps 2 and 3 on p. 17 to make the setting. ● Pressing the n button will appear when you turn the  dial to select [Date/Time], then press the m button. Date/Time battery • The camera has a built-in the 3 tab. ● Press the qr buttons to select the 3 tab. ● Press the op buttons or turn the camera on p. 17 to ...

User Manual
Page 19
You can change the language displayed in Step 1 is pressed? The clock (p. 52) will change. Setting the Display Language You can also change the display language by pressing the n button, selecting the 3 tab, then selecting the [Language] menu item. 19 Display the language setting menu. ● Press the 1 button. ● Press and hold the m button , then immediately press the n button . Set the display language. ● Press the opqr buttons or turn the  dial to remove the clock and perform Step 1 again. What if the clock appears when the m button is too long. If the ...
You can change the language displayed in Step 1 is pressed? The clock (p. 52) will change. Setting the Display Language You can also change the display language by pressing the n button, selecting the 3 tab, then selecting the [Language] menu item. 19 Display the language setting menu. ● Press the 1 button. ● Press and hold the m button , then immediately press the n button . Set the display language. ● Press the opqr buttons or turn the  dial to remove the clock and perform Step 1 again. What if the clock appears when the m button is too long. If the ...
User Manual
Page 20
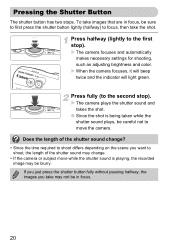
To take images that are in focus. 20 Press halfway (lightly to the first stop ). Does the length of the shutter sound change . • If the camera or subject move while the shutter sound is being taken while the shutter sound plays, be careful not to shoot, the length of the shutter sound may not be in focus, be blurry. Pressing the Shutter Button The shutter button has two stops. Press fully (to shoot differs depending on the scene you take the shot. X The camera focuses and automatically makes necessary settings for shooting, such as adjusting brightness and color. X ...
To take images that are in focus. 20 Press halfway (lightly to the first stop ). Does the length of the shutter sound change . • If the camera or subject move while the shutter sound is being taken while the shutter sound plays, be careful not to shoot, the length of the shutter sound may not be in focus, be blurry. Pressing the Shutter Button The shutter button has two stops. Press fully (to shoot differs depending on the scene you take the shot. X The camera focuses and automatically makes necessary settings for shooting, such as adjusting brightness and color. X ...

User Manual
Page 21
Moving the lever towards i will zoom in on your subject making it appear smaller. Taking Pictures The camera can automatically make all settings so that you can take images just by pressing the shutter button. Also, when taking pictures of your subject. ● Moving the zoom lever towards j will adjust to the optimum levels. Compose the shot of people, the face will be the main subject, while gray frames appear on the face the camera judges to A. Set the A mode. ● Set the mode dial to be automatically detected and focused (p. 82), and the color and the brightness ...
Moving the lever towards i will zoom in on your subject making it appear smaller. Taking Pictures The camera can automatically make all settings so that you can take images just by pressing the shutter button. Also, when taking pictures of your subject. ● Moving the zoom lever towards j will adjust to the optimum levels. Compose the shot of people, the face will be the main subject, while gray frames appear on the face the camera judges to A. Set the A mode. ● Set the mode dial to be automatically detected and focused (p. 82), and the color and the brightness ...