Canon PIXMA iP4700 Printer
View Results Below
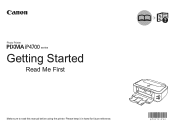
Free Canon PIXMA iP4700 manuals!
Problems with Canon PIXMA iP4700?
Ask a Question
Free Canon PIXMA iP4700 manuals!
Problems with Canon PIXMA iP4700?
Ask a Question
Related Manual Pages

Related Videos

Canon PIXMA iP4700 in action!
Duration: 6:22
Total Views: 58,291
Duration: 6:22
Total Views: 58,291
Canon PIXMA iP4700 UNBOXING (europe version).
Duration: 8:00
Total Views: 3,694
Duration: 8:00
Total Views: 3,694
Busy Cat Wooster vs. the Canon Pixma iP4700 printer
Duration: :26
Total Views: 133
Duration: :26
Total Views: 133
Similar Questions

Canon Mg3120 Printer
where can i get a free download of the software needed to make my printer work with my dell inspiron...
where can i get a free download of the software needed to make my printer work with my dell inspiron...
(Posted by debdotz 11 years ago)

How To Rest My Canon Pixma Mx 340 Printer
how do I reset my canon pixma mx340 printer?
how do I reset my canon pixma mx340 printer?
(Posted by bobbieh 11 years ago)

Conect Macbook Pro To Cannon Printer
I have bought a MacBookPro – MAC OS X 10.7.4 – I had a Canon ImageCLASS MF4350d Laser Al...
I have bought a MacBookPro – MAC OS X 10.7.4 – I had a Canon ImageCLASS MF4350d Laser Al...
(Posted by lindaberron 11 years ago)