
i850 Quick Start Guide
Page 23
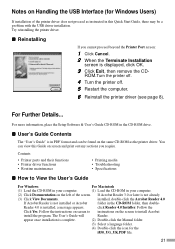
... and can view this Guide on the left of the printer driver does not proceed as the printer driver. Contents • Printer parts and their functions • Printer driver functions • Routine maintenance • Printing media • Troubleshooting • Specifications " How to install Acrobat install the ...this Quick Start Guide, there may be found on Handling the USB Interface (for the i850_UG_UK.PDF file. 21 Try reinstalling the printer driver. " Reinstalling If you require. For more information, place the Setup Software & User's Guide CD-ROM in the CD-ROM...
... and can view this Guide on the left of the printer driver does not proceed as the printer driver. Contents • Printer parts and their functions • Printer driver functions • Routine maintenance • Printing media • Troubleshooting • Specifications " How to install Acrobat install the ...this Quick Start Guide, there may be found on Handling the USB Interface (for the i850_UG_UK.PDF file. 21 Try reinstalling the printer driver. " Reinstalling If you require. For more information, place the Setup Software & User's Guide CD-ROM in the CD-ROM...
i850 Easy Setup Instructions
Page 2
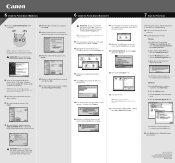
... print head alignment, click OK. 2 Close all open software applications, then insert the "i850 Setup Software & User's Guide" CD-ROM. screen instructions. Canon is complete, click Finish. 7 Register your computer. All other applications can not detect a printer port, refer to the Troubleshooting chapter in a software application, click Page Setup. Macintosh: a. e. Select the Apple menu...
... print head alignment, click OK. 2 Close all open software applications, then insert the "i850 Setup Software & User's Guide" CD-ROM. screen instructions. Canon is complete, click Finish. 7 Register your computer. All other applications can not detect a printer port, refer to the Troubleshooting chapter in a software application, click Page Setup. Macintosh: a. e. Select the Apple menu...
User Guide
Page 3
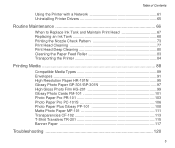
Table of Contents Using the Printer with a Network 61 Uninstalling Printer Drivers 65 Routine Maintenance 66 When to Replace Ink Tank and Maintain Print Head 67 Replacing an Ink Tank ...Printing the Nozzle Check Pattern 73 Print Head Cleaning 77 Print Head Deep Cleaning 80 Cleaning the Paper Feed Roller 83 Transporting the Printer 84 Printing Media 88 Compatible Media Types 89 Envelopes ...91 High Resolution Paper HR-101N 95 Glossy Photo Paper GP-301/GP... 108 Matte Photo Paper MP-101 111 Transparencies CF-102 113 T-Shirt Transfers TR-201 115 Banner Paper 117 Troubleshooting 120 3
Table of Contents Using the Printer with a Network 61 Uninstalling Printer Drivers 65 Routine Maintenance 66 When to Replace Ink Tank and Maintain Print Head 67 Replacing an Ink Tank ...Printing the Nozzle Check Pattern 73 Print Head Cleaning 77 Print Head Deep Cleaning 80 Cleaning the Paper Feed Roller 83 Transporting the Printer 84 Printing Media 88 Compatible Media Types 89 Envelopes ...91 High Resolution Paper HR-101N 95 Glossy Photo Paper GP-301/GP... 108 Matte Photo Paper MP-101 111 Transparencies CF-102 113 T-Shirt Transfers TR-201 115 Banner Paper 117 Troubleshooting 120 3

User Guide
Page 120
Troubleshooting • Cannot Install the Printer Driver • Print Quality is Poor or Contains Errors • Printer Does Not Start or Stops During Print Jobs • Paper Does Not Feed Properly or Paper Jams • The POWER Lamp Flashes Orange • An Error Message is Displayed on the Screen • Problems Unique to Windows Windows • Problems Unique to the Macintosh Macintosh Troubleshooting 120
Troubleshooting • Cannot Install the Printer Driver • Print Quality is Poor or Contains Errors • Printer Does Not Start or Stops During Print Jobs • Paper Does Not Feed Properly or Paper Jams • The POWER Lamp Flashes Orange • An Error Message is Displayed on the Screen • Problems Unique to Windows Windows • Problems Unique to the Macintosh Macintosh Troubleshooting 120
User Guide
Page 121
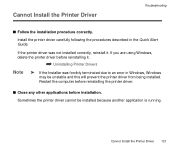
... installed. If you are using Windows, delete the printer driver before reinstalling the printer driver. Restart the computer before reinstalling it . Cannot Install the Printer Driver Troubleshooting s Follow the installation procedure correctly. Cannot Install the Printer Driver 121 s Close any other applications before installation. Install the printer driver carefully following the procedures described in Windows, Windows...
... installed. If you are using Windows, delete the printer driver before reinstalling the printer driver. Restart the computer before reinstalling it . Cannot Install the Printer Driver Troubleshooting s Follow the installation procedure correctly. Cannot Install the Printer Driver 121 s Close any other applications before installation. Install the printer driver carefully following the procedures described in Windows, Windows...
User Guide
Page 122
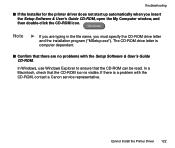
...ROM can be read. If there is computer dependent. Troubleshooting s If the Installer for the printer driver does not start up automatically when you must specify the CD-ROM drive letter and the installation program ("MSetup.exe"). Cannot Install the Printer Driver 122 In Windows, use Windows Explorer to ensure...My Computer window, and then double-click the CD-ROM icon. Windows Note ® If you are no problems with the CD-ROM, contact a Canon service representative. The CD-ROM drive letter is a problem with the Setup Software & User's Guide CD-ROM. In a Macintosh, check that the ...
...ROM can be read. If there is computer dependent. Troubleshooting s If the Installer for the printer driver does not start up automatically when you must specify the CD-ROM drive letter and the installation program ("MSetup.exe"). Cannot Install the Printer Driver 122 In Windows, use Windows Explorer to ensure...My Computer window, and then double-click the CD-ROM icon. Windows Note ® If you are no problems with the CD-ROM, contact a Canon service representative. The CD-ROM drive letter is a problem with the Setup Software & User's Guide CD-ROM. In a Macintosh, check that the ...
User Guide
Page 124
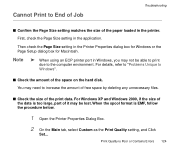
First, check the Page Size setting in the Printer Properties dialog box for Windows or the Page Setup dialog box for Macintosh. s Check the amount of ... Quality is EMF, follow the procedure below. 1 Open the Printer Properties Dialog Box. 2 On the Main tab, select Custom as the Print Quality setting, and Click Set... Cannot Print to End of Job Troubleshooting s Confirm the Page Size setting matches the size ...the data is too large, part of it may need to Windows". Note ® When using an ECP printer port in the printer. When the spool format is Poor or Contains Errors 124
First, check the Page Size setting in the Printer Properties dialog box for Windows or the Page Setup dialog box for Macintosh. s Check the amount of ... Quality is EMF, follow the procedure below. 1 Open the Printer Properties Dialog Box. 2 On the Main tab, select Custom as the Print Quality setting, and Click Set... Cannot Print to End of Job Troubleshooting s Confirm the Page Size setting matches the size ...the data is too large, part of it may need to Windows". Note ® When using an ECP printer port in the printer. When the spool format is Poor or Contains Errors 124
User Guide
Page 126
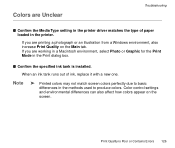
If you are Unclear Troubleshooting s Confirm the Media Type setting in the printer driver matches the type of ink, replace it with a new one. Note ® Printed colors may not match screen colors perfectly due to produce colors. When an ink tank runs out of paper loaded in the printer. Colors are...
If you are Unclear Troubleshooting s Confirm the Media Type setting in the printer driver matches the type of ink, replace it with a new one. Note ® Printed colors may not match screen colors perfectly due to produce colors. When an ink tank runs out of paper loaded in the printer. Colors are...

User Guide
Page 128
Windows 1 Open the Printer Properties dialog box. 2 Click the Maintenance tab. 3 Click Print Head Alignment. Print Quality is Poor or Contains Errors 128 Straight Lines are Misaligned Troubleshooting s Align the print head. Follow the instructions on the screen. Ensure you align the print head every time you install a new print head.
Windows 1 Open the Printer Properties dialog box. 2 Click the Maintenance tab. 3 Click Print Head Alignment. Print Quality is Poor or Contains Errors 128 Straight Lines are Misaligned Troubleshooting s Align the print head. Follow the instructions on the screen. Ensure you align the print head every time you install a new print head.
User Guide
Page 130
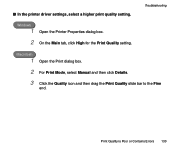
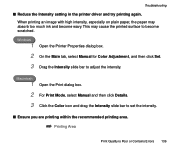
Print Quality is Poor or Contains Errors 130 Troubleshooting Macintosh 1 Open the Print dialog box. 2 For Print Mode, select Manual and then click Details. 3 Click the Quality icon and then drag the Print Quality slide bar to the Fine end. Windows 1 Open the Printer Properties dialog box. 2 On the Main tab, click High for the Print Quality setting. s In the printer driver settings, select a higher print quality setting.
Print Quality is Poor or Contains Errors 130 Troubleshooting Macintosh 1 Open the Print dialog box. 2 For Print Mode, select Manual and then click Details. 3 Click the Quality icon and then drag the Print Quality slide bar to the Fine end. Windows 1 Open the Printer Properties dialog box. 2 On the Main tab, click High for the Print Quality setting. s In the printer driver settings, select a higher print quality setting.
User Guide
Page 131
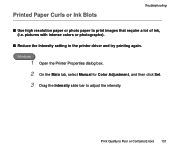
Print Quality is Poor or Contains Errors 131 s Reduce the Intensity setting in the printer driver and try printing again. Windows 1 Open the Printer Properties dialog box. 2 On the Main tab, select Manual for Color Adjustment, and then click Set. 3 Drag the Intensity slide bar to print images that require a lot of ink, (i.e. pictures with intense colors or photographs). Printed Paper Curls or Ink Blots Troubleshooting s Use high resolution paper or photo paper to adjust the intensity.
Print Quality is Poor or Contains Errors 131 s Reduce the Intensity setting in the printer driver and try printing again. Windows 1 Open the Printer Properties dialog box. 2 On the Main tab, select Manual for Color Adjustment, and then click Set. 3 Drag the Intensity slide bar to print images that require a lot of ink, (i.e. pictures with intense colors or photographs). Printed Paper Curls or Ink Blots Troubleshooting s Use high resolution paper or photo paper to adjust the intensity.
User Guide
Page 133
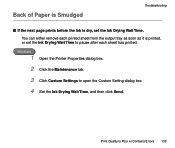
You can either remove each sheet has printed. Windows 1 Open the Printer Properties dialog box. 2 Click the Maintenance tab. 3 Click Custom Settings to pause after each printed sheet from the output tray as soon as it is Poor or Contains Errors 133 Print Quality is printed, or set the Ink Drying Wait Time. Back of Paper is Smudged Troubleshooting s If the next page prints before the ink is dry, set the Ink Drying Wait Time to open the Custom Setting dialog box. 4 Set the Ink Drying Wait Time, and then click Send.
You can either remove each sheet has printed. Windows 1 Open the Printer Properties dialog box. 2 Click the Maintenance tab. 3 Click Custom Settings to pause after each printed sheet from the output tray as soon as it is Poor or Contains Errors 133 Print Quality is printed, or set the Ink Drying Wait Time. Back of Paper is Smudged Troubleshooting s If the next page prints before the ink is dry, set the Ink Drying Wait Time to open the Custom Setting dialog box. 4 Set the Ink Drying Wait Time, and then click Send.
User Guide
Page 134
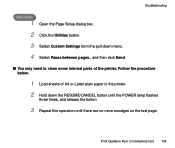
Print Quality is Poor or Contains Errors 134 Follow the procedure below. 1 Load sheets of the printer. Troubleshooting Macintosh 1 Open the Page Setup dialog box. 2 Click the Utilities button. 3 Select Custom Settings form the pull-down the RESUME/CANCEL button until the POWER lamp flashes three times, and release the button. 3 Repeat this operation until there are no more smudges on the test page. s You may need to clean some internal parts of A4 or Letter plain paper in the printer. 2 Hold down menu. 4 Select Pause between pages., and then click Send.
Print Quality is Poor or Contains Errors 134 Follow the procedure below. 1 Load sheets of the printer. Troubleshooting Macintosh 1 Open the Page Setup dialog box. 2 Click the Utilities button. 3 Select Custom Settings form the pull-down the RESUME/CANCEL button until the POWER lamp flashes three times, and release the button. 3 Repeat this operation until there are no more smudges on the test page. s You may need to clean some internal parts of A4 or Letter plain paper in the printer. 2 Hold down menu. 4 Select Pause between pages., and then click Send.
User Guide
Page 136
Windows 1 Open the Printer Properties dialog box. 2 On the Main tab, select Manual for Color Adjustment, and then click Set. 3 Drag the Intensity slide bar to set the intensity. s ... the Color icon and drag the Intensity slide bar to adjust the intensity. This may absorb too much ink and become scratched. Troubleshooting s Reduce the Intensity setting in the printer driver and try printing again. When printing an image with high intensity, especially on plain paper, the paper may cause the printed...
Windows 1 Open the Printer Properties dialog box. 2 On the Main tab, select Manual for Color Adjustment, and then click Set. 3 Drag the Intensity slide bar to set the intensity. s ... the Color icon and drag the Intensity slide bar to adjust the intensity. This may absorb too much ink and become scratched. Troubleshooting s Reduce the Intensity setting in the printer driver and try printing again. When printing an image with high intensity, especially on plain paper, the paper may cause the printed...
User Guide
Page 138
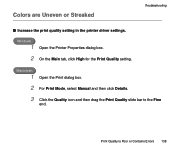
Print Quality is Poor or Contains Errors 138 Macintosh 1 Open the Print dialog box. 2 For Print Mode, select Manual and then click Details. 3 Click the Quality icon and then drag the Print Quality slide bar to the Fine end. Windows 1 Open the Printer Properties dialog box. 2 On the Main tab, click High for the Print Quality setting. Colors are Uneven or Streaked Troubleshooting s Increase the print quality setting in the printer driver settings.
Print Quality is Poor or Contains Errors 138 Macintosh 1 Open the Print dialog box. 2 For Print Mode, select Manual and then click Details. 3 Click the Quality icon and then drag the Print Quality slide bar to the Fine end. Windows 1 Open the Printer Properties dialog box. 2 On the Main tab, click High for the Print Quality setting. Colors are Uneven or Streaked Troubleshooting s Increase the print quality setting in the printer driver settings.
User Guide
Page 139
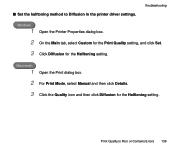
s Set the halftoning method to Diffusion in the printer driver settings. Troubleshooting Windows 1 Open the Printer Properties dialog box. 2 On the Main tab, select Custom for the Print Quality setting, and click Set. 3 Click Diffusion for the Halftoning setting. Print Quality is Poor or Contains Errors 139 Macintosh 1 Open the Print dialog box. 2 For Print Mode, select Manual and then click Details. 3 Click the Quality icon and then click Diffusion for the Halftoning setting.
s Set the halftoning method to Diffusion in the printer driver settings. Troubleshooting Windows 1 Open the Printer Properties dialog box. 2 On the Main tab, select Custom for the Print Quality setting, and click Set. 3 Click Diffusion for the Halftoning setting. Print Quality is Poor or Contains Errors 139 Macintosh 1 Open the Print dialog box. 2 For Print Mode, select Manual and then click Details. 3 Click the Quality icon and then click Diffusion for the Halftoning setting.
User Guide
Page 140
Troubleshooting Printer Does Not Start or Stops During Print Jobs • Printing Does Not Start • Printing Stops Before It is Completed • Printer Moves But Does Not Print • Print Head Holder Does Not Move to the Centre Printer Does Not Start or Stops During Print Jobs 140
Troubleshooting Printer Does Not Start or Stops During Print Jobs • Printing Does Not Start • Printing Stops Before It is Completed • Printer Moves But Does Not Print • Print Head Holder Does Not Move to the Centre Printer Does Not Start or Stops During Print Jobs 140
User Guide
Page 141
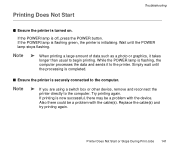
Printing Does Not Start Troubleshooting s Ensure the printer is initialising. Note ® When printing a large amount of data such as a photo or graphics, it to the computer. Note ® If you are using a switch box or other device, remove and reconnect the printer directly to begin printing. If ...the POWER lamp is completed. Try printing again. If the POWER lamp is flashing green, the printer is turned on. Replace the cable(s) and try printing again. Printer Does Not Start or Stops During Print Jobs 141 Also there could be a problem with the cable(s). Simply...
Printing Does Not Start Troubleshooting s Ensure the printer is initialising. Note ® When printing a large amount of data such as a photo or graphics, it to the computer. Note ® If you are using a switch box or other device, remove and reconnect the printer directly to begin printing. If ...the POWER lamp is completed. Try printing again. If the POWER lamp is flashing green, the printer is turned on. Replace the cable(s) and try printing again. Printer Does Not Start or Stops During Print Jobs 141 Also there could be a problem with the cable(s). Simply...
User Guide
Page 142
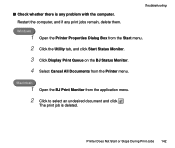
Restart the computer, and if any problem with the computer. Macintosh 1 Open the BJ Print Monitor from the Printer menu. Troubleshooting Windows 1 Open the Printer Properties Dialog Box from the Start menu. 2 Click the Utility tab, and click Start Status Monitor. 3 Click Display Print Queue on the BJ Status Monitor. 4 Select Cancel All Documents from the application menu. 2 Click to select an undesired document and click . The print job is any print jobs remain, delete them. Printer Does Not Start or Stops During Print Jobs 142 s Check whether there is deleted.
Restart the computer, and if any problem with the computer. Macintosh 1 Open the BJ Print Monitor from the Printer menu. Troubleshooting Windows 1 Open the Printer Properties Dialog Box from the Start menu. 2 Click the Utility tab, and click Start Status Monitor. 3 Click Display Print Queue on the BJ Status Monitor. 4 Select Cancel All Documents from the application menu. 2 Click to select an undesired document and click . The print job is any print jobs remain, delete them. Printer Does Not Start or Stops During Print Jobs 142 s Check whether there is deleted.
User Guide
Page 143
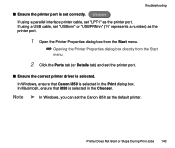
... the Chooser. In Macintosh, ensure that Canon i850 is selected. Troubleshooting s Ensure the printer port is set the Canon i850 as the printer port. Windows If using a USB cable, set "USBnnn" or "USBPRNnn" ("n" represents a number) as the printer port. 1 Open the Printer Properties dialog box from the Start menu. ¬ Opening the Printer Properties dialog box directly from the Start...
... the Chooser. In Macintosh, ensure that Canon i850 is selected. Troubleshooting s Ensure the printer port is set the Canon i850 as the printer port. Windows If using a USB cable, set "USBnnn" or "USBPRNnn" ("n" represents a number) as the printer port. 1 Open the Printer Properties dialog box from the Start menu. ¬ Opening the Printer Properties dialog box directly from the Start...


