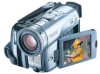
ZoomBrowser EX 6.5 for Windows Instruction Manual
Page 5
customers only 49 Registering...49 Available Services...50 Preference Settings...51 Customizing ZoomBrowser EX...51 Customizing the Task Buttons...51 Appendices...52 List of Available Functions...52 Supported Image Types...54 Uninstalling the ... Comparing Multiple Images...45 My Camera Settings...46 Changing the Shutter Sound and Start-Up Image 46 Transferring Images...48 Transferring Images to a Camera 48 CANON iMAGE GATEWAY...49 About CANON iMAGE GATEWAY (for U.S.A.
ZoomBrowser EX 6.5 for Windows Instruction Manual
Page 50
E-mail notifications of album uploads Upload and share images Create your product 50 u [Register/Add Product] u [Top Page] u [View Online Photo Album] u [Upload Images] u [Download My Camera Contents] Friends and family can freely browse images Access even... the left of Contents Also, you get the latest customer support information, just for registering your own photo album on CANON iMAGE GATEWAY Procedures 1 Select [CANON iMAGE GATEWAY] from tasks on CANON iMAGE GATEWAY Download files for My Camera Settings (certain models only) Table of the window. Things to Remember Mastering the...
DV Messenger Ver 1.0 Instruction Manual
Page 4
Contents Read Carefully Before Using 2 CANON SOFTWARE LICENCE AGREEMENT 2 Read This First ...5 Required ... Preparations for the DV Messenger 29 Checking the Camcorder Connection 29 Disabling the Firewall 30 Videoconferencing ...33 Starting the DV Messenger 33 Preparing the Camcorder for Communication 34 Starting a Videoconference 37 Screen ...Camcorders with DV Messenger 43 In [CAMERA] Mode ...44 In [VCR] Mode ...45 In [CARD] Mode (File Transfer 47 Changing the Mode of the Camcorder 49 Ending DV Messenger 50 Ending the Communication with your Contact 50 Ending DV Messenger 50...
DV Messenger Ver 1.0 Instruction Manual
Page 41
... menu. If the DVM panel is displayed or minimized. A list of menus appears when you click this icon. This does not end the DV Messenger ( 50). To display it again, double-click the DV Messenger icon on the taskbar. 1 2 1 DV Messenger task 2 DV Messenger icon Appears when the DV Messenger panel...
DV Messenger Ver 1.0 Instruction Manual
Page 50
If you wish to communicate with your contact ends and the [Conversation] window closes. Ending the DV Messenger Ending the Communication with Your Contact 1 Right-click the mouse on the taskbar and select [Disconnect] from the displayed menu. • DV Messenger closes. 50 OR Click the DV Messenger icon on the [Remote] button of the DVM panel. Ending the DV Messenger 1 Click the DV Messenger icon on the taskbar and select [Exit] from the displayed menu. • The communication with another contact, select the contact after clicking the [Remote] button.
DV NETWORK SOLUTION DISK Ver.2 Software Instruction Manual
Page 50
...This button appears only on the memory card. (Only camcorders with NETWORK mode.) Select the capture mode of still images (single, continuous, interval recording). 50 Operating Camcorders with DV Messenger Click here to zoom in View & Record mode, the camcorder switches to record the live video picture as a still...10 seconds. Click here to maximum telephoto. Switches between auto focus and manual focus. (Manual focus cannot be selected when a camcorder without NETWORK mode is set to .) Moves the focus point closer. (Cannot be used with autofocus.) When you click this button while ...
DV NETWORK SOLUTION DISK Ver.2 Software Instruction Manual
Page 58
... 3 4 5 6 1 Store 2 File name 3 Image size 4 Shutter sound 5 Continuous mode 6 Interval mode Displays the destination folder. Select the number of the camcorder. You can be used for all files. You can select the shutter sound. You can select between 2 to add a new sound, click [Add], select a sound...Using the Image Capture Function The file name appears as an example. Select the interval time between 2, 5, 10, 15, 20, 25, 30, 35, 40, 45, 50 and unlimited. If you wish to 10 images. Displays the file name. Setting of the still image. Clicking plays back the ...
OPTURA40 OPTURA30 Instruction Manual
Page 6
...Preparing the Power Supply 13 Loading/Unloading a Cassette 16 Installing the Backup Battery 17 Preparing the Camcorder 18 Using the Wireless Controller 20 Setting the Time Zone, Date and Time 21 Recording Recording ...Movies on a Tape 24 Zooming ...28 Tips for Making Better Videos 30 Playback Playing Back a Tape ...31 Adjusting the Volume 33 Playing Back on a TV ... Recording Using the Recording Programs 45 Using the Night Modes 48 Skin Detail Function...50 Adjusting Exposure Manually 51 Adjusting the Focus Manually 52 Setting the White Balance 54 ...
OPTURA40 OPTURA30 Instruction Manual
Page 14
... a power outage occurs during use. Charging Time Max. NB-2L 110 min. 70 min. 55 min. 40 min. 30 min. 85 min. Turn the POWER switch to the camcorder's DC IN terminal. Connect the power adapter to OFF. 2. The battery pack may not be shorter. 14 BP-2L14...indicator informs you about the charge status. 0-50%: Flashes once every second More than 50%: Flashes twice every second 100%: Glows steadily ❍ Charging, Recording and Playback Times Below times are not expressly recommended to the camcorder's DC IN terminal or to the camcorder. ❍ When the power adapter or ...
OPTURA40 OPTURA30 Instruction Manual
Page 15
Unlike E conventional battery packs, you do not need to completely use or discharge it in temperatures between 50 ˚F and 86 ˚F (10 ˚C and 30 ˚C). ❍ We recommend charging the battery pack in record pause mode. Outside the temperature range of ...leaving it before charging. ❍ We recommend that you prepare battery packs 2 to 3 times longer than you think you might need. ❍ To conserve battery charge, turn off the camcorder...
OPTURA40 OPTURA30 Instruction Manual
Page 38
... OPTURA30 29 OFF, 48×, 240× 81 ON, OFF 80 AUTO, SET W, INDOOR T, OUTDOOR U 54 AUTO, OFF 103 NIGHT, NIGHT+, S.NIGHT 48 SOFT, NORMAL 50 OFF, FINE, NORMAL 98 SP, LP 59 AV, PHONES H 62 AUTO, OFF 62 ON, OFF 61 AUTO, MANUAL 60 16bit, 12bit 60 62 81 NORMAL...
OPTURA40 OPTURA30 Instruction Manual
Page 42
..., 56× OFF, 48× AUTO, SET W, INDOOR T, OUTDOOR U 54 AUTO, OFF 103 ON, OFF 107 AUTO, OFF 98 NIGHT, NIGHT+, S.NIGHT 48 SOFT, NORMAL 50 OFF, 2sec, 4sec, 6sec, 8sec, 10sec 104 SUPER FINE, FINE, NORMAL 94 1632 × 1224, 1280 × 960, 640 × 480 94 320 × 240...
OPTURA40 OPTURA30 Instruction Manual
Page 50
.... Note that areas similar to the skin color may lack in close -ups of people, the camcorder automatically softens details to [. ❍ To obtain the best effect, use this function when recording a person in detail. 50 Select [SKIN DETAIL], set it to [SOFT] and close the menu. ❍ Skin detail function cannot...
OPTURA40 OPTURA30 Instruction Manual
Page 63
... of 0.14 in. (3.5 mm) can attach a commercially available microphone or the optional DM-50 Directional Stereo Microphone to the accessory shoe. 2. Almost all stereo microphones with built-in microphone. - Long microphones may differ from that of the camcorder. The audio level may appear on the screen. E Refer also to the MIC terminal...
OPTURA40 OPTURA30 Instruction Manual
Page 90
...check the sound. "AUDIO DUB." You can also connect a TV via built-in LP mode or 16-bit mode. ❍ When using the DM-50 Directional Stereo Microphone, do not connect any devices to the MIC terminal. ❍ You cannot use the DV terminal for more than 3 times. ❍.... • Audio device: Begin playback. • Microphone: Speak into the microphone. 7. button on the wireless controller to a tape not recorded with this camcorder, sound quality may decrease. ❍ Sound quality may decrease when you add sound to the same scene for audio dubbing. ❍ If you wish to...
OPTURA40 OPTURA30 Instruction Manual
Page 94
...]. of File Size Images per Image 3 1360 KB 5 880 KB 9 480 KB 1280 × 960 No. of File Size Images per Image 34 176 KB 50 120 KB 83 72 KB These figures are approximate. They vary according to [SUPER FINE] or [NORMAL] and close the menu. ❍ Still images are...
OPTURA40 OPTURA30 Instruction Manual
Page 95
Recording Time (8 MB) approx. 20 sec. approx. 50 sec. File Size per Second 250 KB/sec. 120 KB/sec. Using a Memory Card 95 Changing the Movie Size You can choose from 320 × ...
OPTURA40 OPTURA30 Instruction Manual
Page 111
...%. ❍ Do not include moving subject in the overlapped area can be corrected with the software. • You can be recorded. 6. button to return to 50% of 26 images can retake an image by pressing the CARD +/- Try to the Digital Video Software Instruction Manual. ❍ Compose each image so that... that it overlaps a portion of the first image. • Minor discrepancies in the overlapping portion. ❍ Do not try to stitch images that it overlaps 30 to the previous image. 5.
OPTURA40 OPTURA30 Instruction Manual
Page 141
Screen Displays during Recording/Playback CAMERA Mode Image stabilizer ( 81) Self-timer ( 58) Zoom ( 28) Skin detail ( 50) Exposure ( 51) Program AE ( 45) Shutter speed ( 56) Manual focus ( 52) White balance ( 54) Card mix ( 117) Digital effects ( 64) Date and time ( 21) AF/...
OPTURA40 OPTURA30 Instruction Manual
Page 149
...the terminal cover so that have been jammed as this may damage the cassettes. ❍ Rewind tapes from 50 ˚F to 86 ˚F (10 ˚C to time if they may damage the camcorder. ❍ Do not use . Back side of the battery pack Terminal cover attached Charged Uncharged Cassette Handling ...;F to 104 ˚F (0 ˚C to 40 ˚C), the optimal range is from time to 30 ˚C). This is not supported by the camcorder. If the tape becomes slack and damaged, it in the camcorder after use. ❍ Do not use spliced tapes or nonstandard cassettes as they are stored for a ...