

Instruction Manual
Page 1
INSTRUCTION MANUAL E EE The "Software Start Guide" is included at the end of this manual. INSTRUCTION MANUAL
INSTRUCTION MANUAL E EE The "Software Start Guide" is included at the end of this manual. INSTRUCTION MANUAL
Instruction Manual
Page 2
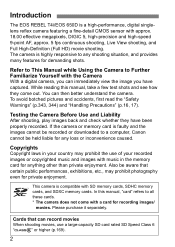
... for anything other than private enjoyment. Refer to This Manual while Using the Camera to a computer, Canon cannot be aware that can then better understand the camera. This camera is a high-performance, digital ...singlelens reflex camera featuring a fine-detail CMOS sensor with approx. 18.00 effective megapixels, DIGIC 5, high-precision and high-speed 9-point AF, approx. 5 fps continuous shooting,... demanding shots. Introduction The EOS REBEL T4i/EOS 650D is compatible with SD memory cards, SDHC memory cards, and SDXC memory cards.
... for anything other than private enjoyment. Refer to This Manual while Using the Camera to a computer, Canon cannot be aware that can then better understand the camera. This camera is a high-performance, digital ...singlelens reflex camera featuring a fine-detail CMOS sensor with approx. 18.00 effective megapixels, DIGIC 5, high-precision and high-speed 9-point AF, approx. 5 fps continuous shooting,... demanding shots. Introduction The EOS REBEL T4i/EOS 650D is compatible with SD memory cards, SDHC memory cards, and SDXC memory cards.
Instruction Manual
Page 3
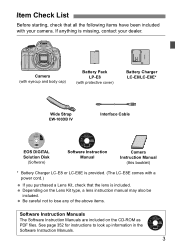
...page 352 for instructions to lose any of the above items. Software Instruction Manuals The Software Instruction Manuals are included on the Lens Kit type, a lens instruction manual may also be included. Camera (with eyecup and body cap) Battery Pack LP-E8 (with protective cover) Battery ...Charger LC-E8/LC-E8E* Wide Strap EW-100DB IV Interface Cable EOS DIGITAL Solution Disk (Software) Software Instruction Manual Camera Instruction Manual (this booklet...
...page 352 for instructions to lose any of the above items. Software Instruction Manuals The Software Instruction Manuals are included on the Lens Kit type, a lens instruction manual may also be included. Camera (with eyecup and body cap) Battery Pack LP-E8 (with protective cover) Battery ...Charger LC-E8/LC-E8E* Wide Strap EW-100DB IV Interface Cable EOS DIGITAL Solution Disk (Software) Software Instruction Manual Camera Instruction Manual (this booklet...
Instruction Manual
Page 4
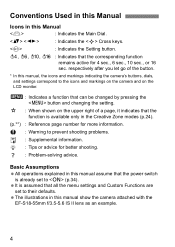
...., 10 sec., or 16 sec. Conventions Used in this Manual Icons in this manual show the camera attached with the EF-S18-55mm f/3.5-5.6 IS II lens as an example. 4 respectively after you let go of a page, it indicates that the function is already set to the icons and markings on the...
...., 10 sec., or 16 sec. Conventions Used in this Manual Icons in this manual show the camera attached with the EF-S18-55mm f/3.5-5.6 IS II lens as an example. 4 respectively after you let go of a page, it indicates that the function is already set to the icons and markings on the...
Instruction Manual
Page 5
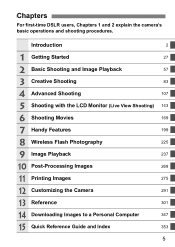
Chapters For first-time DSLR users, Chapters 1 and 2 explain the camera's basic operations and shooting procedures. Introduction 2 1 Getting Started 27 2 Basic Shooting and Image Playback 57 3 Creative Shooting 83 4 Advanced Shooting 107 5 Shooting with the LCD Monitor (Live View Shooting) 143 6 Shooting Movies 169 7 Handy Features 199 8 Wireless Flash Photography 225 9 Image Playback 237 10 Post-Processing Images 269 11 Printing Images 275 12 Customizing the Camera 291 13 Reference 301 14 Downloading Images to a Personal Computer 347 15 Quick Reference Guide ...
Chapters For first-time DSLR users, Chapters 1 and 2 explain the camera's basic operations and shooting procedures. Introduction 2 1 Getting Started 27 2 Basic Shooting and Image Playback 57 3 Creative Shooting 83 4 Advanced Shooting 107 5 Shooting with the LCD Monitor (Live View Shooting) 143 6 Shooting Movies 169 7 Handy Features 199 8 Wireless Flash Photography 225 9 Image Playback 237 10 Post-Processing Images 269 11 Printing Images 275 12 Customizing the Camera 291 13 Reference 301 14 Downloading Images to a Personal Computer 347 15 Quick Reference Guide ...

Instruction Manual
Page 6
Contents at a Glance Shooting Shoot automatically Î p.57 - 74 (Basic Zone modes) Shoot continuously Î p.101 (i Continuous shooting) Take a picture of yourself in a group Î p.103 (j Self-timer) Freeze the action Blur the action Î p.108 (s Shutter-priority AE) Blur the background Î p.64 (C Creative Auto) Keep the background in sharp focus Î p.110 (f Aperture-priority AE) Adjust the image brightness (exposure) Î p.117 (Exposure compensation) Shoot in low light Î p.58, 104 (D Flash photography) Î p.90 (ISO speed setting) Shoot without ...
Contents at a Glance Shooting Shoot automatically Î p.57 - 74 (Basic Zone modes) Shoot continuously Î p.101 (i Continuous shooting) Take a picture of yourself in a group Î p.103 (j Self-timer) Freeze the action Blur the action Î p.108 (s Shutter-priority AE) Blur the background Î p.64 (C Creative Auto) Keep the background in sharp focus Î p.110 (f Aperture-priority AE) Adjust the image brightness (exposure) Î p.117 (Exposure compensation) Shoot in low light Î p.58, 104 (D Flash photography) Î p.90 (ISO speed setting) Shoot without ...

Instruction Manual
Page 7
Take many pictures Î p.86 (7a, 8a, b, c) Focusing Change the point of focus Shoot a moving subject Î p.97 (S AF point selection) Î p.70, 96 (AI Servo AF) Playback View the images on the camera Î p.82 (x Playback) Search for pictures quickly Rate images Î p.238 (H Index display) Î p.239 (I Image browsing) Î p.244 (Ratings) Prevent important images from accidental deletion Î p.262 (K Image protect) Delete unnecessary images Î p.264 (L Delete) Auto play images and movies Î p.254 (Slide show) View the images or movies on a TV set Î...
Take many pictures Î p.86 (7a, 8a, b, c) Focusing Change the point of focus Shoot a moving subject Î p.97 (S AF point selection) Î p.70, 96 (AI Servo AF) Playback View the images on the camera Î p.82 (x Playback) Search for pictures quickly Rate images Î p.238 (H Index display) Î p.239 (I Image browsing) Î p.244 (Ratings) Prevent important images from accidental deletion Î p.262 (K Image protect) Delete unnecessary images Î p.264 (L Delete) Auto play images and movies Î p.254 (Slide show) View the images or movies on a TV set Î...

Instruction Manual
Page 8
...p.35 Î p.302 Î p.34 Card Installing/Removing Format Î p.31 Î p.48 Release shutter without card Î p.200 Lens Attaching/Detaching Zoom Image Stabilizer Î p.39 Î p.40 Î p.41 Basic Settings Dioptric adjustment Language Date/Time/Zone Beeper Î...93 White balance Î p.135 Color space Î p.139 Image enhancement features • Auto Lighting Optimizer Î p.123 • Lens peripheral illumination correction Î p.127 • Chromatic aberration correction Î p.128 • Noise reduction for long exposures Î p....
...p.35 Î p.302 Î p.34 Card Installing/Removing Format Î p.31 Î p.48 Release shutter without card Î p.200 Lens Attaching/Detaching Zoom Image Stabilizer Î p.39 Î p.40 Î p.41 Basic Settings Dioptric adjustment Language Date/Time/Zone Beeper Î...93 White balance Î p.135 Color space Î p.139 Image enhancement features • Auto Lighting Optimizer Î p.123 • Lens peripheral illumination correction Î p.127 • Chromatic aberration correction Î p.128 • Noise reduction for long exposures Î p....
Instruction Manual
Page 9
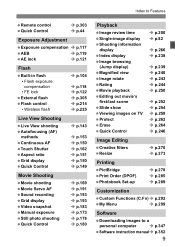
Index to Features Remote control Quick Control Î p.303 Î p.44 Exposure Adjustment Exposure compensation Î p.117 AEB Î p.119 AE lock Î p.121 Flash Built-in flash • Flash exposure compensation • FE lock External flash Flash control • Wireless flash Î p.104 Î p.118 Î p.122 Î p.305 Î p.214 Î p.225 Live View Shooting Live View shooting Autofocusing (AF) methods Continuous AF Touch Shutter Aspect ratio Grid display Quick Control Î p.143 Î p.153 Î p.150 Î p.162 Î p.151 Î p.150 Î p....
Index to Features Remote control Quick Control Î p.303 Î p.44 Exposure Adjustment Exposure compensation Î p.117 AEB Î p.119 AE lock Î p.121 Flash Built-in flash • Flash exposure compensation • FE lock External flash Flash control • Wireless flash Î p.104 Î p.118 Î p.122 Î p.305 Î p.214 Î p.225 Live View Shooting Live View shooting Autofocusing (AF) methods Continuous AF Touch Shutter Aspect ratio Grid display Quick Control Î p.143 Î p.153 Î p.150 Î p.162 Î p.151 Î p.150 Î p....
Instruction Manual
Page 10
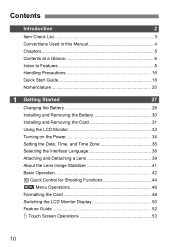
... 3 Conventions Used in this Manual 4 Chapters 5 Contents at a Glance 6 Index to Features 8 Handling Precautions 16 Quick Start Guide 18 Nomenclature 20 1 Getting Started 27 Charging the Battery 28 Installing and Removing the Battery 30 Installing and Removing the Card 31 Using the ... on the Power 34 Setting the Date, Time, and Time Zone 36 Selecting the Interface Language 38 Attaching and Detaching a Lens 39 About the Lens Image Stabilizer 41 Basic Operation 42 Q Quick Control for Shooting Functions 44 3 Menu Operations 46 Formatting the Card 48 Switching...
... 3 Conventions Used in this Manual 4 Chapters 5 Contents at a Glance 6 Index to Features 8 Handling Precautions 16 Quick Start Guide 18 Nomenclature 20 1 Getting Started 27 Charging the Battery 28 Installing and Removing the Battery 30 Installing and Removing the Card 31 Using the ... on the Power 34 Setting the Date, Time, and Time Zone 36 Selecting the Interface Language 38 Attaching and Detaching a Lens 39 About the Lens Image Stabilizer 41 Basic Operation 42 Q Quick Control for Shooting Functions 44 3 Menu Operations 46 Formatting the Card 48 Switching...
Instruction Manual
Page 11
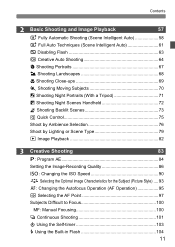
Contents 2 Basic Shooting and Image Playback 57 A Fully Automatic Shooting (Scene Intelligent Auto 58 A Full Auto Techniques (Scene Intelligent Auto 61 7 Disabling Flash 63 C Creative Auto Shooting 64 2 Shooting Portraits 67 3 Shooting Landscapes 68 4 Shooting Close-ups 69 5 Shooting Moving Subjects 70 6 Shooting Night Portraits (With a Tripod 71 F Shooting Night Scenes Handheld 72 G Shooting Backlit Scenes 73 Q Quick Control 75 Shoot by Ambience Selection 76 Shoot by Lighting or Scene Type 79 x Image Playback 82 3 Creative Shooting 83 d: Program AE 84 ...
Contents 2 Basic Shooting and Image Playback 57 A Fully Automatic Shooting (Scene Intelligent Auto 58 A Full Auto Techniques (Scene Intelligent Auto 61 7 Disabling Flash 63 C Creative Auto Shooting 64 2 Shooting Portraits 67 3 Shooting Landscapes 68 4 Shooting Close-ups 69 5 Shooting Moving Subjects 70 6 Shooting Night Portraits (With a Tripod 71 F Shooting Night Scenes Handheld 72 G Shooting Backlit Scenes 73 Q Quick Control 75 Shoot by Ambience Selection 76 Shoot by Lighting or Scene Type 79 x Image Playback 82 3 Creative Shooting 83 d: Program AE 84 ...
Instruction Manual
Page 12
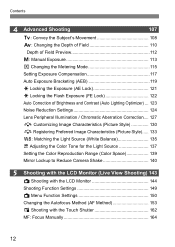
... Exposure (AE Lock 121 A Locking the Flash Exposure (FE Lock 122 Auto Correction of Brightness and Contrast (Auto Lighting Optimizer) ... 123 Noise Reduction Settings 124 Lens Peripheral Illumination / Chromatic Aberration Correction.... 127 A Customizing Image Characteristics (Picture Style 130 A Registering Preferred Image Characteristics (Picture Style)..... 133 B: Matching the Light Source (White Balance...
... Exposure (AE Lock 121 A Locking the Flash Exposure (FE Lock 122 Auto Correction of Brightness and Contrast (Auto Lighting Optimizer) ... 123 Noise Reduction Settings 124 Lens Peripheral Illumination / Chromatic Aberration Correction.... 127 A Customizing Image Characteristics (Picture Style 130 A Registering Preferred Image Characteristics (Picture Style)..... 133 B: Matching the Light Source (White Balance...
Instruction Manual
Page 13
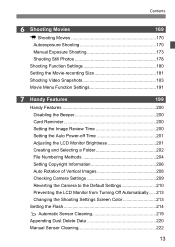
Contents 6 Shooting Movies 169 k Shooting Movies 170 Autoexposure Shooting 170 Manual Exposure Shooting 173 Shooting Still Photos 178 Shooting Function Settings 180 Setting the Movie-recording Size 181 Shooting Video Snapshots 183 Movie Menu Function Settings 191 7 Handy Features 199 Handy Features 200 Disabling the Beeper 200 Card Reminder 200 Setting the Image Review Time 200 Setting the Auto Power-off Time 201 Adjusting the LCD Monitor Brightness 201 Creating and Selecting a Folder 202 File Numbering Methods 204 Setting Copyright Information 206 Auto ...
Contents 6 Shooting Movies 169 k Shooting Movies 170 Autoexposure Shooting 170 Manual Exposure Shooting 173 Shooting Still Photos 178 Shooting Function Settings 180 Setting the Movie-recording Size 181 Shooting Video Snapshots 183 Movie Menu Function Settings 191 7 Handy Features 199 Handy Features 200 Disabling the Beeper 200 Card Reminder 200 Setting the Image Review Time 200 Setting the Auto Power-off Time 201 Adjusting the LCD Monitor Brightness 201 Creating and Selecting a Folder 202 File Numbering Methods 204 Setting Copyright Information 206 Auto ...

Instruction Manual
Page 14
Contents 8 Wireless Flash Photography 225 Using Wireless Flash 226 Easy Wireless Flash Shooting 227 Custom Wireless Flash Shooting 230 Other Settings 234 9 Image Playback 237 H I Searching for Images Quickly 238 u/y Magnified View 240 d Playing Back with the Touch Screen 241 b Rotating the Image 243 Setting Ratings 244 Q Quick Control During Playback 246 k Enjoying Movies 248 k Playing Movies 250 X Editing a Movie's First and Last Scenes 252 Slide Show (Auto Playback 254 Viewing the Images on TV 258 K Protecting Images 262 L Erasing Images 264 B: Shooting...
Contents 8 Wireless Flash Photography 225 Using Wireless Flash 226 Easy Wireless Flash Shooting 227 Custom Wireless Flash Shooting 230 Other Settings 234 9 Image Playback 237 H I Searching for Images Quickly 238 u/y Magnified View 240 d Playing Back with the Touch Screen 241 b Rotating the Image 243 Setting Ratings 244 Q Quick Control During Playback 246 k Enjoying Movies 248 k Playing Movies 250 X Editing a Movie's First and Last Scenes 252 Slide Show (Auto Playback 254 Viewing the Images on TV 258 K Protecting Images 262 L Erasing Images 264 B: Shooting...

Instruction Manual
Page 15
... Availability Table According to Shooting Mode 310 System Map 312 Menu Settings 314 Troubleshooting Guide 320 Error Codes 331 Specifications 332 Handling precautions: EF-S18-135mm f/3.5-5.6 IS STM 340 Safety Warnings 343 14 Downloading Images to a Personal Computer 347 Downloading Images to a Personal Computer 348 About the Software 350 Installing the Software...
... Availability Table According to Shooting Mode 310 System Map 312 Menu Settings 314 Troubleshooting Guide 320 Error Codes 331 Specifications 332 Handling precautions: EF-S18-135mm f/3.5-5.6 IS STM 340 Safety Warnings 343 14 Downloading Images to a Personal Computer 347 Downloading Images to a Personal Computer 348 About the Software 350 Installing the Software...
Instruction Manual
Page 16
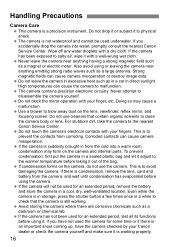
...a warm room, condensation may cause a malfunction. This is working . If condensation forms on the lens, viewfinder, reflex mirror, and focusing screen. If you have the camera checked by your Canon dealer or check the camera yourself and make sure it to physical shock. High temperatures can cause ...it with a dry cloth. If the camera is condensation, remove the lens, card and battery from the cold into water, promptly consult the nearest Canon Service Center. If there is suddenly brought in a while to the nearest Canon Service Center. Do not leave the camera in a cool, dry, ...
...a warm room, condensation may cause a malfunction. This is working . If condensation forms on the lens, viewfinder, reflex mirror, and focusing screen. If you have the camera checked by your Canon dealer or check the camera yourself and make sure it to physical shock. High temperatures can cause ...it with a dry cloth. If the camera is condensation, remove the lens, card and battery from the cold into water, promptly consult the nearest Canon Service Center. If there is suddenly brought in a while to the nearest Canon Service Center. Do not leave the camera in a cool, dry, ...
Instruction Manual
Page 17
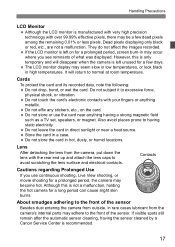
...slow in low temperatures, or look black in direct sunlight or near anything metallic. Lens After detaching the lens from outside, in hot, dusty, or humid locations. Also avoid places prone to avoid scratching the lens surface and electrical contacts. Store the card in may occur where you use the...you see remnants of the sensor Besides dust entering the camera from the camera, put down the lens with the rear end up and attach the lens caps to having the sensor cleaned by a Canon Service Center is not a malfunction, holding the hot camera for a few dead pixels among the ...
...slow in low temperatures, or look black in direct sunlight or near anything metallic. Lens After detaching the lens from outside, in hot, dusty, or humid locations. Also avoid places prone to avoid scratching the lens surface and electrical contacts. Store the card in may occur where you use the...you see remnants of the sensor Besides dust entering the camera from the camera, put down the lens with the rear end up and attach the lens caps to having the sensor cleaned by a Canon Service Center is not a malfunction, holding the hot camera for a few dead pixels among the ...
Instruction Manual
Page 18
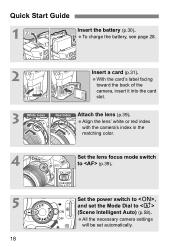
To charge the battery, see page 28. 2 Insert a card (p.31). Align the lens' white or red index with the camera's index in the matching color. 4 Set the lens focus mode switch to (p.39). 5 Set the power switch to (Scene Intelligent Auto) (p.58). All the necessary camera settings will be set the Mode Dial to , and set automatically. 18 Quick Start Guide 1 Insert the battery (p.30). With the card's label facing toward the back of the camera, insert it into the card slot. 3 White index Red index Attach the lens (p.39).
To charge the battery, see page 28. 2 Insert a card (p.31). Align the lens' white or red index with the camera's index in the matching color. 4 Set the lens focus mode switch to (p.39). 5 Set the power switch to (Scene Intelligent Auto) (p.58). All the necessary camera settings will be set the Mode Dial to , and set automatically. 18 Quick Start Guide 1 Insert the battery (p.30). With the card's label facing toward the back of the camera, insert it into the card slot. 3 White index Red index Attach the lens (p.39).
Instruction Manual
Page 19
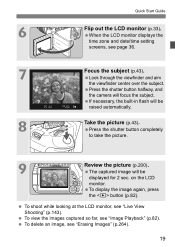
If necessary, the built-in flash will be raised automatically. 8 Take the picture (p.43). To view the images captured so far, see "Live View Shooting" (p.143). To shoot while looking at the LCD monitor, see "Image Playback" (p.82). To delete an image, see page 36. 7 Focus the subject (p.43). The captured image will be displayed for 2 sec. on the LCD monitor. Press the shutter button completely to take the picture. 9 Review the picture (p.200). When the LCD monitor displays the time zone and date/time setting screens, see "Erasing Images" (p.264). 19 ...
If necessary, the built-in flash will be raised automatically. 8 Take the picture (p.43). To view the images captured so far, see "Live View Shooting" (p.143). To shoot while looking at the LCD monitor, see "Image Playback" (p.82). To delete an image, see page 36. 7 Focus the subject (p.43). The captured image will be displayed for 2 sec. on the LCD monitor. Press the shutter button completely to take the picture. 9 Review the picture (p.200). When the LCD monitor displays the time zone and date/time setting screens, see "Erasing Images" (p.264). 19 ...

Instruction Manual
Page 20
... Dial (p.24) Microphone (p.170) Power switch (p.34) Flash-sync contacts ISO speed setting button (p.90) Main Dial Hot shoe (p.305) EF-S Lens mount index (p.39) Shutter button (p.43) Flash button (p.104) Focal plane mark (p.69) Red-eye reduction/ Self-timer lamp (p.105/103) Remote... control sensor (p.140, 303) Grip Mirror (p.140, 222) Contacts (p.17) Lens mount Lens lock pin Strap mount (p.27) Terminal cover Lens release button (p.40) Depth-of-field preview button (p.112) Body cap (p.39) Audio/video OUT/ Digital terminal (p.261, ...
... Dial (p.24) Microphone (p.170) Power switch (p.34) Flash-sync contacts ISO speed setting button (p.90) Main Dial Hot shoe (p.305) EF-S Lens mount index (p.39) Shutter button (p.43) Flash button (p.104) Focal plane mark (p.69) Red-eye reduction/ Self-timer lamp (p.105/103) Remote... control sensor (p.140, 303) Grip Mirror (p.140, 222) Contacts (p.17) Lens mount Lens lock pin Strap mount (p.27) Terminal cover Lens release button (p.40) Depth-of-field preview button (p.112) Body cap (p.39) Audio/video OUT/ Digital terminal (p.261, ...