SELPHY CP800 Printer User Guide
Page 22
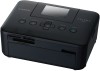
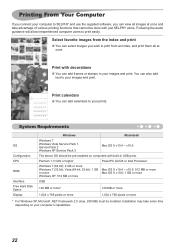
... OS Configuration CPU RAM Interface Free Hard Disk Space Display Windows Macintosh Windows 7 Windows Vista Service Pack 1, Service Pack 2 Windows XP Service Pack 3 Mac OS X v10.4 - Print with decorations You can also add text to your images and print. You can add frames or stamps to your... images and print. Printing From Your Computer If you connect your computer to SELPHY and use the supplied software, you wish to print from an index, and print them all images at once. Following the audio guidance will allow inexperienced computer users...
... OS Configuration CPU RAM Interface Free Hard Disk Space Display Windows Macintosh Windows 7 Windows Vista Service Pack 1, Service Pack 2 Windows XP Service Pack 3 Mac OS X v10.4 - Print with decorations You can also add text to your images and print. You can add frames or stamps to your... images and print. Printing From Your Computer If you connect your computer to SELPHY and use the supplied software, you wish to print from an index, and print them all images at once. Following the audio guidance will allow inexperienced computer users...
SELPHY CP800 Printer User Guide
Page 23
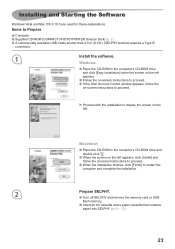
... Supplied CD-ROM (COMPACT PHOTO PRINTER Solution Disk) (p. 2) A commercially available USB Cable shorter than 2.5 m (8.2 ft.) (SELPHY terminal requires a Type B connector). 1 Install the software. Windows Place the CD-ROM in the computer's CD-ROM drive and double-click . When the screen on the left appears, click [Install...] and follow the on-screen instructions to proceed. Proceed with the installation to display the screen on the left . Installing and Starting the Software Windows Vista and Mac OS X 10.5 are used for these explanations.
... Supplied CD-ROM (COMPACT PHOTO PRINTER Solution Disk) (p. 2) A commercially available USB Cable shorter than 2.5 m (8.2 ft.) (SELPHY terminal requires a Type B connector). 1 Install the software. Windows Place the CD-ROM in the computer's CD-ROM drive and double-click . When the screen on the left appears, click [Install...] and follow the on-screen instructions to proceed. Proceed with the installation to display the screen on the left . Installing and Starting the Software Windows Vista and Mac OS X 10.5 are used for these explanations.


