
User Manual
Page 2
... digital apparatus as computers, monitors, printers, fax machines, copiers and scanners. Trademarks and Registered Trademarks ● Microsoft WindowsR and Microsoft Windows NTR are subject to...Canada. The targeted products are uniform among the participating nations. This equipment generates, uses, and can participate voluntarily. r We do not assume any responsibility for any language...Rules. International ENERGY STAR® Office Equipment Program As an ENERGY STAR partner, Canon Electronics Inc. If such changes or modifications should be made to ensure the accuracy...
... digital apparatus as computers, monitors, printers, fax machines, copiers and scanners. Trademarks and Registered Trademarks ● Microsoft WindowsR and Microsoft Windows NTR are subject to...Canada. The targeted products are uniform among the participating nations. This equipment generates, uses, and can participate voluntarily. r We do not assume any responsibility for any language...Rules. International ENERGY STAR® Office Equipment Program As an ENERGY STAR partner, Canon Electronics Inc. If such changes or modifications should be made to ensure the accuracy...

User Manual
Page 3
... OPEN THE SEALED DISK PACKAGE AND PROMPTLY RETURN THE CANON SCANNER, THE DISK PACKAGE CONTAINING SCANNER DRIVER SOFTWARE PROGRAMS AND/OR SCANNER UTILITY SOFTWARE PROGRAM PROPRIETARY TO CANON OR ITS LICENSOR (THE "SOFTWARE") AND THE ACCOMPANYING DOCUMENTATION AND OTHER ITEMS TO THE PLACE WHERE YOU OBTAINED ...THEM FOR A REFUND BEFORE THEY ARE USED OR OPENED OR ...
... OPEN THE SEALED DISK PACKAGE AND PROMPTLY RETURN THE CANON SCANNER, THE DISK PACKAGE CONTAINING SCANNER DRIVER SOFTWARE PROGRAMS AND/OR SCANNER UTILITY SOFTWARE PROGRAM PROPRIETARY TO CANON OR ITS LICENSOR (THE "SOFTWARE") AND THE ACCOMPANYING DOCUMENTATION AND OTHER ITEMS TO THE PLACE WHERE YOU OBTAINED ...THEM FOR A REFUND BEFORE THEY ARE USED OR OPENED OR ...

User Manual
Page 5
Conventions This manual uses the following and familiarize yourself with its many functions. After reading this manual thoroughly before operating the machine in order to familiarize yourself with their ... to observe the instructions provided in a warning could result in death or serious injury to the equipment. CAUTION Caution notices are provided for purchasing the Canon Document Scanner DR-7580/9080C. Failure to observe the instructions provided in a caution notice could result in damage to make the most of its capabilities, and to the equipment...
Conventions This manual uses the following and familiarize yourself with its many functions. After reading this manual thoroughly before operating the machine in order to familiarize yourself with their ... to observe the instructions provided in a warning could result in death or serious injury to the equipment. CAUTION Caution notices are provided for purchasing the Canon Document Scanner DR-7580/9080C. Failure to observe the instructions provided in a caution notice could result in damage to make the most of its capabilities, and to the equipment...
User Manual
Page 6
... of the DR-7580/9080C 10 1.2 Packaging: What Is in the Box 12 1.3 Part Names 13 ◆ Front View 13 ◆ Rear View 14 ◆ Connectors (Bottom View 14 ◆ Operation Panel 15 1.4 Optional Products 16 Chapter 2 Preparation Before Use 2.1 Checking Your Operating Environment 18 2.2 Connecting to a Computer 19 SCSI Connections 19 ...; USB 2.0 Interface Cards 22 ◆ Connecting a USB Interface Cable 23 Connecting the Power Cord 23 2.3 Preparing for Paper Feed and Eject 24 Preparing the Document Tray Extension 24 Preparing the Document Eject Tray Extension 25 ◆ Long...
... of the DR-7580/9080C 10 1.2 Packaging: What Is in the Box 12 1.3 Part Names 13 ◆ Front View 13 ◆ Rear View 14 ◆ Connectors (Bottom View 14 ◆ Operation Panel 15 1.4 Optional Products 16 Chapter 2 Preparation Before Use 2.1 Checking Your Operating Environment 18 2.2 Connecting to a Computer 19 SCSI Connections 19 ...; USB 2.0 Interface Cards 22 ◆ Connecting a USB Interface Cable 23 Connecting the Power Cord 23 2.3 Preparing for Paper Feed and Eject 24 Preparing the Document Tray Extension 24 Preparing the Document Eject Tray Extension 25 ◆ Long...
User Manual
Page 7
...the Scanner 28 Turning OFF the Power 30 Chapter 3 Software 3.1 About the Software 32 3.2 Installing the Software 33 Installing the ISIS/TWAIN Driver 33 Installing CapturePerfect 34 3.3 How to Use the Software 36 How to Use the ISIS/TWAIN Driver 36 How to Use ...CapturePerfect 37 ◆ Starting CapturePerfect 37 ◆ Closing CapturePerfect 38 3.4 Uninstalling the Software 39 Chapter 4 Document Feeding and Scanning 4.1 Documents 42 Types of Documents 42 How to Place Documents 43 4.2 Document Feeding ...
...the Scanner 28 Turning OFF the Power 30 Chapter 3 Software 3.1 About the Software 32 3.2 Installing the Software 33 Installing the ISIS/TWAIN Driver 33 Installing CapturePerfect 34 3.3 How to Use the Software 36 How to Use the ISIS/TWAIN Driver 36 How to Use ...CapturePerfect 37 ◆ Starting CapturePerfect 37 ◆ Closing CapturePerfect 38 3.4 Uninstalling the Software 39 Chapter 4 Document Feeding and Scanning 4.1 Documents 42 Types of Documents 42 How to Place Documents 43 4.2 Document Feeding ...
User Manual
Page 8
...Mode 60 How to Set the User Mode 62 Chapter 6 Troubleshooting 6.1 When the Scanner Is Not Recognized 64 SCSI Connections 64 USB Connections 66 6.2 Clearing Paper Jams 67... Daily Cleaning 7.1 Daily Cleaning 80 Cleaning the Main Unit 80 Cleaning the Document Detection Sensor 81 Cleaning the Scanning Glasses and Rollers 81 Cleaning the Shading Plates 85 Cleaning the Guide Plate ...(When Using the Imprinter 87 Cleaning the Ink Jet Nozzles (When Using the Imprinter 87 Power Outlet 87 7.2 Replacing the Rollers 88 When to...
...Mode 60 How to Set the User Mode 62 Chapter 6 Troubleshooting 6.1 When the Scanner Is Not Recognized 64 SCSI Connections 64 USB Connections 66 6.2 Clearing Paper Jams 67... Daily Cleaning 7.1 Daily Cleaning 80 Cleaning the Main Unit 80 Cleaning the Document Detection Sensor 81 Cleaning the Scanning Glasses and Rollers 81 Cleaning the Shading Plates 85 Cleaning the Guide Plate ...(When Using the Imprinter 87 Cleaning the Ink Jet Nozzles (When Using the Imprinter 87 Power Outlet 87 7.2 Replacing the Rollers 88 When to...
User Manual
Page 9
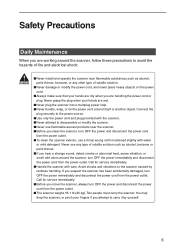
...disconnect the power cord from the power outlet. Two people must carry the scanner. You may drop the scanner, or pinch your fingers if you attempt to disassemble or modify the scanner. ■ Never use flammable aerosol products near flammable substances such as alcohol, benzene or paint thinner... shock: WARNING ■ Never install and operate the scanner near the scanner. ■ Before you clean the scanner, turn OFF the power and disconnect the power cord from the power outlet. ■ To clean the scanner exterior, use a firmly wrung cloth moistened slightly with water or mild...
...disconnect the power cord from the power outlet. Two people must carry the scanner. You may drop the scanner, or pinch your fingers if you attempt to disassemble or modify the scanner. ■ Never use flammable aerosol products near flammable substances such as alcohol, benzene or paint thinner... shock: WARNING ■ Never install and operate the scanner near the scanner. ■ Before you clean the scanner, turn OFF the power and disconnect the power cord from the power outlet. ■ To clean the scanner exterior, use a firmly wrung cloth moistened slightly with water or mild...
User Manual
Page 10
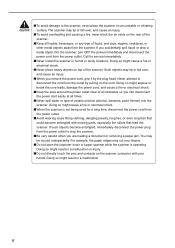
... with your fingers. ■ Do not open the imprinter cover or upper scanner while the scanner is not being used for service immediately. ■ Never install the scanner in a malfunction. 6 Call for a long time, disconnect the power cord... from the outlet by the plug head. Doing so might cause a fire or electrical shock. ■ Never place heavy objects on the rear of the scanner. ■ Keep all obstacles so you are loading a document...
... with your fingers. ■ Do not open the imprinter cover or upper scanner while the scanner is not being used for service immediately. ■ Never install the scanner in a malfunction. 6 Call for a long time, disconnect the power cord... from the outlet by the plug head. Doing so might cause a fire or electrical shock. ■ Never place heavy objects on the rear of the scanner. ■ Keep all obstacles so you are loading a document...
User Manual
Page 11
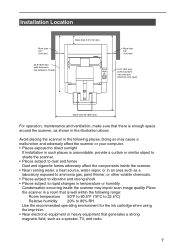
... scan image quality. Avoid placing the scanner in the following range: Room temperature 50°F to 90.5°F (10°C to 32.5°C) Relative humidity 20% to 80% RH Use the recommended operating environment for the ink cartridge when using the imprinter. • Near electronic ...than 3.9" (100 mm) 31.9" (810 mm) (with document tray extension, extension wire open) More than 26" (660 mm) For operation, maintenance and ventilation, make sure that there is unavoidable, provide a curtain or similar object to shade the scanner. • Places subject to dust and fumes Dust and...
... scan image quality. Avoid placing the scanner in the following range: Room temperature 50°F to 90.5°F (10°C to 32.5°C) Relative humidity 20% to 80% RH Use the recommended operating environment for the ink cartridge when using the imprinter. • Near electronic ...than 3.9" (100 mm) 31.9" (810 mm) (with document tray extension, extension wire open) More than 26" (660 mm) For operation, maintenance and ventilation, make sure that there is unavoidable, provide a curtain or similar object to shade the scanner. • Places subject to dust and fumes Dust and...
User Manual
Page 12
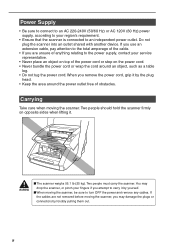
... Take care when moving the scanner, you may drop the scanner, or pinch your fingers if you remove the power cord, grip it by the plug head. • Keep the area around an object, such as a table leg. • Do not tug the power cord. If you use an extension cable, pay attention... to an independent power outlet. WARNING ■ The scanner weighs 55.1 lb (25 kg). If the cables are unsure of anything relating to the power supply, contact your...
... Take care when moving the scanner, you may drop the scanner, or pinch your fingers if you remove the power cord, grip it by the plug head. • Keep the area around an object, such as a table leg. • Do not tug the power cord. If you use an extension cable, pay attention... to an independent power outlet. WARNING ■ The scanner weighs 55.1 lb (25 kg). If the cables are unsure of anything relating to the power supply, contact your...
User Manual
Page 17
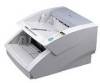
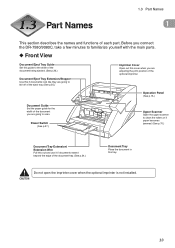
Power Switch (See p.27.) Upper Scanner Open the upper scanner to clean the rollers or if paper becomes jammed. (See p.70.) Document Tray Extension/ Extension Wire Pull this out and use it if documents extend beyond the edge of the optional imprinter. CAUTION 13 Part Names 1.3 Part Names 1... of the document you connect the DR-7580/9080C, take a few minutes to familiarize yourself with the main parts. ◆ Front View Document Eject Tray Guide Set this guide to the width of the document being ejected. (See p.26.) Document Eject Tray Extension/Stopper Use this if documents look like ...
Power Switch (See p.27.) Upper Scanner Open the upper scanner to clean the rollers or if paper becomes jammed. (See p.70.) Document Tray Extension/ Extension Wire Pull this out and use it if documents extend beyond the edge of the optional imprinter. CAUTION 13 Part Names 1.3 Part Names 1... of the document you connect the DR-7580/9080C, take a few minutes to familiarize yourself with the main parts. ◆ Front View Document Eject Tray Guide Set this guide to the width of the document being ejected. (See p.26.) Document Eject Tray Extension/Stopper Use this if documents look like ...

User Manual
Page 19
... that are bound at least two seconds. (2) Count Only key Sets the scanner to the Count Only mode for just counting the number of pages fed. (See p.52.) When you place the document and press the Start key in use this key to cancel the currently set mode, or to clear the number...
... that are bound at least two seconds. (2) Count Only key Sets the scanner to the Count Only mode for just counting the number of pages fed. (See p.52.) When you place the document and press the Start key in use this key to cancel the currently set mode, or to clear the number...

User Manual
Page 20
...a eight digit number on the front of the document being scanned. It keeps a tally of the pages that are fed through the scanner. ◆ Bar Code Module The bar code module is add-on the DR-7580/9080C, if they are using the endorser, the scanning speed lowers to match the... a seven digit counter that is imprinted in order to recognize bar codes. Chapter 1 DR-7580/9080C Optional Products The following options can set the text message that is installed inside the scanner, and prints a text message on the back of the document being scanned. The application you are necessary.
...a eight digit number on the front of the document being scanned. It keeps a tally of the pages that are fed through the scanner. ◆ Bar Code Module The bar code module is add-on the DR-7580/9080C, if they are using the endorser, the scanning speed lowers to match the... a seven digit counter that is imprinted in order to recognize bar codes. Chapter 1 DR-7580/9080C Optional Products The following options can set the text message that is installed inside the scanner, and prints a text message on the back of the document being scanned. The application you are necessary.
User Manual
Page 21
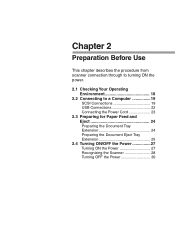
Chapter 2 Preparation Before Use This chapter describes the procedure from scanner connection through to turning ON the power. 2.1 Checking Your Operating Environment 18 2.2 Connecting to a Computer 19 SCSI Connections 19 USB Connections 22 Connecting the Power Cord 23 2.3 Preparing for Paper Feed and Eject 24 Preparing the Document Tray Extension 24 Preparing the Document Eject Tray Extension 25 2.4 Turning ON/OFF the Power 27 Turning ON the Power 27 Recognizing the Scanner 28 Turning OFF the Power 30
Chapter 2 Preparation Before Use This chapter describes the procedure from scanner connection through to turning ON the power. 2.1 Checking Your Operating Environment 18 2.2 Connecting to a Computer 19 SCSI Connections 19 USB Connections 22 Connecting the Power Cord 23 2.3 Preparing for Paper Feed and Eject 24 Preparing the Document Tray Extension 24 Preparing the Document Eject Tray Extension 25 2.4 Turning ON/OFF the Power 27 Turning ON the Power 27 Recognizing the Scanner 28 Turning OFF the Power 30

User Manual
Page 22
...MB or more of free space on one of the operating systems noted above. Chapter 2 Preparation Before Use Checking Your Operating Environment Your computer system must meet the following conditions to use the DR-7580/9080C. ● IBM PC/AT or compatible machines that meet the recommended specifications, the scanning speed may ...● Either an ISIS (compatible) or a TWAIN (compatible) application that operates on the hard disk ● SCSI card that is compatible with this scanner or Hi-Speed USB 2.0 interface card (See "Connecting to transfer data may increase. 18 Important ●...
...MB or more of free space on one of the operating systems noted above. Chapter 2 Preparation Before Use Checking Your Operating Environment Your computer system must meet the following conditions to use the DR-7580/9080C. ● IBM PC/AT or compatible machines that meet the recommended specifications, the scanning speed may ...● Either an ISIS (compatible) or a TWAIN (compatible) application that operates on the hard disk ● SCSI card that is compatible with this scanner or Hi-Speed USB 2.0 interface card (See "Connecting to transfer data may increase. 18 Important ●...
User Manual
Page 23
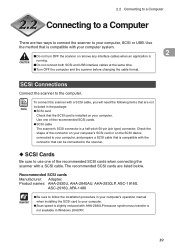
...not Note included in the package: ● SCSI card Check that can be connected to the scanner. ◆ SCSI Cards Be sure to use one of the recommended SCSI cards. ● SCSI cable The scanner's SCSI connector is a half-pitch 50-pin (pin type) connector. The recommended SCSI cards are... listed below. SCSI Connections Connect the scanner to your computer, and prepare a SCSI cable that is compatible ...
...not Note included in the package: ● SCSI card Check that can be connected to the scanner. ◆ SCSI Cards Be sure to use one of the recommended SCSI cards. ● SCSI cable The scanner's SCSI connector is a half-pitch 50-pin (pin type) connector. The recommended SCSI cards are... listed below. SCSI Connections Connect the scanner to your computer, and prepare a SCSI cable that is compatible ...

User Manual
Page 24
... ON ON OFF OFF ON ON SW3 OFF OFF OFF OFF ON ON ON ON Set the SCSI ID referring to the scanner using the SCSI cable. Chapter 2 Preparation Before Use ◆ Connecting the SCSI Cable CAUTION ■ Before you to turn it OFF and move it towards you connect the SCSI cable..., make sure that the scanner and the computer are located on the bottom of the SCSI cable into the SCSI device in SCSI devices...
... ON ON OFF OFF ON ON SW3 OFF OFF OFF OFF ON ON ON ON Set the SCSI ID referring to the scanner using the SCSI cable. Chapter 2 Preparation Before Use ◆ Connecting the SCSI Cable CAUTION ■ Before you to turn it OFF and move it towards you connect the SCSI cable..., make sure that the scanner and the computer are located on the bottom of the SCSI cable into the SCSI device in SCSI devices...

User Manual
Page 25
...devices to OFF. If a SCSI hard disk is mounted, do not use a terminator plug if this is normally assigned to the SCSI controller. In such a connection, set the terminator on the scanner to OFF. Note that if you use a terminator plug and the DIP switch is set to ON. Terminator ...OFF Terminator ON Set the terminator switch on the SCSI device connected as this scanner is installed as the last piece of equipment in ...
...devices to OFF. If a SCSI hard disk is mounted, do not use a terminator plug if this is normally assigned to the SCSI controller. In such a connection, set the terminator on the scanner to OFF. Note that if you use a terminator plug and the DIP switch is set to ON. Terminator ...OFF Terminator ON Set the terminator switch on the SCSI device connected as this scanner is installed as the last piece of equipment in ...
User Manual
Page 26
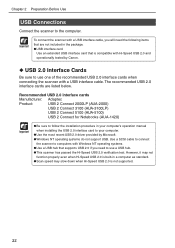
... 2.0 interface card to your computer. ● Use the most recent USB 2.0 driver provided by Canon. ◆ USB 2.0 Interface Cards Be sure to the computer. Use a SCSI cable to connect the scanner to use one of the recommended USB 2.0 interface cards when connecting the scanner with Windows NT operating systems. ● Use a USB hub that supports USB 2.0 if...
... 2.0 interface card to your computer. ● Use the most recent USB 2.0 driver provided by Canon. ◆ USB 2.0 Interface Cards Be sure to the computer. Use a SCSI cable to connect the scanner to use one of the recommended USB 2.0 interface cards when connecting the scanner with Windows NT operating systems. ● Use a USB hub that supports USB 2.0 if...

User Manual
Page 27
...follow these precautions. Connect the plug securely to the power source. ■ Use only the power cord and plug provided with the scanner. ■ Before you use only the power cord provided with another object. Failure to use an extension cable, pay attention to a Computer ◆ Connecting a USB ...do so might cause a fire or electrical shock. ■ Never grasp the plug when your region's requirement. ■ Do not plug the scanner into a multiplug power strip. ■ Never bundle or tie the power cord around itself or another device. 2.2 Connecting to the total amperage...
...follow these precautions. Connect the plug securely to the power source. ■ Use only the power cord and plug provided with the scanner. ■ Before you use only the power cord provided with another object. Failure to use an extension cable, pay attention to a Computer ◆ Connecting a USB ...do so might cause a fire or electrical shock. ■ Never grasp the plug when your region's requirement. ■ Do not plug the scanner into a multiplug power strip. ■ Never bundle or tie the power cord around itself or another device. 2.2 Connecting to the total amperage...


