
ZR Instruction Manual
Page 12
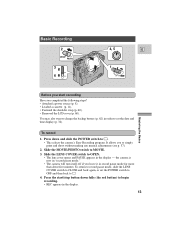
...) to [. 4. It allows you to [. • This selects the camera's Easy Recording program. Slide the MOVIE/PHOTO switch to OPEN. • The lens cover opens and PAUSE appears in the display. 13 Basic Recording 2 MOVIE PHOTO 3 OPEN 6 CLOSE 4, 5 E 1 OFF VCR POWER Mastering the Basics Before you start /stop button...down and slide the POWER switch to simply point and shoot without making any manual adjustments (see p. 37). 2. Slide the LENS COVER switch to MOVIE. 3. You may also want to charge the backup battery (p. 62) in order to set the POWER switch to OFF and then back to ...
...) to [. 4. It allows you to [. • This selects the camera's Easy Recording program. Slide the MOVIE/PHOTO switch to OPEN. • The lens cover opens and PAUSE appears in the display. 13 Basic Recording 2 MOVIE PHOTO 3 OPEN 6 CLOSE 4, 5 E 1 OFF VCR POWER Mastering the Basics Before you start /stop button...down and slide the POWER switch to simply point and shoot without making any manual adjustments (see p. 37). 2. Slide the LENS COVER switch to MOVIE. 3. You may also want to charge the backup battery (p. 62) in order to set the POWER switch to OFF and then back to ...
ZR Instruction Manual
Page 32
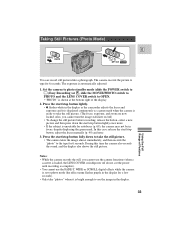
Set the camera to photo standby mode (slide the POWER switch to [ (Easy Recording) or P , slide the MOVIE/PHOTO switch to PHOTO and the LENS COVER switch to OPEN. • "PHOTO" is shown at the bottom right of Features You can record still ..., despite displaying the green mark. During this case: release the start /stop button, adjust the focus manually (p. 49) and retry. 3. Taking Still Pictures (Photo Mode) MOVIE PHOTO E OFF VCR POWER Using the Full Range of the display. 2. The camera records the picture to tape for a few seconds). • Only take "photos...
Set the camera to photo standby mode (slide the POWER switch to [ (Easy Recording) or P , slide the MOVIE/PHOTO switch to PHOTO and the LENS COVER switch to OPEN. • "PHOTO" is shown at the bottom right of Features You can record still ..., despite displaying the green mark. During this case: release the start /stop button, adjust the focus manually (p. 49) and retry. 3. Taking Still Pictures (Photo Mode) MOVIE PHOTO E OFF VCR POWER Using the Full Range of the display. 2. The camera records the picture to tape for a few seconds). • Only take "photos...
ZR Instruction Manual
Page 42
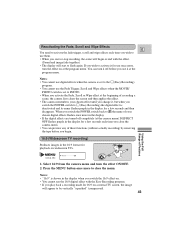
... digital effects when the camera is set to the [ (Easy Recording) program. • You cannot use the Fade Trigger, Scroll and Wipe effects when the MOVIE/ PHOTO switch is set to PHOTO. • When you activate the Fade, Scroll or Wipe effect at the beginning of these functions (without actually recording...
... digital effects when the camera is set to the [ (Easy Recording) program. • You cannot use the Fade Trigger, Scroll and Wipe effects when the MOVIE/ PHOTO switch is set to PHOTO. • When you activate the Fade, Scroll or Wipe effect at the beginning of these functions (without actually recording...

ZR Instruction Manual
Page 45
...;•ON 1. Press the start/stop button to PHOTO, and then set to record after a 10 second countdown period (or 2 secs from the wireless controller). Notes: • Once the countdown has begun, press the start /stop button to turn it off. • Cancel the self-timer at any stage... also displayed at the camera menu. 3. Set the self-timer first, before the countdown is complete. Setting the Self-Timer E OFF VCR POWER MOVIE PHOTO This is useful when you want to face the lens. The camera automatically adjusts the focus and exposure 2 seconds before lifting the LCD screen...
...;•ON 1. Press the start/stop button to PHOTO, and then set to record after a 10 second countdown period (or 2 secs from the wireless controller). Notes: • Once the countdown has begun, press the start /stop button to turn it off. • Cancel the self-timer at any stage... also displayed at the camera menu. 3. Set the self-timer first, before the countdown is complete. Setting the Self-Timer E OFF VCR POWER MOVIE PHOTO This is useful when you want to face the lens. The camera automatically adjusts the focus and exposure 2 seconds before lifting the LCD screen...