
User Manual
Page 13
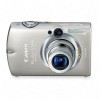
... monitor. Guide: Checking for approximately 2 seconds. Selecting a Shooting Mode 1. button while the image is recorded to display images regardless of the review duration setting with the following procedures. • Keeping the shutter button pressed after a shot. • Pressing the FUNC./SET or DISP.... the shutter button fully to the desired mode ( ). To stop displaying the image, press the shutter button halfway. Î See the Advanced Guide: Review (p. 24). Î See the Advanced Shooting (p. 67). In the , and modes, press the FUNC./SET button ( ) and use the or button...
... monitor. Guide: Checking for approximately 2 seconds. Selecting a Shooting Mode 1. button while the image is recorded to display images regardless of the review duration setting with the following procedures. • Keeping the shutter button pressed after a shot. • Pressing the FUNC./SET or DISP.... the shutter button fully to the desired mode ( ). To stop displaying the image, press the shutter button halfway. Î See the Advanced Guide: Review (p. 24). Î See the Advanced Shooting (p. 67). In the , and modes, press the FUNC./SET button ( ) and use the or button...
User Manual
Page 28
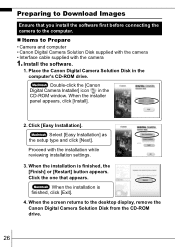
...to the computer. „ Items to Prepare • Camera and computer • Canon Digital Camera Solution Disk supplied with the camera • Interface cable supplied with the installation while reviewing installation settings. 3. When the installer panel appears, click [Install]. 2. When the... screen returns to the desktop display, remove the Canon Digital Camera Solution Disk from the CD-ROM drive. 26 ...
...to the computer. „ Items to Prepare • Camera and computer • Canon Digital Camera Solution Disk supplied with the camera • Interface cable supplied with the installation while reviewing installation settings. 3. When the installer panel appears, click [Install]. 2. When the... screen returns to the desktop display, remove the Canon Digital Camera Solution Disk from the CD-ROM drive. 26 ...


