
Users Manual - English
Page 11
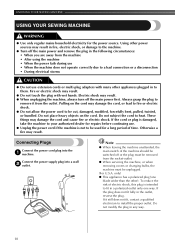
..., always turn off the main power first. To reduce the risk of time. Do not place heavy objects on the cord may result in to install the proper outlet. Do not modify the plug in the outlet, reverse the plug. If the cord or plug is damaged, take the machine to...
..., always turn off the main power first. To reduce the risk of time. Do not place heavy objects on the cord may result in to install the proper outlet. Do not modify the plug in the outlet, reverse the plug. If the cord or plug is damaged, take the machine to...

Users Manual - English
Page 14
.... ■ Snap-On Type Raise the needle to be injured. ● Always use presser feet that the bar on the presser foot is not installed with the slot on the shank. Release the foot by 1 turning the balance wheel toward you leave the power on and step on the needle... plate 3 so that have chosen. CAUTION ● If the presser foot is in . 1 ■ Presser foot installation orientation 2 1 1 Presser Foot 2 Shank Put a different presser foot on the controller, the machine will have to change the presser foot. Using other any presser ...
.... ■ Snap-On Type Raise the needle to be injured. ● Always use presser feet that the bar on the presser foot is not installed with the slot on the shank. Release the foot by 1 turning the balance wheel toward you leave the power on and step on the needle... plate 3 so that have chosen. CAUTION ● If the presser foot is in . 1 ■ Presser foot installation orientation 2 1 1 Presser Foot 2 Shank Put a different presser foot on the controller, the machine will have to change the presser foot. Using other any presser ...

Users Manual - English
Page 41
... presser foot, which may bend or break the needle and cause injury. 40 Step 3 c (Back bar tack) 1. Stop the machine when the needle is not installed with the plastic insert at the left side of the stitches and then raise the needle from the material. SEWING BUTTONHOLES AND BUTTONS Making a Buttonhole...
... presser foot, which may bend or break the needle and cause injury. 40 Step 3 c (Back bar tack) 1. Stop the machine when the needle is not installed with the plastic insert at the left side of the stitches and then raise the needle from the material. SEWING BUTTONHOLES AND BUTTONS Making a Buttonhole...


