Users Guide
Page 3
...Supply...3 Connecting to an AC Power Outlet 3 Installing the Printer Driver and Software 4 Installer Screen 5 USB Cable Connection 5 Wired LAN Connection (TD-2120N/2130N only 7 Registering Paper Size Information With the Printer 9 Uninstalling the Printer Driver 10 2 Printing 12 Operation Panel 12 Indicators ...12 Button ... the Computer and Printer 21 USB Cable Connection 21 Wired LAN Connection (TD-2120N/2130N only 21 Printing Solutions 22 Printing ...23 Making Prints Lighter or Darker 23 Printer Driver Options 24 3 Printer Setting Tool 25 About the Printer Setting Tool 25...
...Supply...3 Connecting to an AC Power Outlet 3 Installing the Printer Driver and Software 4 Installer Screen 5 USB Cable Connection 5 Wired LAN Connection (TD-2120N/2130N only 7 Registering Paper Size Information With the Printer 9 Uninstalling the Printer Driver 10 2 Printing 12 Operation Panel 12 Indicators ...12 Button ... the Computer and Printer 21 USB Cable Connection 21 Wired LAN Connection (TD-2120N/2130N only 21 Printing Solutions 22 Printing ...23 Making Prints Lighter or Darker 23 Printer Driver Options 24 3 Printer Setting Tool 25 About the Printer Setting Tool 25...
Users Guide
Page 5
...85 Printing Using the Basic Control Panel 85 Printing Using the One-Touch Panel 87 Printing a Different Date/Time Than the Printer's Internal Clock 88 Printing Using a Barcode Reader 89 Label Layouts on the Printer (Checking, Deleting and Log 89 Replacing the Time/Date ...Battery 90 Frequently Asked Questions 91 Product Specifications 92 11 Using the WLAN Interface (Optional:PA-WI-001) (TD-2120N/2130N only) 93 Installing the Printer Driver and Software 93 Before Making a Wireless LAN Connection 93 Choosing Your Wireless Installation Method 94 Configuration Using the Installer...
...85 Printing Using the Basic Control Panel 85 Printing Using the One-Touch Panel 87 Printing a Different Date/Time Than the Printer's Internal Clock 88 Printing Using a Barcode Reader 89 Label Layouts on the Printer (Checking, Deleting and Log 89 Replacing the Time/Date ...Battery 90 Frequently Asked Questions 91 Product Specifications 92 11 Using the WLAN Interface (Optional:PA-WI-001) (TD-2120N/2130N only) 93 Installing the Printer Driver and Software 93 Before Making a Wireless LAN Connection 93 Choosing Your Wireless Installation Method 94 Configuration Using the Installer...

Users Guide
Page 10
...in the following three methods: USB cable connection (page 5) Wired LAN connection (TD-2120N/2130N only) (page 7) Wireless LAN connection (TD-2120N/2130N only) (if the WLAN interface is being used , read the procedures with the screens replaced with ...administrator rights. 4 In addition, the installation procedure is Internet Explorer® before using the CD-ROM. Chapter 1 Installing the Printer Driver and Software 1 The printer driver...
...in the following three methods: USB cable connection (page 5) Wired LAN connection (TD-2120N/2130N only) (page 7) Wireless LAN connection (TD-2120N/2130N only) (if the WLAN interface is being used , read the procedures with the screens replaced with ...administrator rights. 4 In addition, the installation procedure is Internet Explorer® before using the CD-ROM. Chapter 1 Installing the Printer Driver and Software 1 The printer driver...

Users Guide
Page 11
... and the Network User's Guide (TD-2120N/2130N only). 2 User's Guides Displays or installs the User's Guide, the Software User's Guide and the Network User's Guide (TD-2120N/2130N only). 3 Custom Installation Allows P-touch Editor 5.0, the printer driver, P-touch Update Software and Printer ... • The following installation procedures are for installation. 4 Advanced Applications Installs the BRAdmin Light utility (TD-2120N/2130N only), or displays the Brother Developer Center. 5 Brother Support Displays the support website (Brother Solutions Center). b Click [Standard Installation].
... and the Network User's Guide (TD-2120N/2130N only). 2 User's Guides Displays or installs the User's Guide, the Software User's Guide and the Network User's Guide (TD-2120N/2130N only). 3 Custom Installation Allows P-touch Editor 5.0, the printer driver, P-touch Update Software and Printer ... • The following installation procedures are for installation. 4 Advanced Applications Installs the BRAdmin Light utility (TD-2120N/2130N only), or displays the Brother Developer Center. 5 Brother Support Displays the support website (Brother Solutions Center). b Click [Standard Installation].

Users Guide
Page 14
... to the Internet.) Follow the on your security settings, a Windows Security or antivirus software window may take a few seconds for new versions of the printer driver and software begins. i Installation of the software and to update them, click [Yes], and then go to check for new software versions or update them...
... to the Internet.) Follow the on your security settings, a Windows Security or antivirus software window may take a few seconds for new versions of the printer driver and software begins. i Installation of the software and to update them, click [Yes], and then go to check for new software versions or update them...

Users Guide
Page 16
... necessary or when re-installing the TD-XXXX printer driver. e Click the [Drivers] tab, and then click [Change Driver Settings]. The [Print Server Properties] window appears. c Select [Brother TD-XXXX] and click [Delete this procedure only if printing from the TD-XXXX is turned on the menu bar. e Click the [Drivers] tab, select [Brother TD-XXXX], and then click [Remove...
... necessary or when re-installing the TD-XXXX printer driver. e Click the [Drivers] tab, and then click [Change Driver Settings]. The [Print Server Properties] window appears. c Select [Brother TD-XXXX] and click [Delete this procedure only if printing from the TD-XXXX is turned on the menu bar. e Click the [Drivers] tab, select [Brother TD-XXXX], and then click [Remove...

Users Guide
Page 17
... b Click [Control Panel] in the menu bar. e Click the [Drivers] tab, and then click [Change Driver Settings]. Windows® 8 1 a If the printer is turned on -screen instructions. c Select [Brother TD-XXXX] and click [Remove device], or right-click the icon and click... [Remove device]. Getting Started 1 11 The printer driver has been uninstalled. f Select [Remove driver and driver package], and then click [OK]. g Close the [Print ...
... b Click [Control Panel] in the menu bar. e Click the [Drivers] tab, and then click [Change Driver Settings]. Windows® 8 1 a If the printer is turned on -screen instructions. c Select [Brother TD-XXXX] and click [Remove device], or right-click the icon and click... [Remove device]. Getting Started 1 11 The printer driver has been uninstalled. f Select [Remove driver and driver package], and then click [OK]. g Close the [Print ...
Users Guide
Page 19
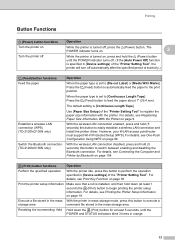
...With Marks]: Press the (Feed) button to automatically feed the paper to easily establish a wireless LAN connection and install the printer driver. For details, see Registering Paper Size Information With the Printer on page 19. With the wireless LAN connection disabled, press and hold... the specified period of inactivity.) (Feed) button functions Feed the paper Establish a wireless LAN connection (WPS) (TD-2120N/2130N only) Switch the Bluetooth connection (TD-2120N/2130N only) Operation When the paper type is set to [Continuous Length Tape]: Press the (Feed) button to execute...
...With Marks]: Press the (Feed) button to automatically feed the paper to easily establish a wireless LAN connection and install the printer driver. For details, see Registering Paper Size Information With the Printer on page 19. With the wireless LAN connection disabled, press and hold... the specified period of inactivity.) (Feed) button functions Feed the paper Establish a wireless LAN connection (WPS) (TD-2120N/2130N only) Switch the Bluetooth connection (TD-2120N/2130N only) Operation When the paper type is set to [Continuous Length Tape]: Press the (Feed) button to execute...

Users Guide
Page 27
..., make sure that the printer is turned off . 21 d Turn on page 4. Wired LAN Connection (TD-2120N/2130N only) 2 In order for the printer to use a static IP address to communicate through a wired LAN connection, the printer driver and the "Printer Setting Tool" must first be installed, and the wired LAN connection settings...
..., make sure that the printer is turned off . 21 d Turn on page 4. Wired LAN Connection (TD-2120N/2130N only) 2 In order for the printer to use a static IP address to communicate through a wired LAN connection, the printer driver and the "Printer Setting Tool" must first be installed, and the wired LAN connection settings...

Users Guide
Page 28
... your computer. For details, see Communication Settings (TD-2120N/2130N only) on page 27. • By using the setup CD-ROM. For details, see Applying Setting Changes to the ethernet network port on the back of the drivers. Printing Solutions 2 Your printer can be changed ...and easily applied to multiple printers. These drivers can be downloaded from the support website (Brother Solutions Center). (http://support.brother.com/). 22 NOTE • The printer's communication ...
... your computer. For details, see Communication Settings (TD-2120N/2130N only) on page 27. • By using the setup CD-ROM. For details, see Applying Setting Changes to the ethernet network port on the back of the drivers. Printing Solutions 2 Your printer can be changed ...and easily applied to multiple printers. These drivers can be downloaded from the support website (Brother Solutions Center). (http://support.brother.com/). 22 NOTE • The printer's communication ...

Users Guide
Page 29
...make prints lighter or darker by adjusting the print density setting in the printer driver's dialog box or the "Printer Setting Tool". (See Print Density on page 36) When using either the printer driver or the Printer Setting Tool on the printer. The POWER indicator blinks in ... methods and procedures, see Inserting the RD Roll on a single charge. 2 1 POWER indicator 2 (Power) button d Connect the printer to use genuine Brother roll media. e Insert the RD Roll. Be sure to a computer. The following describes the procedure for printing with this printer. Making Prints Lighter or ...
...make prints lighter or darker by adjusting the print density setting in the printer driver's dialog box or the "Printer Setting Tool". (See Print Density on page 36) When using either the printer driver or the Printer Setting Tool on the printer. The POWER indicator blinks in ... methods and procedures, see Inserting the RD Roll on a single charge. 2 1 POWER indicator 2 (Power) button d Connect the printer to use genuine Brother roll media. e Insert the RD Roll. Be sure to a computer. The following describes the procedure for printing with this printer. Making Prints Lighter or ...

Users Guide
Page 30
Chapter 2 Printer Driver Options 2 You can also use the "Printer Setting Tool" to configure more advanced settings. For details, see Printer Setting Tool on page 25. 24 NOTE You can configure various settings in the printer driver's dialog box, such as paper size, number of copies, print quality, etc.
Chapter 2 Printer Driver Options 2 You can also use the "Printer Setting Tool" to configure more advanced settings. For details, see Printer Setting Tool on page 25. 24 NOTE You can configure various settings in the printer driver's dialog box, such as paper size, number of copies, print quality, etc.

Users Guide
Page 31
...®/Windows® 7: From the Start menu, click [All Programs] - [Brother] [Label & Mobile Printer] - [Printer Setting Tool]. Using the Printer Setting Tool 3 a Connect the printer to a computer with compatible Brother printers. The "Printer Setting Tool" is functional. Connect this tool, ...settings cannot be configured to make a selection since only that the printer driver has been installed and is available only with a USB...
...®/Windows® 7: From the Start menu, click [All Programs] - [Brother] [Label & Mobile Printer] - [Printer Setting Tool]. Using the Printer Setting Tool 3 a Connect the printer to a computer with compatible Brother printers. The "Printer Setting Tool" is functional. Connect this tool, ...settings cannot be configured to make a selection since only that the printer driver has been installed and is available only with a USB...

Users Guide
Page 32
...the printer is displayed, select the desired printer from the drop-down list. For details on the settings dialog boxes, see Communication Settings (TD-2120N/2130N only) on page 27, Device Settings on page 34, P-touch Template Settings on page 41 or Paper Size Setup on with administrator ...P-touch Template settings. 5 Paper Size Setup Add media information and settings to the printer driver in standby. e After changing the settings, click [Apply] - [Exit] in the [Paper Size] list of the printer driver. Use the "Printer Setting Tool" to use a size not listed in the settings ...
...the printer is displayed, select the desired printer from the drop-down list. For details on the settings dialog boxes, see Communication Settings (TD-2120N/2130N only) on page 27, Device Settings on page 34, P-touch Template Settings on page 41 or Paper Size Setup on with administrator ...P-touch Template settings. 5 Paper Size Setup Add media information and settings to the printer driver in standby. e After changing the settings, click [Apply] - [Exit] in the [Paper Size] list of the printer driver. Use the "Printer Setting Tool" to use a size not listed in the settings ...

Users Guide
Page 40
... 29) Device Settings 3 With [Device settings] in the "Printer Setting Tool", default printer settings as well as the first printer. When printing from the printer driver; c for the touch panel display (optional, TD-2120N/2130N only) can be applied to make a selection since only that printer will also be changed . Chapter 3 d Repeat steps a -
... 29) Device Settings 3 With [Device settings] in the "Printer Setting Tool", default printer settings as well as the first printer. When printing from the printer driver; c for the touch panel display (optional, TD-2120N/2130N only) can be applied to make a selection since only that printer will also be changed . Chapter 3 d Repeat steps a -

Users Guide
Page 42
... differences in the tab, and the settings can no longer be erased when the printer is closed. In addition, the settings in the printer driver will be sure to the printer or save or export them, be retained even when the printer is selected, click the [File] button and... not be applied to the printer even if [Apply] is used, the setting specified in the tab will be specified or changed using the printer driver, use this tool to 10.0 mm) Advanced Tab 3 1 2 3 4 5 6 7 1 Disable these settings When this check box is executed. Chapter 3 5 Command Mode Select the printer's ...
... differences in the tab, and the settings can no longer be erased when the printer is closed. In addition, the settings in the printer driver will be sure to the printer or save or export them, be retained even when the printer is selected, click the [File] button and... not be applied to the printer even if [Apply] is used, the setting specified in the tab will be specified or changed using the printer driver, use this tool to 10.0 mm) Advanced Tab 3 1 2 3 4 5 6 7 1 Disable these settings When this check box is executed. Chapter 3 5 Command Mode Select the printer's ...
Users Guide
Page 43
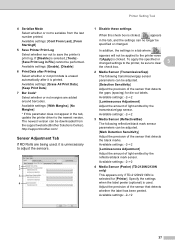
... by the transmissive/gap sensor. Available settings: -2-+2 4 Media Sensor (Peeler) (TD-2120N/2130N only) This appears only if TD-2120N/2130N is printed. Printer Setting Tool 4 Serialize Mode Select whether or not to serialize from the support website (Brother Solutions Center). If [Disable] is clicked. Available settings: -2-+2 37 Available settings:...Printer Print Log Select whether nor not to the newest version. In addition, the settings in the tab, update the printer driver to save the printer's print log. Adjust the precision of the sensor that detects the black marks.
... by the transmissive/gap sensor. Available settings: -2-+2 4 Media Sensor (Peeler) (TD-2120N/2130N only) This appears only if TD-2120N/2130N is printed. Printer Setting Tool 4 Serialize Mode Select whether or not to serialize from the support website (Brother Solutions Center). If [Disable] is clicked. Available settings: -2-+2 37 Available settings:...Printer Print Log Select whether nor not to the newest version. In addition, the settings in the tab, update the printer driver to save the printer's print log. Adjust the precision of the sensor that detects the black marks.
Users Guide
Page 45
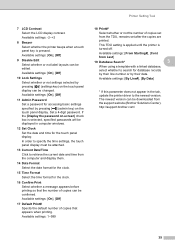
...will be attached. 13 Current Date/Time Click to retrieve the current date and time from the support website (Brother Solutions Center). This TDU setting is applied until the printer is pressed. Available settings: -2-+2 8 Beeper Select ... edited. Available settings: [From Starting#], [Cont from the TDU, remains set after the copies are printed. http://support.brother.com/ 39 Available settings: [On], [Off] 17 Default Print# Specify the default number of copies set from Last... must be displayed in the tab, update the printer driver to search for the touch panel display.
...will be attached. 13 Current Date/Time Click to retrieve the current date and time from the support website (Brother Solutions Center). This TDU setting is applied until the printer is pressed. Available settings: -2-+2 8 Beeper Select ... edited. Available settings: [From Starting#], [Cont from the TDU, remains set after the copies are printed. http://support.brother.com/ 39 Available settings: [On], [Off] 17 Default Print# Specify the default number of copies set from Last... must be displayed in the tab, update the printer driver to search for the touch panel display.

Users Guide
Page 50
.... Chapter 3 Paper Size Setup 3 With [Paper Size Setup] in the "Printer Setting Tool", paper sizes not available in the [Paper Size] list of the printer driver can then be added. Paper Size Setup Dialog Box 3 1 2 3 4 5 6 8 7 1 Current settings Displays the current settings for a normal printer, the paper format must be replaced with...
.... Chapter 3 Paper Size Setup 3 With [Paper Size Setup] in the "Printer Setting Tool", paper sizes not available in the [Paper Size] list of the printer driver can then be added. Paper Size Setup Dialog Box 3 1 2 3 4 5 6 8 7 1 Current settings Displays the current settings for a normal printer, the paper format must be replaced with...

Users Guide
Page 53
...on the recipient's computer. Distributing Only Paper Formats 3 If the printer driver has been installed on the recipient's computer. TD-2020: bst202ed.txt, bst202ed.ptd, pdt3335.bin TD-2120N: bst212ed.txt, bst212ed.ptd, pdt3535.bin TD-2130N: bst213ed.txt, bst213ed.ptd, pdt3635.bin b Save bst202ed.txt, bst212ed...be distributed are created. TD-2020: bst202ed.txt, bst202ed.ptd, pdt3335.bin TD-2120N: bst212ed.txt, bst212ed.ptd, pdt3535.bin TD-2130N: bst213ed.txt, bst213ed.ptd, pdt3635.bin b Insert the CD-ROM into the CD-ROM drive of the Custom folder in TD-2000\Drivers (copied in step ...
...on the recipient's computer. Distributing Only Paper Formats 3 If the printer driver has been installed on the recipient's computer. TD-2020: bst202ed.txt, bst202ed.ptd, pdt3335.bin TD-2120N: bst212ed.txt, bst212ed.ptd, pdt3535.bin TD-2130N: bst213ed.txt, bst213ed.ptd, pdt3635.bin b Save bst202ed.txt, bst212ed...be distributed are created. TD-2020: bst202ed.txt, bst202ed.ptd, pdt3335.bin TD-2120N: bst212ed.txt, bst212ed.ptd, pdt3535.bin TD-2130N: bst213ed.txt, bst213ed.ptd, pdt3635.bin b Insert the CD-ROM into the CD-ROM drive of the Custom folder in TD-2000\Drivers (copied in step ...


