
Users Manual - English
Page 4
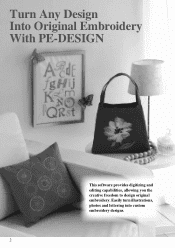
Turn Any Design Into Original Embroidery With PE-DESIGN This software provides digitizing and editing capabilities, allowing you the creative freedom to design original embroidery. Easily turn illustrations, photos and lettering into custom embroidery designs. 2
Turn Any Design Into Original Embroidery With PE-DESIGN This software provides digitizing and editing capabilities, allowing you the creative freedom to design original embroidery. Easily turn illustrations, photos and lettering into custom embroidery designs. 2
Users Manual - English
Page 14
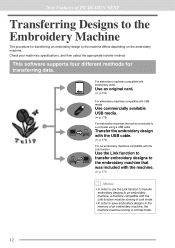
... to a computer using a USB cable Transfer the embroidery design with the USB cable. (☞ p. 176) For our embroidery machines compatible with the Link function Use the Link function to transfer embroidery designs to the embroidery machine that was included with the machine. (☞...In order to the machine differs depending on the embroidery machine. This software supports four different methods for transferring an embroidery design to save embroidery designs in the memory of PE-DESIGN NEXT Transferring Designs to the Embroidery Machine The procedure for transferring data. Check your ...
... to a computer using a USB cable Transfer the embroidery design with the USB cable. (☞ p. 176) For our embroidery machines compatible with the Link function Use the Link function to transfer embroidery designs to the embroidery machine that was included with the machine. (☞...In order to the machine differs depending on the embroidery machine. This software supports four different methods for transferring an embroidery design to save embroidery designs in the memory of PE-DESIGN NEXT Transferring Designs to the Embroidery Machine The procedure for transferring data. Check your ...
Users Manual - English
Page 15
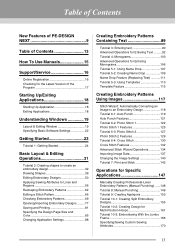
... Specifying Basic Software Settings 22 Getting Started 23 Tutorial 1: Getting Started 24 Basic Layout & Editing Operations 31 Tutorial 2: Drawing shapes to create an embroidery design 32 Drawing Shapes 39 Editing Embroidery Designs 50 Applying Sewing Attributes to Lines and Regions 56 Reshaping Embroidery Patterns 62 Editing a Stitch Pattern 66 Checking Embroidery Patterns 69 Opening/Importing Embroidery Designs ......... 77 Saving...
... Specifying Basic Software Settings 22 Getting Started 23 Tutorial 1: Getting Started 24 Basic Layout & Editing Operations 31 Tutorial 2: Drawing shapes to create an embroidery design 32 Drawing Shapes 39 Editing Embroidery Designs 50 Applying Sewing Attributes to Lines and Regions 56 Reshaping Embroidery Patterns 62 Editing a Stitch Pattern 66 Checking Embroidery Patterns 69 Opening/Importing Embroidery Designs ......... 77 Saving...
Users Manual - English
Page 17
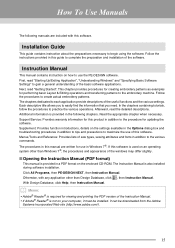
...® Reader® is not on how to gain a general understanding of the basic software applications. The chapters dedicated to the embroidery machine. Afterward, read "Starting Up/Exiting Application", "Understanding Windows" and "Specifying Basic Software Settings" to use the PE-DESIGN software. Read the appropriate chapter when necessary. Supplement: Provides function introductions, details on the settings...
...® Reader® is not on how to gain a general understanding of the basic software applications. The chapters dedicated to the embroidery machine. Afterward, read "Starting Up/Exiting Application", "Understanding Windows" and "Specifying Basic Software Settings" to use the PE-DESIGN software. Read the appropriate chapter when necessary. Supplement: Provides function introductions, details on the settings...
Users Manual - English
Page 157
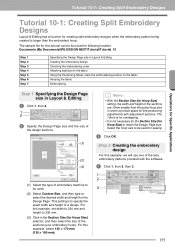
... Embroidery Designs Operations for Specific Applications Tutorial 10-1: Creating Split Embroidery Designs Layout & Editing has a function for creating split embroidery designs when the embroidery pattern being created is larger than the actual hoop size in order to provide space for fine positioning adjustments with the software.... are 10mm smaller than the embroidery hoop. For this example, we will use one of a design. Step 2 Creating the embroidery design For this example, select 120 × 170 mm (130 × 180 mm). Documents (My Documents)\PE-DESIGN NEXT\Tutorial\Tutorial_10 Step 1...
... Embroidery Designs Operations for Specific Applications Tutorial 10-1: Creating Split Embroidery Designs Layout & Editing has a function for creating split embroidery designs when the embroidery pattern being created is larger than the actual hoop size in order to provide space for fine positioning adjustments with the software.... are 10mm smaller than the embroidery hoop. For this example, we will use one of a design. Step 2 Creating the embroidery design For this example, select 120 × 170 mm (130 × 180 mm). Documents (My Documents)\PE-DESIGN NEXT\Tutorial\Tutorial_10 Step 1...

Users Manual - English
Page 169
...Creating the embroidery design For this example, an embroidery pattern provided with a section overlapping (1) and (2). a Note: The embroidery pattern is split with this section uses satin stitches, the stitch may change when the pattern is split. If the pattern arranged in this software will be... Jumbo Frame 3 The Design Page appears on the screen as shown below . 1 First, import a pattern. Step 3 Checking a divided pattern Before starting to fill stitches. Documents (My Document)\PE-DESIGN NEXT\Tutorial\Tutorial_10 Then, select the file ChristmasTree.pes and import it is ...
...Creating the embroidery design For this example, an embroidery pattern provided with a section overlapping (1) and (2). a Note: The embroidery pattern is split with this section uses satin stitches, the stitch may change when the pattern is split. If the pattern arranged in this software will be... Jumbo Frame 3 The Design Page appears on the screen as shown below . 1 First, import a pattern. Step 3 Checking a divided pattern Before starting to fill stitches. Documents (My Document)\PE-DESIGN NEXT\Tutorial\Tutorial_10 Then, select the file ChristmasTree.pes and import it is ...


