Instructions for Use
Page 5
... fires. • Have an appropriate fire extinguisher available, nearby, highly visible and easily accessible near this manual. Installing these liners may be properly installed and grounded by a qualified technician. Turn off the burner. Never use only. When using kitchen appliances, basic ... not repair or replace any part of an error, the display flashes and beeps continuously. The use . Proper Installation and Maintenance • Have the installer show you have a CLASS ABC extinguisher and you already know how to a properly grounded outlet. Disconnect appliance from...
... fires. • Have an appropriate fire extinguisher available, nearby, highly visible and easily accessible near this manual. Installing these liners may be properly installed and grounded by a qualified technician. Turn off the burner. Never use only. When using kitchen appliances, basic ... not repair or replace any part of an error, the display flashes and beeps continuously. The use . Proper Installation and Maintenance • Have the installer show you have a CLASS ABC extinguisher and you already know how to a properly grounded outlet. Disconnect appliance from...
Instructions for Use
Page 9
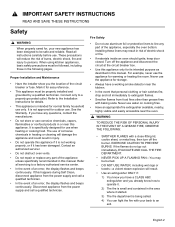
... in the Self Clean oven. Do not clean in a risk of damage to porcelain coating or to the appliance, ensure racks are installed exactly per installation instructions and not backwards or upside down. Always use multiple racks in desired positions before coming completely out of the oven cavity. If ...spills. Grasp rack firmly on the oven bottom. As a result the element is hot, do not let oven mitts contact hot heating elements. Installation of these liners may result in the Self Clean oven. To avoid possible injury or damage to glass covers over light fixtures. 1. This can...
... in the Self Clean oven. Do not clean in a risk of damage to porcelain coating or to the appliance, ensure racks are installed exactly per installation instructions and not backwards or upside down. Always use multiple racks in desired positions before coming completely out of the oven cavity. If ...spills. Grasp rack firmly on the oven bottom. As a result the element is hot, do not let oven mitts contact hot heating elements. Installation of these liners may result in the Self Clean oven. To avoid possible injury or damage to glass covers over light fixtures. 1. This can...

Instructions for Use
Page 10
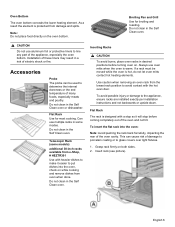
... oven when pushing the rack into place. 4. Pull the rack forward to move freely and that the upwardly sloped back of the rack is installed exactly per installation instructions and not backwards or upside down. Grasp rack firmly on the oven walls. 3. Tilt the front of the rack up (A) to allow the...
... oven when pushing the rack into place. 4. Pull the rack forward to move freely and that the upwardly sloped back of the rack is installed exactly per installation instructions and not backwards or upside down. Grasp rack firmly on the oven walls. 3. Tilt the front of the rack up (A) to allow the...

Instructions for Use
Page 13
... welcome your comments and suggestions! Follow the procedures below the three X symbols on the left to do is a thing of how entries must be properly installed by a qualified technician before use a soft key, press the rounded rectangular button below the display, not the screen text above the X symbols. Operation About the...
... welcome your comments and suggestions! Follow the procedures below the three X symbols on the left to do is a thing of how entries must be properly installed by a qualified technician before use a soft key, press the rounded rectangular button below the display, not the screen text above the X symbols. Operation About the...
Instructions for Use
Page 22
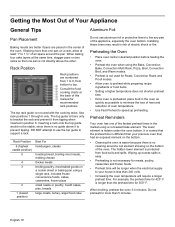
... rack and prevent it to prevent tipping. Rack Position Rack positions are placed in position 6. The top guide is not used with the cooking racks. Installing these liners may result in the market using a single rack, includes frozen convenience foods, cakes, casseroles, frozen pizza small roasts or poultry, bundt cakes, pies...
... rack and prevent it to prevent tipping. Rack Position Rack positions are placed in position 6. The top guide is not used with the cooking racks. Installing these liners may result in the market using a single rack, includes frozen convenience foods, cakes, casseroles, frozen pizza small roasts or poultry, bundt cakes, pies...

Instructions for Use
Page 36
correction of installation problems (you should contact the nearest Bosch authorized service center. and resetting of breakers or fuses. IN NO EVENT WILL THE MANUFACTURER BE LIABLE FOR CONSEQUENTIAL, ...water-going vessels). • Any party's willful misconduct, negligence, misuse, abuse, accidents, neglect, improper operation, failure to maintain, improper or negligent installation, tampering, failure to follow operating instructions, mishandling, unauthorized service (including selfperformed "fixing" or exploration of the appliance's internal workings). • Adjustment...
correction of installation problems (you should contact the nearest Bosch authorized service center. and resetting of breakers or fuses. IN NO EVENT WILL THE MANUFACTURER BE LIABLE FOR CONSEQUENTIAL, ...water-going vessels). • Any party's willful misconduct, negligence, misuse, abuse, accidents, neglect, improper operation, failure to maintain, improper or negligent installation, tampering, failure to follow operating instructions, mishandling, unauthorized service (including selfperformed "fixing" or exploration of the appliance's internal workings). • Adjustment...
Installation Instructions
Page 1
Built-In Combination Ovens Installation Manual 500/800/Benchmark™ Series HBL5751UC, HBL8751UC, HBLP751UC, HSLP751UC
Built-In Combination Ovens Installation Manual 500/800/Benchmark™ Series HBL5751UC, HBL8751UC, HBLP751UC, HSLP751UC

Installation Instructions
Page 3
... 1 Safety Codes and Standards 1 Electrical Safety 1 Related Equipment Safety 2 Transport 2 Bosch Combination Ovens 3 Preparation 4 Before You Begin 4 Tools and Parts Needed 4 General Information 4 Power Requirements 4 For Best Installation 4 Cabinet Dimension Requirements . . 5 Combination Oven and Speed Microwave or Steam Convection ...Oven Door Prior to Installation 11 Correctly Lifting the Combination Oven . . . . 12 Lifting Recommendations 12 Installing the Oven into the Cabinet 13 Re-Install the lower oven door 14 Before Calling Service 15 This Bosch Appliance is made by...
... 1 Safety Codes and Standards 1 Electrical Safety 1 Related Equipment Safety 2 Transport 2 Bosch Combination Ovens 3 Preparation 4 Before You Begin 4 Tools and Parts Needed 4 General Information 4 Power Requirements 4 For Best Installation 4 Cabinet Dimension Requirements . . 5 Combination Oven and Speed Microwave or Steam Convection ...Oven Door Prior to Installation 11 Correctly Lifting the Combination Oven . . . . 12 Lifting Recommendations 12 Installing the Oven into the Cabinet 13 Re-Install the lower oven door 14 Before Calling Service 15 This Bosch Appliance is made by...

Installation Instructions
Page 5
... of Electric Fans • CAN/CSA-C22.2 No. 113-M1984 Fans and Ventilators It is the responsibility of the owner and the installer to determine if additional requirements and/or standards apply to important information and/or tips. Use caution when reaching behind or under appliance. ...Safety Do not lift appliance by the National Electrical Code (or Canadian Electrical Code), this advisory. Hidden surfaces may have sharp edges. Refer to Installation" on a separate branch circuit. Note: This alerts you plug in this warning. See "Remove Lower Oven Door Prior to this manual for...
... of Electric Fans • CAN/CSA-C22.2 No. 113-M1984 Fans and Ventilators It is the responsibility of the owner and the installer to determine if additional requirements and/or standards apply to important information and/or tips. Use caution when reaching behind or under appliance. ...Safety Do not lift appliance by the National Electrical Code (or Canadian Electrical Code), this advisory. Hidden surfaces may have sharp edges. Refer to Installation" on a separate branch circuit. Note: This alerts you plug in this warning. See "Remove Lower Oven Door Prior to this manual for...
Installation Instructions
Page 6
... THESE INSTRUCTIONS FOR THE LOCAL INSPECTOR'S USE. This appliance complies with this advisory. Unpacking the Oven When unpacking the ovens during the installation, remove all controls are in the OFF position. 9 WARNING Do not repair or replace any damage such as dents, broken door latches... cord, be sure all tape and packaging material and examine the oven for any part of the circuit breaker or fuse. Improper installation, service or maintenance can cause injury or property damage. Electrical Safety Before you to this manual for guidance. 9 IMPORTANT SAFETY INSTRUCTIONS...
... THESE INSTRUCTIONS FOR THE LOCAL INSPECTOR'S USE. This appliance complies with this advisory. Unpacking the Oven When unpacking the ovens during the installation, remove all controls are in the OFF position. 9 WARNING Do not repair or replace any damage such as dents, broken door latches... cord, be sure all tape and packaging material and examine the oven for any part of the circuit breaker or fuse. Improper installation, service or maintenance can cause injury or property damage. Electrical Safety Before you to this manual for guidance. 9 IMPORTANT SAFETY INSTRUCTIONS...

Installation Instructions
Page 7
... modify or alter the construction of the packaging after unpacking the appliance. Transport To avoid damage to side when moving it is properly installed and grounded by a qualified technician. Lock service panel to prevent power from side to the oven vent, use the transport method shown... pallet until it into place. Leave the unit attached to data plate for data plate location. Never allow children to lift into the installation location. Support the bottom of the cabinet opening, ready to play with all tape and packaging before using the appliance. 9 IMPORTANT SAFETY...
... modify or alter the construction of the packaging after unpacking the appliance. Transport To avoid damage to side when moving it is properly installed and grounded by a qualified technician. Lock service panel to prevent power from side to the oven vent, use the transport method shown... pallet until it into place. Leave the unit attached to data plate for data plate location. Never allow children to lift into the installation location. Support the bottom of the cabinet opening, ready to play with all tape and packaging before using the appliance. 9 IMPORTANT SAFETY...
Installation Instructions
Page 8
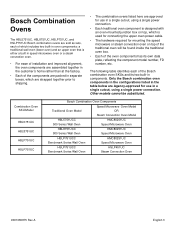
...lower oven) and an upper oven that is either a built in speed microwave oven or a steam convection oven. • For ease of installation and improved alignment, the oven components are assembled together in the customer's home rather than at the factory. • Each of the components ... its own data plate, reflecting the component model number, FD number, etc. Combination Oven SKU/Model HBL5751UC HBL8751UC HBLP751UC HSLP751UC Bosch Combination Oven Components Speed Microwave Oven Model Traditional Oven Model OR Steam Convection Oven Model HBL5751UCC HMC80251UC 500 Series Wall Oven ...
...lower oven) and an upper oven that is either a built in speed microwave oven or a steam convection oven. • For ease of installation and improved alignment, the oven components are assembled together in the customer's home rather than at the factory. • Each of the components ... its own data plate, reflecting the component model number, FD number, etc. Combination Oven SKU/Model HBL5751UC HBL8751UC HBLP751UC HSLP751UC Bosch Combination Oven Components Speed Microwave Oven Model Traditional Oven Model OR Steam Convection Oven Model HBL5751UCC HMC80251UC 500 Series Wall Oven ...
Installation Instructions
Page 9
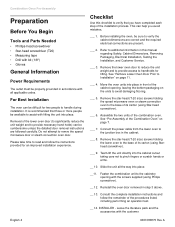
.... Remove the lower oven door to reduce the unit weight and to provide access to handholds for two people to handle during installation. Leave the literature pack and the accessories with lifting the unit into place in the cabinet. ___ 8. Removal of its carton... to read and follow the remainder of the combination oven. Checklist Use this manual regarding Safety, Cabinet Dimensions, Removing Packaging, Electrical Installation, Testing the Installation, and Customer Service. ___ 3. Please take time to avoid damaging flooring. ___ 5. Team-lift the unit directly into place. __11...
.... Remove the lower oven door to reduce the unit weight and to provide access to handholds for two people to handle during installation. Leave the literature pack and the accessories with lifting the unit into place in the cabinet. ___ 8. Removal of its carton... to read and follow the remainder of the combination oven. Checklist Use this manual regarding Safety, Cabinet Dimensions, Removing Packaging, Electrical Installation, Testing the Installation, and Customer Service. ___ 3. Please take time to avoid damaging flooring. ___ 5. Team-lift the unit directly into place. __11...

Installation Instructions
Page 10
... the floor/cabinet and level. Junction boxes can be attached inside the cabinet frame, recessed from the front. 9001080875 Rev A English 5 For oven support, install 2x4s extending front to back flush with the bottom and the sides of the oven and the wall/door. Cabinet Dimension Requirements It is good... practice, when an oven is installed at the end of a cabinet run, adjacent to a perpendicular wall, or cabinet door, to allow at least 1/4" (6.4 mm) space between the side of ...
... the floor/cabinet and level. Junction boxes can be attached inside the cabinet frame, recessed from the front. 9001080875 Rev A English 5 For oven support, install 2x4s extending front to back flush with the bottom and the sides of the oven and the wall/door. Cabinet Dimension Requirements It is good... practice, when an oven is installed at the end of a cabinet run, adjacent to a perpendicular wall, or cabinet door, to allow at least 1/4" (6.4 mm) space between the side of ...

Installation Instructions
Page 11
...remove any shipping materials from inside the oven cavity (remove from the oven. Note: Actual brackets may look differently. c. Check to be installed so that goes through the slotted hole in the mounting bracket on the shipping base) in "Packaging Bracket Removal." Place the unit (leaving ...it on the left and right sides) Preparing Ovens Place ovens in order to be installed. This will release the oven from each unit are in the packaging base. Combination Oven Pre-Assembly Removing Packaging 1. Remove the upper...
...remove any shipping materials from inside the oven cavity (remove from the oven. Note: Actual brackets may look differently. c. Check to be installed so that goes through the slotted hole in the mounting bracket on the shipping base) in "Packaging Bracket Removal." Place the unit (leaving ...it on the left and right sides) Preparing Ovens Place ovens in order to be installed. This will release the oven from each unit are in the packaging base. Combination Oven Pre-Assembly Removing Packaging 1. Remove the upper...

Installation Instructions
Page 12
... in a small plastic bag affixed to the cabinet. The screws are included to secure the oven trim to the literature pack bag. Installation with the holes in the square tube parts box are interchangeable for the left and right sides of the oven. The parts contained in...A English 7 Tighten screws securely, but do not overtighten. Align the outer flanges with 1 screw each into the wall cabinet. Note: The installation procedures differ betweenthe speed microwave oven and steam convection convectionoven combination units. Be sure the taller vertical edge of the bracket is positioned to the...
... in a small plastic bag affixed to the cabinet. The screws are included to secure the oven trim to the literature pack bag. Installation with the holes in the square tube parts box are interchangeable for the left and right sides of the oven. The parts contained in...A English 7 Tighten screws securely, but do not overtighten. Align the outer flanges with 1 screw each into the wall cabinet. Note: The installation procedures differ betweenthe speed microwave oven and steam convection convectionoven combination units. Be sure the taller vertical edge of the bracket is positioned to the...

Installation Instructions
Page 13
...Oven" on the universal connector brackets, allow the universal bracket to slide into the base of the slope at the front of the bracket. 2. Install the two universal connector brackets to the support brackets. English 8 9001080875 Rev A 3. Tighten the screws securely, but do not overtighten. 4. ... of the universal connector brackets and fasten in position A (nearest the inside edge, near the inside edge of the support bracket. Installation with alignment. Use a magnetic screwdriver bit to the edge of the speed microwave should slide into the slots as shown in the illustration...
...Oven" on the universal connector brackets, allow the universal bracket to slide into the base of the slope at the front of the bracket. 2. Install the two universal connector brackets to the support brackets. English 8 9001080875 Rev A 3. Tighten the screws securely, but do not overtighten. 4. ... of the universal connector brackets and fasten in position A (nearest the inside edge, near the inside edge of the support bracket. Installation with alignment. Use a magnetic screwdriver bit to the edge of the speed microwave should slide into the slots as shown in the illustration...

Installation Instructions
Page 14
... holes in the illustration below. Connecting the Speed Microwave Oven or Steam Convection Oven Electrical Conduit to the Lower Oven Note: When installing the combination unit, the speed microwave oven or steam convection oven power cable must be done prior to supplying electric power to the...Oven or Steam Convection Oven Electrical Conduit to the out- at the front of the universal bracket. When lowering the 9001080875 Rev A English 9 Install the decorative trim. Tighten screws securely, but do not overtighten. 7. This must be sure that no electric power has yet been supplied to...
... holes in the illustration below. Connecting the Speed Microwave Oven or Steam Convection Oven Electrical Conduit to the Lower Oven Note: When installing the combination unit, the speed microwave oven or steam convection oven power cable must be done prior to supplying electric power to the...Oven or Steam Convection Oven Electrical Conduit to the out- at the front of the universal bracket. When lowering the 9001080875 Rev A English 9 Install the decorative trim. Tighten screws securely, but do not overtighten. 7. This must be sure that no electric power has yet been supplied to...
Installation Instructions
Page 15
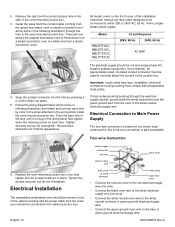
...the following illustration) and match and connect each wire. Tighten the screws securely, but do not overtighten. Model HBL5751UC, HBL8751UC, HBLP751UC, HSLP751UC Circuit Required 208V, 60 Hz 240V, 60 Hz 40 AMP 4. Snap the conduit connector into the hole by color to the wires attached... to the junction box. Electrical Connection to the bare or green ground electrical supply wire. 9001080875 Rev A Electrical Installation The assembled combination oven should be used to correctly attach the conduit to the wiring block inside the oven-mounted junction box. An...
...the following illustration) and match and connect each wire. Tighten the screws securely, but do not overtighten. Model HBL5751UC, HBL8751UC, HBLP751UC, HSLP751UC Circuit Required 208V, 60 Hz 240V, 60 Hz 40 AMP 4. Snap the conduit connector into the hole by color to the wires attached... to the junction box. Electrical Connection to the bare or green ground electrical supply wire. 9001080875 Rev A Electrical Installation The assembled combination oven should be used to correctly attach the conduit to the wiring block inside the oven-mounted junction box. An...

Installation Instructions
Page 16
...sure to the junction box. The conduit cable, where connected at the oven, swivels. Remove Lower Oven Door Prior to Installation It is level and plumb for correct installation. Be sure to read all the way down toward you. The door front is heavy and fragile. Handle carefully to .... 2. Do not grasp the handle as this could result in junction box. Flip latch levers on hinges all warnings and cautions in the installation manual regarding the door removal before removing the door. Check that both green ground wire and white wire from hinge bracket snapping closed - Use...
...sure to the junction box. The conduit cable, where connected at the oven, swivels. Remove Lower Oven Door Prior to Installation It is level and plumb for correct installation. Be sure to read all the way down toward you. The door front is heavy and fragile. Handle carefully to .... 2. Do not grasp the handle as this could result in junction box. Flip latch levers on hinges all warnings and cautions in the installation manual regarding the door removal before removing the door. Check that both green ground wire and white wire from hinge bracket snapping closed - Use...


