
Use & Care Manual (all languages)
Page 37
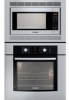
Model No. FD No./No FD Date of Purchase Specifications Power Source Power Consumption Cooking Power* Outside Dimensions (H x W x D) Oven Cavity Dimensions (H x W x D) Operating Frequency Net Weight Trim Kit 27" Trim Kit 30" * IEC Test procedure Specifications subject to change without notice. 120 V, 60 Hz 1,460 W 1,200 W 14" x 23 7/8" x 19 7/16" 356...The serial number of this book as a permanent record of the control panel. You should note the model number and the FD No./No FD of this oven in the space provided and retain this product may be found on the left side of your purchase for...
Model No. FD No./No FD Date of Purchase Specifications Power Source Power Consumption Cooking Power* Outside Dimensions (H x W x D) Oven Cavity Dimensions (H x W x D) Operating Frequency Net Weight Trim Kit 27" Trim Kit 30" * IEC Test procedure Specifications subject to change without notice. 120 V, 60 Hz 1,460 W 1,200 W 14" x 23 7/8" x 19 7/16" 356...The serial number of this book as a permanent record of the control panel. You should note the model number and the FD No./No FD of this oven in the space provided and retain this product may be found on the left side of your purchase for...
Installation Instructions
Page 11
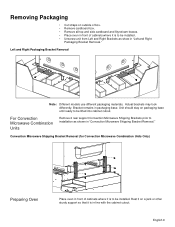
...installation as show in "Left and Right Packaging Bracket Removal." Left and Right Packaging Bracket Removal Note: Different models use different packaging materials. Convection Microwave Shipping Bracket Removal (for Convection Microwave Combination Units Only) Preparing Oven Place oven in packaging base. Unit should stay on a jack or other sturdy support so that it is in ... Packaging • Cut straps on outside of box. • Remove cardboard box. • Remove all top and side cardboard and Styrofoam braces. • Place oven in front of cabinets where it is to be installed.
...installation as show in "Left and Right Packaging Bracket Removal." Left and Right Packaging Bracket Removal Note: Different models use different packaging materials. Convection Microwave Shipping Bracket Removal (for Convection Microwave Combination Units Only) Preparing Oven Place oven in packaging base. Unit should stay on a jack or other sturdy support so that it is in ... Packaging • Cut straps on outside of box. • Remove cardboard box. • Remove all top and side cardboard and Styrofoam braces. • Place oven in front of cabinets where it is to be installed.

Installation Instructions
Page 12
.../240V AC, 60 Hz, 4 wire, single-phase power supply. Install a suitable conduit box (not furnished). Installation Electrical Installation All model ovens on the front cover are dual rated, designed to be connected to local electrical codes for de-rating requirements. installation, electrical connections and... both the white neutral wire and the bare ground wire from the oven to the junction box. Model Circuit Required 208V, 60 Hz 240V, 60 Hz HBN33, HBL33 25 AMP 30 AMP HBN34, HBL34, HBN54, HBL54 HBL85 30 AMP 30 AMP HBN35, HBL35, HBN56, HBL56, HBL57, HBL8650, HBL8750 40 or...
.../240V AC, 60 Hz, 4 wire, single-phase power supply. Install a suitable conduit box (not furnished). Installation Electrical Installation All model ovens on the front cover are dual rated, designed to be connected to local electrical codes for de-rating requirements. installation, electrical connections and... both the white neutral wire and the bare ground wire from the oven to the junction box. Model Circuit Required 208V, 60 Hz 240V, 60 Hz HBN33, HBL33 25 AMP 30 AMP HBN34, HBL34, HBN54, HBL54 HBL85 30 AMP 30 AMP HBN35, HBL35, HBN56, HBL56, HBL57, HBL8650, HBL8750 40 or...
Installation Instructions
Page 16
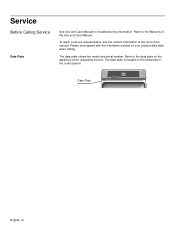
Refer to the data plate on your product data plate when calling. Refer to the Warranty in the Use and Care Manual. The data plate shows the model and serial number. Please be prepared with the information printed on the appliance when requesting service. Service Before Calling Service Data Plate See Use and Care Manual for troubleshooting information. To reach a service representative, see the contact information at the front of the control panel: Data Plate English 14 The data plate is located on the underside of the manual.
Refer to the data plate on your product data plate when calling. Refer to the Warranty in the Use and Care Manual. The data plate shows the model and serial number. Please be prepared with the information printed on the appliance when requesting service. Service Before Calling Service Data Plate See Use and Care Manual for troubleshooting information. To reach a service representative, see the contact information at the front of the control panel: Data Plate English 14 The data plate is located on the underside of the manual.
Use & Care Manual
Page 1
Use and Care Manual Built-In Ovens Models: HBL54, HBN54, HBL56, HBN56, HBL57
Use and Care Manual Built-In Ovens Models: HBL54, HBN54, HBL56, HBN56, HBL57
Use & Care Manual
Page 12
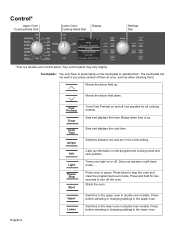
...:12 pm Broil Convection Bake Oven 200° Preheating 12:30 pm Settings Dial Fast Preheat Timer Cook Time am/pm Settings Info Upper Light Lower Pause Stop Start *This is up. Switches to the lower oven in the lower oven. Press before selecting or changing settings in double oven models. Your control panel may vary...
...:12 pm Broil Convection Bake Oven 200° Preheating 12:30 pm Settings Dial Fast Preheat Timer Cook Time am/pm Settings Info Upper Light Lower Pause Stop Start *This is up. Switches to the lower oven in the lower oven. Press before selecting or changing settings in double oven models. Your control panel may vary...
Use & Care Manual
Page 17
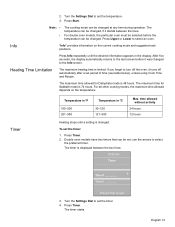
...Heating Time Limitation The maximum heating time is 48 hours. The maximum time allowed for Sabbath mode is 74 hours. To set the timer. 4. Double oven models have two timers that can be set: use the arrows to turn off automatically after a set the temperature. 3. The timer is changed , if... it stands between the two lines: 10:30 am Timer Timer1 __:__:__ +- Turn the Settings Dial to select an oven. The temperature can be changed . Press Info repeatedly until a setting is displayed between the lines. time allowed ...
...Heating Time Limitation The maximum heating time is 48 hours. The maximum time allowed for Sabbath mode is 74 hours. To set the timer. 4. Double oven models have two timers that can be set: use the arrows to turn off automatically after a set the temperature. 3. The timer is changed , if... it stands between the two lines: 10:30 am Timer Timer1 __:__:__ +- Turn the Settings Dial to select an oven. The temperature can be changed . Press Info repeatedly until a setting is displayed between the lines. time allowed ...
Use & Care Manual
Page 18
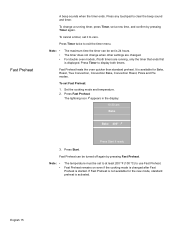
Fast Preheat A beep sounds when the timer ends. Note The maximum time the timer can be turned off again by pressing Timer again. For double oven models, if both timers. Press Timer to zero. Set the cooking mode and temperature. 2. Fast Preheat can be set to at least 200 ºF ...Roast, True Convection, Convection Bake, Convection Roast, Pizza and Pie modes. It is activated. The lightning icon ã appears in the display: 10:30 am Bake Bake 400° ã Press Start if ready 3. Press any touchpad to exit the timer menu. To change when other settings are ...
Fast Preheat A beep sounds when the timer ends. Note The maximum time the timer can be turned off again by pressing Timer again. For double oven models, if both timers. Press Timer to zero. Set the cooking mode and temperature. 2. Fast Preheat can be set to at least 200 ºF ...Roast, True Convection, Convection Bake, Convection Roast, Pizza and Pie modes. It is activated. The lightning icon ã appears in the display: 10:30 am Bake Bake 400° ã Press Start if ready 3. Press any touchpad to exit the timer menu. To change when other settings are ...
Use & Care Manual
Page 25
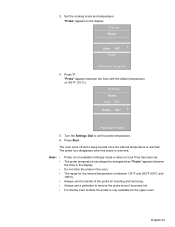
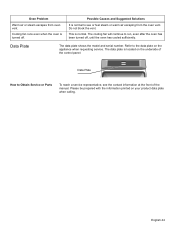
... 200°F (60°C and 100°C). English 22 "Probe" appears in the display. "Probe" appears between the lines in the display: 10:30 am Roast Oven 350° Probe 160° +- Press Start if ready 5. Turn the Settings Dial to remove the probe since it becomes hot. Note: • ... "Probe" appears between the lines with the default temperature of the probe for the upper oven. Always use a potholder to set the probe temperature. 6. For double oven models: the probe is not available in the oven. Do not store the probe in Recipe mode or when a Cook Time has been set...
... 200°F (60°C and 100°C). English 22 "Probe" appears in the display. "Probe" appears between the lines in the display: 10:30 am Roast Oven 350° Probe 160° +- Press Start if ready 5. Turn the Settings Dial to remove the probe since it becomes hot. Note: • ... "Probe" appears between the lines with the default temperature of the probe for the upper oven. Always use a potholder to set the probe temperature. 6. For double oven models: the probe is not available in the oven. Do not store the probe in Recipe mode or when a Cook Time has been set...
Use & Care Manual
Page 26
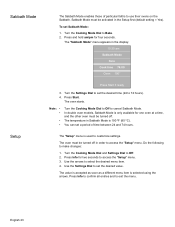
... to access the "Setup" menu. 3. The temperature in Sabbath Mode is only available for one oven at a time, and the other oven must be turned off in order to use their ovens on the Sabbath. English 23 In double oven models, Sabbath Mode is 190 ºF (85 ºC). The value is accepted as soon as... those of time between 24 and 74 hours. The "Setup" menu is selected using the arrows. Sabbath Mode must be activated in the display: 10:30 am /pm for two seconds to cancel Sabbath Mode. Use the arrows to customize settings. To set the desired time (24 to Bake. 2. The...
... to access the "Setup" menu. 3. The temperature in Sabbath Mode is only available for one oven at a time, and the other oven must be turned off in order to use their ovens on the Sabbath. English 23 In double oven models, Sabbath Mode is 190 ºF (85 ºC). The value is accepted as soon as... those of time between 24 and 74 hours. The "Setup" menu is selected using the arrows. Sabbath Mode must be activated in the display: 10:30 am /pm for two seconds to cancel Sabbath Mode. Use the arrows to customize settings. To set the desired time (24 to Bake. 2. The...
Use & Care Manual
Page 42
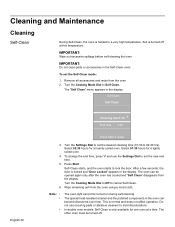
...before self-cleaning the oven. Remove all accessories and racks from the oven using a moist cloth. The oven can become discolored over time. Do not use the Settings Dial to lock the door. IMPORTANT: Do not clean parts or accessories in the display. In double oven models: Self Clean is burned... off . This is locked and "Door Locked" appears in the Self-Clean oven. Turn the Cooking Mode Dial to Off to Self Clean. The other oven must be turned off at a time. Select 01:30 hours for a lightly soiled oven. 4. Turn the...
...before self-cleaning the oven. Remove all accessories and racks from the oven using a moist cloth. The oven can become discolored over time. Do not use the Settings Dial to lock the door. IMPORTANT: Do not clean parts or accessories in the display. In double oven models: Self Clean is burned... off . This is locked and "Door Locked" appears in the Self-Clean oven. Turn the Cooking Mode Dial to Off to Self Clean. The other oven must be turned off at a time. Select 01:30 hours for a lightly soiled oven. 4. Turn the...
Use & Care Manual
Page 46
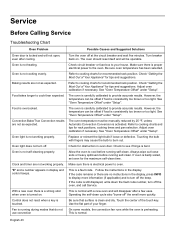
...fault code number, turn off . Make sure there is electrical power to cooking charts for recommended rack position. If the code is badly soiled, set oven for tips and suggestions. This is not heating. Operating the self-clean cycle also "burns-off" the smell more information (if applicable) and to ... before running self-clean. Be sure that do not use convection On some models, the convection fan runs while the oven is locked and will be offset if food is overcooked. With a new oven there is a strong odor when oven is clean and dry. If the code remains or there are not as...
...fault code number, turn off . Make sure there is electrical power to cooking charts for recommended rack position. If the code is badly soiled, set oven for tips and suggestions. This is not heating. Operating the self-clean cycle also "burns-off" the smell more information (if applicable) and to ... before running self-clean. Be sure that do not use convection On some models, the convection fan runs while the oven is locked and will be offset if food is overcooked. With a new oven there is a strong odor when oven is clean and dry. If the code remains or there are not as...
Use & Care Manual
Page 47
...see the contact information at the front of the control panel: Data Plate How to run, even after the oven has been turned off . Oven Problem Warm air or steam escapes from the oven vent. This is located on the underside of the manual. The cooling fan will continue to Obtain Service or.... Do not block the vent. The data plate is normal. English 44 Data Plate The data plate shows the model and serial number. Cooling fan runs even when the oven is normal to the data plate on your product data plate when calling. Possible Causes and Suggested Solutions It is turned off...
...see the contact information at the front of the control panel: Data Plate How to run, even after the oven has been turned off . Oven Problem Warm air or steam escapes from the oven vent. This is located on the underside of the manual. The cooling fan will continue to Obtain Service or.... Do not block the vent. The data plate is normal. English 44 Data Plate The data plate shows the model and serial number. Cooling fan runs even when the oven is normal to the data plate on your product data plate when calling. Possible Causes and Suggested Solutions It is turned off...
Use & Care Manual
Page 48
...you (subject to certain limitations stated herein) if your Product (upgraded models may be fully liable and responsible for Bosch to return your normal, household (non-commercial) use an un-authorized servicer; Bosch will replace your Product proves to have been manufactured with a defect...stalled, tolled, extended, or suspended, for an additional charge). Out of Warranty Product Bosch is ", or previously returned model), and not for repairs or work on Bosch products, and who possess, in Bosch's opinion, a superior reputation for normal household purposes. • New at its ...
...you (subject to certain limitations stated herein) if your Product (upgraded models may be fully liable and responsible for Bosch to return your normal, household (non-commercial) use an un-authorized servicer; Bosch will replace your Product proves to have been manufactured with a defect...stalled, tolled, extended, or suspended, for an additional charge). Out of Warranty Product Bosch is ", or previously returned model), and not for repairs or work on Bosch products, and who possess, in Bosch's opinion, a superior reputation for normal household purposes. • New at its ...


