
Installation Instructions
Page 3
... Important Safety Instructions READ AND SAVE THESE INSTRUCTIONS Appliance Handling Safety Safety Codes and Standards Electric Safety WARNING: If the information in this manual for guidance. Remove the door for data plate location. Lock service panel to data plate for more of the following Standards: •...• CAN/CSA-C22.2 No. 61-M89 Household Cooking Ranges It is the responsibility of the appliance unless specifically recommended in the manuals. Unit is not followed exactly, fire or shock may have sharp edges. If required by a qualified technician. Refer to move. ...
... Important Safety Instructions READ AND SAVE THESE INSTRUCTIONS Appliance Handling Safety Safety Codes and Standards Electric Safety WARNING: If the information in this manual for guidance. Remove the door for data plate location. Lock service panel to data plate for more of the following Standards: •...• CAN/CSA-C22.2 No. 61-M89 Household Cooking Ranges It is the responsibility of the appliance unless specifically recommended in the manuals. Unit is not followed exactly, fire or shock may have sharp edges. If required by a qualified technician. Refer to move. ...

Installation Instructions
Page 15
... single ovens, 4 screws for assistance. Close and open door slowly to crimp flexible conduit between oven and cabinet back wall. Turn on and the oven begins to 208 volts. 3. See the Use and Care Manual for detailed operation instructions. 4. Confirm that the oven light... comes on power at junction box using a volt meter. English 13 Testing Operation 1. Test the oven mode. If installing a double oven, test the second oven as explained above, contact Bosch service for double/combo ovens) To replace the oven...
... single ovens, 4 screws for assistance. Close and open door slowly to crimp flexible conduit between oven and cabinet back wall. Turn on and the oven begins to 208 volts. 3. See the Use and Care Manual for detailed operation instructions. 4. Confirm that the oven light... comes on power at junction box using a volt meter. English 13 Testing Operation 1. Test the oven mode. If installing a double oven, test the second oven as explained above, contact Bosch service for double/combo ovens) To replace the oven...
Installation Instructions
Page 16
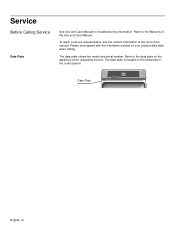
Refer to the Warranty in the Use and Care Manual. Refer to the data plate on your product data plate when calling. Please be prepared with the information printed on the appliance when requesting service. The data plate shows the model and serial number. Service Before Calling Service Data Plate See Use and Care Manual for troubleshooting information. To reach a service representative, see the contact information at the front of the control panel: Data Plate English 14 The data plate is located on the underside of the manual.
Refer to the Warranty in the Use and Care Manual. Refer to the data plate on your product data plate when calling. Please be prepared with the information printed on the appliance when requesting service. The data plate shows the model and serial number. Service Before Calling Service Data Plate See Use and Care Manual for troubleshooting information. To reach a service representative, see the contact information at the front of the control panel: Data Plate English 14 The data plate is located on the underside of the manual.

Use & Care Manual
Page 1
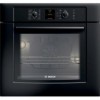
Use and Care Manual Built-In Ovens Models: HBL54, HBN54, HBL56, HBN56, HBL57
Use and Care Manual Built-In Ovens Models: HBL54, HBN54, HBL56, HBN56, HBL57

Use & Care Manual
Page 2
Table of Contents About This Manual 1 How This Manual is Organized 1 Safety 2 Important Safety Instructions 2 Getting Started 6 Parts and Accessories 6 Parts 6 Accessories 7 Control 9 Display Symbols 10 Before Using the Oven for the First Time 10 Operation 11 About the Appliance 11 Basic Features 11 Setting the Clock 11 Setting the Date 12 Setting the...
Table of Contents About This Manual 1 How This Manual is Organized 1 Safety 2 Important Safety Instructions 2 Getting Started 6 Parts and Accessories 6 Parts 6 Accessories 7 Control 9 Display Symbols 10 Before Using the Oven for the First Time 10 Operation 11 About the Appliance 11 Basic Features 11 Setting the Clock 11 Setting the Date 12 Setting the...

Use & Care Manual
Page 4
...systematically get the most out of your new oven by -step instructions on how to operate your oven. • "Getting Started" introduces you to the oven components and features. • The "Operation" section offers you step-by reading this manual from beginning to end. This section also...important safety instructions in the "Safety" section. English 1 About This Manual How This Manual is Organized You can find a list of many common foods with the appropriate oven mode, temperature, rack position and bake time. The manual consists of the following sections: • The "Safety" section ...
...systematically get the most out of your new oven by -step instructions on how to operate your oven. • "Getting Started" introduces you to the oven components and features. • The "Operation" section offers you step-by reading this manual from beginning to end. This section also...important safety instructions in the "Safety" section. English 1 About This Manual How This Manual is Organized You can find a list of many common foods with the appropriate oven mode, temperature, rack position and bake time. The manual consists of the following sections: • The "Safety" section ...

Use & Care Manual
Page 5
...safe and reliable. Do not operate this appliance. Refer all instructions carefully before use . If materials inside an oven should ignite, keep door closed. English 2 Safety m Important Safety Instructions READ AND SAVE THESE INSTRUCTIONS m WARNING...: When properly cared for details. It is specifically designed for outdoor use . Do not obstruct oven vents. These precautions will damage the appliance and could result in this happens during self-clean, disconnect appliance from.... Read all servicing to a properly grounded outlet. If this manual.
...safe and reliable. Do not operate this appliance. Refer all instructions carefully before use . If materials inside an oven should ignite, keep door closed. English 2 Safety m Important Safety Instructions READ AND SAVE THESE INSTRUCTIONS m WARNING...: When properly cared for details. It is specifically designed for outdoor use . Do not obstruct oven vents. These precautions will damage the appliance and could result in this happens during self-clean, disconnect appliance from.... Read all servicing to a properly grounded outlet. If this manual.

Use & Care Manual
Page 6
...let hot air and/or steam escape. Smother flames from food fires other flammable materials contact heating elements or interior surfaces of oven until they are dark in this manual. Other surfaces of the appliance may be burned. • DO NOT USE WATER, including wet rags or towels-a violent... food containers. Build-up of the opening the appliance. Always have a CLASS ABC extinguisher, and you have a working smoke detector near the oven. If the flames do not touch, or let clothing, potholders, or other than grease fires with your face clear of pressure may be hot...
...let hot air and/or steam escape. Smother flames from food fires other flammable materials contact heating elements or interior surfaces of oven until they are dark in this manual. Other surfaces of the appliance may be burned. • DO NOT USE WATER, including wet rags or towels-a violent... food containers. Build-up of the opening the appliance. Always have a CLASS ABC extinguisher, and you have a working smoke detector near the oven. If the flames do not touch, or let clothing, potholders, or other than grease fires with your face clear of pressure may be hot...
Use & Care Manual
Page 7
...an appliance, especially a door, warming drawer or storage drawer. Do not allow anyone to ensure that they are instructed in use this manual. Operating the unit according to use . This can cause burns from steam. Do not clean the appliance while it does not hang...Always use a towel or other reproductive harm, and requires businesses to warn customers of potential exposure to children should not be moved while oven is still hot. English 4 Do not use dry potholders. Children climbing on the backsplash. Contact service. CAUTION: Items of formaldehyde during ...
...an appliance, especially a door, warming drawer or storage drawer. Do not allow anyone to ensure that they are instructed in use this manual. Operating the unit according to use . This can cause burns from steam. Do not clean the appliance while it does not hang...Always use a towel or other reproductive harm, and requires businesses to warn customers of potential exposure to children should not be moved while oven is still hot. English 4 Do not use dry potholders. Children climbing on the backsplash. Contact service. CAUTION: Items of formaldehyde during ...
Use & Care Manual
Page 13
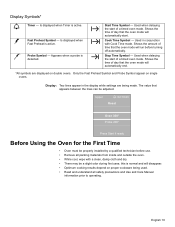
...Press Start if ready Before Using the Oven for the First Time • Oven must be properly installed by a qualified technician before turning off automatically. English 10 Start Time Symbol - Used in the display while settings are displayed on single ovens. Used when delaying the start . Shows... the amount of a timed oven mode. Appears when a probe is normal and will automatically start of time that the oven mode will run before use. • Remove all safety precautions and Use and Care Manual information prior...
...Press Start if ready Before Using the Oven for the First Time • Oven must be properly installed by a qualified technician before turning off automatically. English 10 Start Time Symbol - Used in the display while settings are displayed on single ovens. Used when delaying the start . Shows... the amount of a timed oven mode. Appears when a probe is normal and will automatically start of time that the oven mode will run before use. • Remove all safety precautions and Use and Care Manual information prior...
Use & Care Manual
Page 14
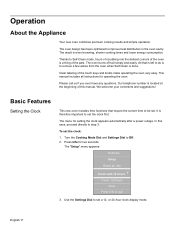
...suggestions! The menu for two seconds. To set a 12- The "Setup" menu appears: 10:30 am Setup Reset all instructions for operating the oven. Clock: 12:00 pm ...more... The oven burns off soil simply and easily. It is a thing of the touch keys and knobs make ...energy consumption. Press Info for setting the clock appears automatically after a power outage. Operation About the Appliance Your new oven combines premium cooking results and simple operation. This manual includes all : No Clock with 12 hours +- Please call us if you ever have any questions. Use the...
...suggestions! The menu for two seconds. To set a 12- The "Setup" menu appears: 10:30 am Setup Reset all instructions for operating the oven. Clock: 12:00 pm ...more... The oven burns off soil simply and easily. It is a thing of the touch keys and knobs make ...energy consumption. Press Info for setting the clock appears automatically after a power outage. Operation About the Appliance Your new oven combines premium cooking results and simple operation. This manual includes all : No Clock with 12 hours +- Please call us if you ever have any questions. Use the...
Use & Care Manual
Page 21
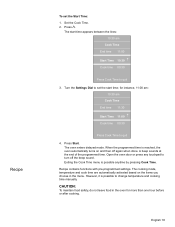
.... Turn the Settings Dial to quit 3. The start time appears between the lines: 10:30 am Cook Time End time 11:30 Start Time 11:00 +Cook time 00:30 Press Cook Time to change temperature and cooking time manually. Exiting the Cook Time menu is possible to quit 4. However, it is possible anytime... of the programmed time. Recipe contains functions with pre-programmed settings. CAUTION: To maintain food safety, do not leave food in the menu. Open the oven door or press any touchpad to turn off again when done. Recipe To set the start time; Set the Cook Time. 2.
.... Turn the Settings Dial to quit 3. The start time appears between the lines: 10:30 am Cook Time End time 11:30 Start Time 11:00 +Cook time 00:30 Press Cook Time to change temperature and cooking time manually. Exiting the Cook Time menu is possible to quit 4. However, it is possible anytime... of the programmed time. Recipe contains functions with pre-programmed settings. CAUTION: To maintain food safety, do not leave food in the menu. Open the oven door or press any touchpad to turn off again when done. Recipe To set the start time; Set the Cook Time. 2.
Use & Care Manual
Page 30
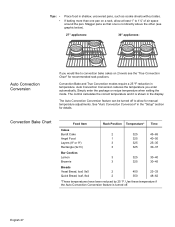
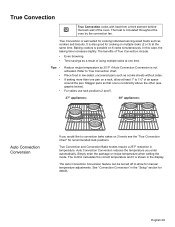
...the "True Convection Chart" for recommended rack positions. Stagger pans so that one pan on 2 levels see graphic below). 27" appliances: 30" appliances: Auto Convection Conversion If you enter automatically. English 27 Convection Bake and True Convection modes require a 25 ºF reduction in ...calculates the correct temperature and it is turned off to allow at least 1" to convection bake cakes on a rack, allow for manual temperature adjustments. Auto Convection Conversion reduces the temperature you would like to 1½" of air space around the pan. Use these ...
...the "True Convection Chart" for recommended rack positions. Stagger pans so that one pan on 2 levels see graphic below). 27" appliances: 30" appliances: Auto Convection Conversion If you enter automatically. English 27 Convection Bake and True Convection modes require a 25 ºF reduction in ...calculates the correct temperature and it is turned off to allow at least 1" to convection bake cakes on a rack, allow for manual temperature adjustments. Auto Convection Conversion reduces the temperature you would like to 1½" of air space around the pan. Use these ...
Use & Care Manual
Page 31
... slightly. For cakes use rack positions 2 and 5. 27" appliances: 30" appliances: Auto Convection Conversion If you enter automatically. The control calculates ... True Convection cooks with heat from a third element behind the back wall of using multiple racks at one is not activated. The benefits of... one pan on 6 racks simultaneously. The heat is circulated throughout the oven by 25 ºF if Auto Convection Conversion is not directly above the...individual serving-sized foods such as a result of the oven. It is possible on a rack, allow for details. True Convection and...
... slightly. For cakes use rack positions 2 and 5. 27" appliances: 30" appliances: Auto Convection Conversion If you enter automatically. The control calculates ... True Convection cooks with heat from a third element behind the back wall of using multiple racks at one is not activated. The benefits of... one pan on 6 racks simultaneously. The heat is circulated throughout the oven by 25 ºF if Auto Convection Conversion is not directly above the...individual serving-sized foods such as a result of the oven. It is possible on a rack, allow for details. True Convection and...
Use & Care Manual
Page 46
...of Your Appliance" for recommended rack position. Fan is running during modes that surface is clean and dry. English 43 Turn the oven off " the smell more information (if applicable) and to cooking charts for tips and suggestions. Refer to turn off . However, ...the temperature can be manually reduced by 25 ºF, unless Automatic Convection Conversion is activated. Make sure there is electrical power to the oven. Baking results are not working properly. The oven temperature must be offset if food is consistently too brown...
...of Your Appliance" for recommended rack position. Fan is running during modes that surface is clean and dry. English 43 Turn the oven off " the smell more information (if applicable) and to cooking charts for tips and suggestions. Refer to turn off . However, ...the temperature can be manually reduced by 25 ºF, unless Automatic Convection Conversion is activated. Make sure there is electrical power to the oven. Baking results are not working properly. The oven temperature must be offset if food is consistently too brown...
Use & Care Manual
Page 47
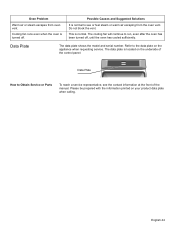
... plate is normal to run, even after the oven has been turned off . This is turned off , until the oven has cooled sufficiently. Oven Problem Warm air or steam escapes from the oven vent. Possible Causes and Suggested Solutions It is located on the underside of the manual. Please be prepared with the information printed...
... plate is normal to run, even after the oven has been turned off . This is turned off , until the oven has cooled sufficiently. Oven Problem Warm air or steam escapes from the oven vent. Possible Causes and Suggested Solutions It is located on the underside of the manual. Please be prepared with the information printed...


