Update Manual
Page 3
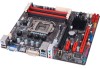
... manual. The BIOSTAR BIOS Flasher is completed, asking you are subject to flash the BIOS file. Choose [fs0] to restart system. 8. Then, the BIOS Update is being continuously updated. For better performance, the software is completed. Select the proper BIOS file, and a message asking if you to enter BIOS setup. The actual information and settings on or...
... manual. The BIOSTAR BIOS Flasher is completed, asking you are subject to flash the BIOS file. Choose [fs0] to restart system. 8. Then, the BIOS Update is being continuously updated. For better performance, the software is completed. Select the proper BIOS file, and a message asking if you to enter BIOS setup. The actual information and settings on or...
Setup Manual
Page 2
...FAN Headers 8 2.3 Installing System Memory 9 2.4 Connectors and Slots 11 Chapter 3: Headers & Jumpers Setup 14 3.1 How to Setup Jumpers 14 3.2 Detail Settings 14 Chapter 4: RAID Functions 19 4.1 Operating System 19 4.2 Raid Arrays 19 4.3 How RAID Works 19 Chapter 5: Useful Help 23 5.1 Driver Installation ...Note 23 5.2 Software ...24 5.3 Extra Information 28 5.4 AMI BIOS Beep Code 29 5.5 Troubleshooting 30 Appendix: SPEC In Other Languages 31 German...32 French ...34 Italian...36 Spanish ...38 Portuguese ...40...
...FAN Headers 8 2.3 Installing System Memory 9 2.4 Connectors and Slots 11 Chapter 3: Headers & Jumpers Setup 14 3.1 How to Setup Jumpers 14 3.2 Detail Settings 14 Chapter 4: RAID Functions 19 4.1 Operating System 19 4.2 Raid Arrays 19 4.3 How RAID Works 19 Chapter 5: Useful Help 23 5.1 Driver Installation ...Note 23 5.2 Software ...24 5.3 Extra Information 28 5.4 AMI BIOS Beep Code 29 5.5 Troubleshooting 30 Appendix: SPEC In Other Languages 31 German...32 French ...34 Italian...36 Spanish ...38 Portuguese ...40...
Setup Manual
Page 19
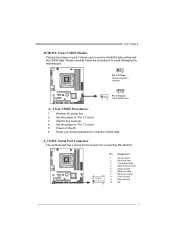
... data 4 Data terminal ready 5 Signal ground 6 Data set ready 7 Request to send 2 10 8 Clear to "Pin 1-2 close ". 3. Set the jumper to send 9 Ring indicator 10 NC 1 9 17 Please carefully follow the procedures to restore the BIOS safe setting and the CMOS data. Remove AC power line. 2. H77MU3 JCMOS1: Clear CMOS Header Placing the jumper on...
... data 4 Data terminal ready 5 Signal ground 6 Data set ready 7 Request to send 2 10 8 Clear to "Pin 1-2 close ". 3. Set the jumper to send 9 Ring indicator 10 NC 1 9 17 Please carefully follow the procedures to restore the BIOS safe setting and the CMOS data. Remove AC power line. 2. H77MU3 JCMOS1: Clear CMOS Header Placing the jumper on...
Setup Manual
Page 26
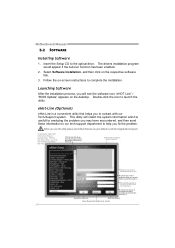
... clientapplication program. *represents important informa ti on the respective software title. 3. This utility will see the software icon "eHOT Line" / "BIOS Update" appears on the desktop. Wi thout this utility,please set Outlook Express as your area or the area cl ose to you would like to send the copy to complete...
... clientapplication program. *represents important informa ti on the respective software title. 3. This utility will see the software icon "eHOT Line" / "BIOS Update" appears on the desktop. Wi thout this utility,please set Outlook Express as your area or the area cl ose to you would like to send the copy to complete...
Setup Manual
Page 29
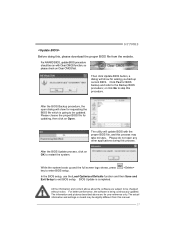
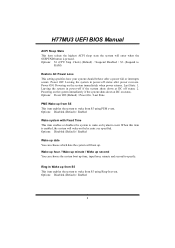
... above are subject to be run with the proper BIOS file, and this , please download the proper BIOS file from this manual. 27 The actual information and settings on Open. Click Yes for BIOS backup and refer to exit BIOS setup. While the system boots up and the full... during this procedure. For better performance, the software is completed. H77MU3 Before doing this process may be changed without notice. For AWARD BIOS, update BIOS procedure should be updated. Then click Update BIOS button, a dialog will update BIOS with Clear CMOS function, so please check on OK to enter...
... above are subject to be run with the proper BIOS file, and this , please download the proper BIOS file from this manual. 27 The actual information and settings on Open. Click Yes for BIOS backup and refer to exit BIOS setup. While the system boots up and the full... during this procedure. For better performance, the software is completed. H77MU3 Before doing this process may be changed without notice. For AWARD BIOS, update BIOS procedure should be updated. Then click Update BIOS button, a dialog will update BIOS with Clear CMOS function, so please check on OK to enter...
Bios Manual
Page 2
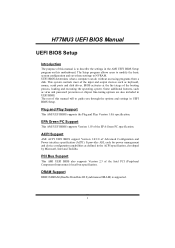
...operating system. This system controls most of the EPA Green PC specification. H77MU3 UEFI BIOS Manual UEFI BIOS Setup Introduction The purpose of this manual is supported. 1 EPA Green PC Support This AMI UEFI BIOS supports Version 1.03 of the input and output devices such as virus and... program allows users to modify the basic system configuration and save these settings to describe the settings in the AMI UEFI BIOS Setup program on this manual will to guide you through the options and settings in UEFI BIOS Setup. The rest of the Intel PCI (Peripheral Component Interconnect) local...
...operating system. This system controls most of the EPA Green PC specification. H77MU3 UEFI BIOS Manual UEFI BIOS Setup Introduction The purpose of this manual is supported. 1 EPA Green PC Support This AMI UEFI BIOS supports Version 1.03 of the input and output devices such as virus and... program allows users to modify the basic system configuration and save these settings to describe the settings in the AMI UEFI BIOS Setup program on this manual will to guide you through the options and settings in UEFI BIOS Setup. The rest of the Intel PCI (Peripheral Component Interconnect) local...
Bios Manual
Page 3
... When starting up the computer, press during the Power-On Self-Test (POST) to ensure optimum performance of the selected item. Notice z The default UEFI BIOS settings apply for any mistakes found in this is subject to ensure system's compatibility and stability. If the system becomes unstable after changing any system damage... that particular menu are at the top right corner, and this manual is being continuously updated. Use Load Setup Default under the Exit Menu. H77MU3 UEFI BIOS Manual Supported CPUs This AMI UEFI...
... When starting up the computer, press during the Power-On Self-Test (POST) to ensure optimum performance of the selected item. Notice z The default UEFI BIOS settings apply for any mistakes found in this is subject to ensure system's compatibility and stability. If the system becomes unstable after changing any system damage... that particular menu are at the top right corner, and this manual is being continuously updated. Use Load Setup Default under the Exit Menu. H77MU3 UEFI BIOS Manual Supported CPUs This AMI UEFI...
Bios Manual
Page 4
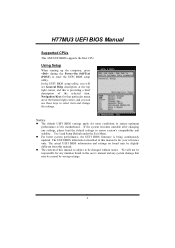
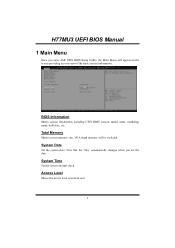
System Date Set the system date. BIOS Information Shows system information including UEFI BIOS version, model name, marketing name, built date, etc. System Time Set the system internal clock. Access Level Shows the access level of the basic system information. H77MU3 UEFI BIOS Manual 1 Main Menu Once you set the date. Note that the 'Day' automatically changes when you enter AMI UEFI BIOS Setup Utility, the Main Menu will be excluded. Total Memory Shows system memory size, VGA shard memory will appear on the screen providing an overview of current user. 3
System Date Set the system date. BIOS Information Shows system information including UEFI BIOS version, model name, marketing name, built date, etc. System Time Set the system internal clock. Access Level Shows the access level of the basic system information. H77MU3 UEFI BIOS Manual 1 Main Menu Once you set the date. Note that the 'Day' automatically changes when you enter AMI UEFI BIOS Setup Utility, the Main Menu will be excluded. Total Memory Shows system memory size, VGA shard memory will appear on the screen providing an overview of current user. 3
Bios Manual
Page 5
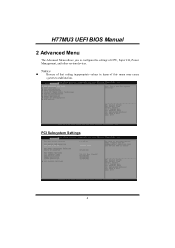
PCI Subsystem Settings 4 H77MU3 UEFI BIOS Manual 2 Advanced Menu The Advanced Menu allows you to configure the settings of this menu may cause system to malfunction. Notice z Beware of that setting inappropriate values in items of CPU, Super I/O, Power Management, and other system devices.
PCI Subsystem Settings 4 H77MU3 UEFI BIOS Manual 2 Advanced Menu The Advanced Menu allows you to configure the settings of this menu may cause system to malfunction. Notice z Beware of that setting inappropriate values in items of CPU, Super I/O, Power Management, and other system devices.
Bios Manual
Page 6
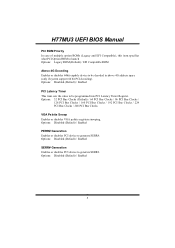
...: Disabled (Default) / Enabled SERR# Generation Enables or disables PCI device to generate SERR#. Options: Disabled (Default) / Enabled 5 H77MU3 UEFI BIOS Manual PCI ROM Priority In case of multiple option ROMs (Legacy and EFI Compatible), this item specifies what PCI Option ROM to launch... Enables or disables 64bit capable device to be programmed into PCI Latency Timer Register. Options: Disabled (Default) / Enabled PCI Latency Timer This item sets the value to be decoded in above 4G address space (only if system support 64 bit PCI decoding). Options: Disabled (Default) / Enabled PERR...
...: Disabled (Default) / Enabled SERR# Generation Enables or disables PCI device to generate SERR#. Options: Disabled (Default) / Enabled 5 H77MU3 UEFI BIOS Manual PCI ROM Priority In case of multiple option ROMs (Legacy and EFI Compatible), this item specifies what PCI Option ROM to launch... Enables or disables 64bit capable device to be programmed into PCI Latency Timer Register. Options: Disabled (Default) / Enabled PCI Latency Timer This item sets the value to be decoded in above 4G address space (only if system support 64 bit PCI decoding). Options: Disabled (Default) / Enabled PERR...
Bios Manual
Page 7
... Enabled Extended Tag If enabled allows device to select the value. Options: Enabled (Default) / Disabled Maximum Payload This item sets Maximum Payload of PCI Express Device or allows System BIOS to select the value. Options: Auto (Default) / 128 Bytes / 256 Bytes / 512 Bytes / 1024 Bytes / .... Options: Auto (Default) / 128 Bytes / 256 Bytes / 512 Bytes / 1024 Bytes / 2048 Bytes / 4096 Bytes 6 H77MU3 UEFI BIOS Manual PCI Express Settings Relaxed Ordering Enables or disables PCI express device No snoop option. Options: Disabled (Default) / Enabled No Snoop This item enables or disables...
... Enabled Extended Tag If enabled allows device to select the value. Options: Enabled (Default) / Disabled Maximum Payload This item sets Maximum Payload of PCI Express Device or allows System BIOS to select the value. Options: Auto (Default) / 128 Bytes / 256 Bytes / 512 Bytes / 1024 Bytes / .... Options: Auto (Default) / 128 Bytes / 256 Bytes / 512 Bytes / 1024 Bytes / 2048 Bytes / 4096 Bytes 6 H77MU3 UEFI BIOS Manual PCI Express Settings Relaxed Ordering Enables or disables PCI express device No snoop option. Options: Disabled (Default) / Enabled No Snoop This item enables or disables...

Bios Manual
Page 8
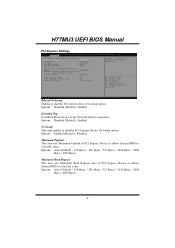
... extended synchronization patterns. Value range from 10 to LO State; Options: Keep Link ON (Default) / Disable Link ACPI Settings 7 H77MU3 UEFI BIOS Manual ASPM This item sets the ASPM (Active State Power Management Settings) Level: Force L0 - BIOS auto configures; Auto - Force all links to 1000 uS. Options: 100 (Default) Unpopulated Links In order to save...
... extended synchronization patterns. Value range from 10 to LO State; Options: Keep Link ON (Default) / Disable Link ACPI Settings 7 H77MU3 UEFI BIOS Manual ASPM This item sets the ASPM (Active State Power Management Settings) Level: Force L0 - BIOS auto configures; Auto - Force all links to 1000 uS. Options: 100 (Default) Unpopulated Links In order to save...
Bios Manual
Page 9
Leaving the system in power-off status; 2. When this item is pressed. H77MU3 UEFI BIOS Manual ACPI Sleep State This item selects the highest ACPI sleep state the system will enter when the SUSPEND button is enabled, the system will ... to wake from S5 using Ring-In event. Options: S1 (CPU Stop Clock) (Default) / Suspend Disabled / S3 (Suspend to RAM) Restore AC Power Loss This setting specifies how your system should behave after power recovers.
Leaving the system in power-off status; 2. When this item is pressed. H77MU3 UEFI BIOS Manual ACPI Sleep State This item selects the highest ACPI sleep state the system will enter when the SUSPEND button is enabled, the system will ... to wake from S5 using Ring-In event. Options: S1 (CPU Stop Clock) (Default) / Suspend Disabled / S3 (Suspend to RAM) Restore AC Power Loss This setting specifies how your system should behave after power recovers.
Bios Manual
Page 10
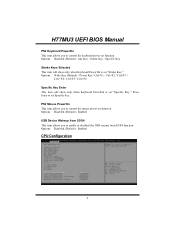
...F1 / Ctrl+F2 / Ctrl+F3 / Ctrl +F4 / Ctrl+F5 / Ctrl+F6 Specific Key Enter This item will show only when Keyboard PowerOn is set Specific key. Options: Disabled (Default) / Enabled USB Device Wakeup from S3/S4 This item allows you to enable or disabled the USB resume from S3.../S4 function. Options: Disabled (Default) / Enabled CPU Configuration 9 Press Enter to set "Stroke Key." PS2 Mouse PowerOn This item allows you to control the mouse power on function. H77MU3 UEFI BIOS Manual PS2 Keyboard PowerOn This item allows you to control the keyboard power on function.
...F1 / Ctrl+F2 / Ctrl+F3 / Ctrl +F4 / Ctrl+F5 / Ctrl+F6 Specific Key Enter This item will show only when Keyboard PowerOn is set Specific key. Options: Disabled (Default) / Enabled USB Device Wakeup from S3/S4 This item allows you to enable or disabled the USB resume from S3.../S4 function. Options: Disabled (Default) / Enabled CPU Configuration 9 Press Enter to set "Stroke Key." PS2 Mouse PowerOn This item allows you to control the mouse power on function. H77MU3 UEFI BIOS Manual PS2 Keyboard PowerOn This item allows you to control the keyboard power on function.

Bios Manual
Page 11
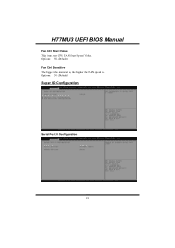
... associated with a supporting OS (Windows Server 2003 SP1, Windows XP SP2, SuSE Linux 9.2, RedHat Enterprise 3 Update 3.). Before it as well. Options: Enabled (Default) / Disabled 10 H77MU3 UEFI BIOS Manual Active Processor Cores This item sets number of cores to find out the highest input value CPUID recognizes.
... associated with a supporting OS (Windows Server 2003 SP1, Windows XP SP2, SuSE Linux 9.2, RedHat Enterprise 3 Update 3.). Before it as well. Options: Enabled (Default) / Disabled 10 H77MU3 UEFI BIOS Manual Active Processor Cores This item sets number of cores to find out the highest input value CPUID recognizes.
Bios Manual
Page 14
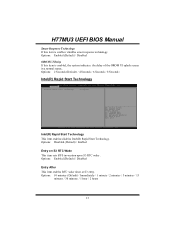
... item enables RTC wake timer at S3 entry. Options: Disabled (Default) / Enabled Entry on S3 RTC Wake This item sets iFFS invocation upon S3 RTC wake . the delay of the OROM UI splash screen in a normal status.. H77MU3 UEFI BIOS Manual Smart Response Technology If this item is enables/ disables smart response technology.
... item enables RTC wake timer at S3 entry. Options: Disabled (Default) / Enabled Entry on S3 RTC Wake This item sets iFFS invocation upon S3 RTC wake . the delay of the OROM UI splash screen in a normal status.. H77MU3 UEFI BIOS Manual Smart Response Technology If this item is enables/ disables smart response technology.
Bios Manual
Page 15
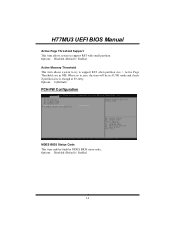
Options: Disabled (Default) / Enabled 14 Options: 0 (Default) PCH-FW Configuration MDES BIOS Status Code This item enables/disables MDES BIOS status code.. Options: Disabled (Default) / Enabled Active Memory Threshold This item allows system to try to support RST when partition size > Active Page Threshold size in AUTO mode and check if partition size is enough at S3 entry. H77MU3 UEFI BIOS Manual Active Page Threshold Support This item allows system to zero, the item will be in MB. When set to support RST with small partition.
Options: Disabled (Default) / Enabled 14 Options: 0 (Default) PCH-FW Configuration MDES BIOS Status Code This item enables/disables MDES BIOS status code.. Options: Disabled (Default) / Enabled Active Memory Threshold This item allows system to try to support RST when partition size > Active Page Threshold size in AUTO mode and check if partition size is enough at S3 entry. H77MU3 UEFI BIOS Manual Active Page Threshold Support This item allows system to zero, the item will be in MB. When set to support RST with small partition.
Bios Manual
Page 17
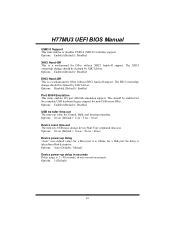
... keyboard legacy support for OSes without EHCI hand-off support. Options: 20 sec (Default) / 1 sec / 5 sec / 10 sec Device reset time-out The item sets USB mass storage device Start Unit command time-out. The XHCI ownership change should be claimed by XHCI driver. Options: Disabled (Default) / Enabled Port 60... value for OSes without XHCI hand-off support. Options: Enabled (Default) / Disabled XHCI Hand-Off This is a workaround for Control, Bulk, and Interrupt transfers. H77MU3 UEFI BIOS Manual USB3.0 Support This item enables or disables USB3.0 (XHCI) Controller support.
... keyboard legacy support for OSes without EHCI hand-off support. Options: 20 sec (Default) / 1 sec / 5 sec / 10 sec Device reset time-out The item sets USB mass storage device Start Unit command time-out. The XHCI ownership change should be claimed by XHCI driver. Options: Disabled (Default) / Enabled Port 60... value for OSes without XHCI hand-off support. Options: Enabled (Default) / Disabled XHCI Hand-Off This is a workaround for Control, Bulk, and Interrupt transfers. H77MU3 UEFI BIOS Manual USB3.0 Support This item enables or disables USB3.0 (XHCI) Controller support.
Bios Manual
Page 19
Options: 30 (Default) Super IO Configuration Serial Port 0 Configuration 18 H77MU3 UEFI BIOS Manual Fan Ctrl Start Value This item sets CPU FAN Start Speed Value. Options: 50 (Default) Fan Ctrl Sensitive The bigger the numeral is, the higher the FAN speed is.
Options: 30 (Default) Super IO Configuration Serial Port 0 Configuration 18 H77MU3 UEFI BIOS Manual Fan Ctrl Start Value This item sets CPU FAN Start Speed Value. Options: 50 (Default) Fan Ctrl Sensitive The bigger the numeral is, the higher the FAN speed is.
Bios Manual
Page 20
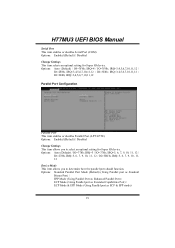
...12 Device Mode This item allows you to determine how the parallel port should function. Options: Enabled (Default) / Disabled Change Settings This item selects an optimal setting for Super IO device. Options: Auto (Default) / IO=378h; IRQ=3,4,5,6,7,10,11,12 / IO=3E8h; Options: Standard ...11,12 / IO=2E8h; Options: Enabled (Default) / Disabled Change Settings This item allows you to select an optimal setting for Super IO device. IRQ=5, 6, 7, 9, 10, 11, 12 / IO=278h; IRQ=5 / IO=378h; H77MU3 UEFI BIOS Manual Serial Port This item enables or disables Serial Port (COM). IRQ...
...12 Device Mode This item allows you to determine how the parallel port should function. Options: Enabled (Default) / Disabled Change Settings This item selects an optimal setting for Super IO device. Options: Auto (Default) / IO=378h; IRQ=3,4,5,6,7,10,11,12 / IO=3E8h; Options: Standard ...11,12 / IO=2E8h; Options: Enabled (Default) / Disabled Change Settings This item allows you to select an optimal setting for Super IO device. IRQ=5, 6, 7, 9, 10, 11, 12 / IO=278h; IRQ=5 / IO=378h; H77MU3 UEFI BIOS Manual Serial Port This item enables or disables Serial Port (COM). IRQ...


