
User Guide
Page 2
... across the ocean. The Belkin Components VideoBus II is a true Plug-and-Play experience. Video clips can also stay in touch using the VideoBus II, originating from various standard video sources via the USB port! Plug the VideoBus II cable into programs such as Microsoft NetMeeting to bring video and still images into a PC-compatible digital video image and audio format. Introduction Capture video and sound on your camcorder onto...
... across the ocean. The Belkin Components VideoBus II is a true Plug-and-Play experience. Video clips can also stay in touch using the VideoBus II, originating from various standard video sources via the USB port! Plug the VideoBus II cable into programs such as Microsoft NetMeeting to bring video and still images into a PC-compatible digital video image and audio format. Introduction Capture video and sound on your camcorder onto...

User Guide
Page 3
... software from MGI®. • Capture audio and video in the fastest and most convenient way. • Connect your camcorder, VCR, digital camera, or any other video source to -install USB device doesn't require opening your own live video or creating amazing images! Features • Make your own movies using your camcorder. • Easy-to-use Plug-and-Play operation. • Easy-to the VideoBus II yellow RCA input...
... software from MGI®. • Capture audio and video in the fastest and most convenient way. • Connect your camcorder, VCR, digital camera, or any other video source to -install USB device doesn't require opening your own live video or creating amazing images! Features • Make your own movies using your camcorder. • Easy-to-use Plug-and-Play operation. • Easy-to the VideoBus II yellow RCA input...

User Guide
Page 4
... video capture via USB. • Software-controlled digital PAN and ZOOM. • Any Standard NTSC/PAL/SECAM video source is supported. • Any Standard low-level (RCA) audio source is supported. • Easy plug-and-play operation. • Fully compatible with Microsoft DirectShow®. • Compatible with popular video applications for Windows®. • Compatible with TWAIN applications for video editing (Ultra DMA, SCSI-2 sub-system recommended) • Video card with Microsoft Windows...
... video capture via USB. • Software-controlled digital PAN and ZOOM. • Any Standard NTSC/PAL/SECAM video source is supported. • Any Standard low-level (RCA) audio source is supported. • Easy plug-and-play operation. • Fully compatible with Microsoft DirectShow®. • Compatible with popular video applications for Windows®. • Compatible with TWAIN applications for video editing (Ultra DMA, SCSI-2 sub-system recommended) • Video card with Microsoft Windows...

User Guide
Page 5
... II hardware. 3. Begin using the VideoBus II. Close the tray by pressing the eject button. The following screen will appear automatically. Scroll up the VideoBus II and the software is the drive letter of your CD-ROM drive. 1. Software Installation Make sure to install. 6 7 DO NOT PLUG IN THE VideoBus II AT THIS POINT. If you wish to close all Windows programs before starting the installation of the VideoBus...
... II hardware. 3. Begin using the VideoBus II. Close the tray by pressing the eject button. The following screen will appear automatically. Scroll up the VideoBus II and the software is the drive letter of your CD-ROM drive. 1. Software Installation Make sure to install. 6 7 DO NOT PLUG IN THE VideoBus II AT THIS POINT. If you wish to close all Windows programs before starting the installation of the VideoBus...

User Guide
Page 6
... drive. Next, double-click on your screen. F5U208 VideoBus II Hardware Installation Instructions for a better driver selected (Recommended)" selected. This will then appear, prompting the user that you must install the viewer. The Add New Hardware Wizard will set up and click on the bottom left corner of your operating system. Click "Next". 8 9 Click the "Start" button found new hardware, which is a "USB Device". Windows...
... drive. Next, double-click on your screen. F5U208 VideoBus II Hardware Installation Instructions for a better driver selected (Recommended)" selected. This will then appear, prompting the user that you must install the viewer. The Add New Hardware Wizard will set up and click on the bottom left corner of your operating system. Click "Next". 8 9 Click the "Start" button found new hardware, which is a "USB Device". Windows...

User Guide
Page 7
... for the driver on your video editing program (e.g., Windows Movie Maker or MGI VideoWave III). To capture video and audio, follow the tutorial on the floppy disk. Click "Finish". 6. Hardware Installation (continued) 7. Click "Finish". 8. Hardware Installation (continued) 4. Windows will be repeated to install the video driver. 10 11 Steps 3 and 4 will get a prompt that Windows has finished installing the new hardware device: "Belkin USB Video Cable, Audio". After Windows has found the audio driver, you...
... for the driver on your video editing program (e.g., Windows Movie Maker or MGI VideoWave III). To capture video and audio, follow the tutorial on the floppy disk. Click "Finish". 6. Hardware Installation (continued) 7. Click "Finish". 8. Hardware Installation (continued) 4. Windows will be repeated to install the video driver. 10 11 Steps 3 and 4 will get a prompt that Windows has finished installing the new hardware device: "Belkin USB Video Cable, Audio". After Windows has found the audio driver, you...

User Guide
Page 8
... Device". Windows 98 5. Hardware Installation (continued) F5U208 VideoBus II Hardware Installation Instructions for the drivers. Click "Next". 3. Windows will detect a "USB Composite Device". Click "Next". 12 13 Windows will find the built-in drivers for your device (Recommended)" and click "Next". Leave all boxes unchecked and click "Next". Hardware Installation (continued) 4. On the next screen that appears will ask you where to search for Windows® 98 1. Connect...
... Device". Windows 98 5. Hardware Installation (continued) F5U208 VideoBus II Hardware Installation Instructions for the drivers. Click "Next". 3. Windows will detect a "USB Composite Device". Click "Next". 12 13 Windows will find the built-in drivers for your device (Recommended)" and click "Next". Leave all boxes unchecked and click "Next". Hardware Installation (continued) 4. On the next screen that appears will ask you where to search for Windows® 98 1. Connect...

User Guide
Page 9
Hardware Installation (continued) 6. Next, Windows will detect the Belkin VideoBus II Audio Capture as "Unknown Device". Select "Search for the best driver for your device (Recommended)" and click "Next". Insert the Belkin VideoBus II Driver CD into the CD-ROM drive. Hardware Installation (continued) 8. After Windows copies the necessary files, installation of the "USB Composite Device" is complete. Click "Finish". Click "Next". 9. Windows 98 7. Check the "CD-ROM drive" and click "Next". 14 15
Hardware Installation (continued) 6. Next, Windows will detect the Belkin VideoBus II Audio Capture as "Unknown Device". Select "Search for the best driver for your device (Recommended)" and click "Next". Insert the Belkin VideoBus II Driver CD into the CD-ROM drive. Hardware Installation (continued) 8. After Windows copies the necessary files, installation of the "USB Composite Device" is complete. Click "Finish". Click "Next". 9. Windows 98 7. Check the "CD-ROM drive" and click "Next". 14 15

User Guide
Page 10
... "Next". After the files are copied, the installation of the VideoBus II Audio Capture drivers is finished. Hardware Installation (continued) 10. If asked, insert the Windows 98 SE CD into the CD-ROM drive and follow the directions on the screen. 12. Windows 98 11. Windows will detect the Belkin VideoBus II Audio Capture as "Composite USB Device". At this time, Windows may ask for your device (Recommended)" and...
... "Next". After the files are copied, the installation of the VideoBus II Audio Capture drivers is finished. Hardware Installation (continued) 10. If asked, insert the Windows 98 SE CD into the CD-ROM drive and follow the directions on the screen. 12. Windows 98 11. Windows will detect the Belkin VideoBus II Audio Capture as "Composite USB Device". At this time, Windows may ask for your device (Recommended)" and...

User Guide
Page 11
Make sure the Belkin VideoBus II Driver CD is now complete. 18 19 Hardware Installation (continued) 15. Click "Finish". Check the "CD-ROM drive" and click "Next". Windows 98 16. Click "Next". 18. Hardware Installation (continued) 17. Installation of the VideoBus II Video Capture driver is finished. After the files are copied, the installation of the Belkin VideoBus II is inserted in the CD-ROM drive. Windows will find the drivers for the "Belkin USB VideoBus II, Video".
Make sure the Belkin VideoBus II Driver CD is now complete. 18 19 Hardware Installation (continued) 15. Click "Finish". Check the "CD-ROM drive" and click "Next". Windows 98 16. Click "Next". 18. Hardware Installation (continued) 17. Installation of the VideoBus II Video Capture driver is finished. After the files are copied, the installation of the Belkin VideoBus II is inserted in the CD-ROM drive. Windows will find the drivers for the "Belkin USB VideoBus II, Video".

User Guide
Page 12
... a "USB Composite Device". Click "Next". 3. Windows 98 SE 5. On the next screen that appears, leave all boxes unchecked and click "Next". Hardware Installation (continued) F5U208 VideoBus II Hardware Installation Instructions for your device (Recommended)" and click "Next". Hardware Installation (continued) 4. On the next screen that appears, select "Search for the best driver for Windows® 98 Second Edition 1. Connect the Belkin USB VideoBus II into an available USB port...
... a "USB Composite Device". Click "Next". 3. Windows 98 SE 5. On the next screen that appears, leave all boxes unchecked and click "Next". Hardware Installation (continued) F5U208 VideoBus II Hardware Installation Instructions for your device (Recommended)" and click "Next". Hardware Installation (continued) 4. On the next screen that appears, select "Search for the best driver for Windows® 98 Second Edition 1. Connect the Belkin USB VideoBus II into an available USB port...

User Guide
Page 13
Click "Next". Check the "CD-ROM drive" and click "Next". 22 23 Insert the Belkin VideoBus II Driver CD into the CD-ROM drive. Next, Windows will detect the Belkin VideoBus II Audio Capture as "Composite USB Device". Windows 98 SE 9. Hardware Installation (continued) 6. After Windows copies the necessary files, installation of the "USB Composite Device" is complete. Select "Search for the best driver for your device (Recommended)" and click "Next". Hardware Installation (continued) 8. Click "Finish". 7.
Click "Next". Check the "CD-ROM drive" and click "Next". 22 23 Insert the Belkin VideoBus II Driver CD into the CD-ROM drive. Next, Windows will detect the Belkin VideoBus II Audio Capture as "Composite USB Device". Windows 98 SE 9. Hardware Installation (continued) 6. After Windows copies the necessary files, installation of the "USB Composite Device" is complete. Select "Search for the best driver for your device (Recommended)" and click "Next". Hardware Installation (continued) 8. Click "Finish". 7.

User Guide
Page 14
... SE CD. If asked, insert the Windows 98 SE CD into the CD-ROM drive and follow the directions on the screen. 12. Next, Windows will copy the necessary files. At this time, Windows may ask for your device (Recommended)" and click "Next". 24 25 Click "Finish". Hardware Installation (continued) 13. Windows will find the drivers for the "Belkin USB VideoBus II, Audio". Hardware Installation (continued) 10.
... SE CD. If asked, insert the Windows 98 SE CD into the CD-ROM drive and follow the directions on the screen. 12. Next, Windows will copy the necessary files. At this time, Windows may ask for your device (Recommended)" and click "Next". 24 25 Click "Finish". Hardware Installation (continued) 13. Windows will find the drivers for the "Belkin USB VideoBus II, Audio". Hardware Installation (continued) 10.

User Guide
Page 15
Windows will find the drivers for the "Belkin USB VideoBus II, Video". Windows 98 SE 18. Hardware Installation (continued) 17. Insert the Belkin VideoBus II Driver CD into the CD-ROM drive. Click "Next". Click "Finish". Check the "CD-ROM drive" and click "Next". 16. Installation of the VideoBus II Video Capture driver is now complete. 26 27 Hardware Installation (continued) 15. After the files are copied, the installation of the Belkin VideoBus II is finished.
Windows will find the drivers for the "Belkin USB VideoBus II, Video". Windows 98 SE 18. Hardware Installation (continued) 17. Insert the Belkin VideoBus II Driver CD into the CD-ROM drive. Click "Next". Click "Finish". Check the "CD-ROM drive" and click "Next". 16. Installation of the VideoBus II Video Capture driver is now complete. 26 27 Hardware Installation (continued) 15. After the files are copied, the installation of the Belkin VideoBus II is finished.

User Guide
Page 16
..." screen will detect a "USB Composite Device" and automatically install the necessary drivers. 3. Windows 2000 28 29 Select "Search for a suitable driver for Windows® 2000 1. Connect the Belkin USB VideoBus II into the CD-ROM drive. Select the "CD-ROM drive" and click "Next". Insert the Belkin VideoBus II Driver CD into an available USB port on the computer. 2. Hardware Installation (continued) F5U208 VideoBus II Hardware Installation Instructions for my device (recommended...
..." screen will detect a "USB Composite Device" and automatically install the necessary drivers. 3. Windows 2000 28 29 Select "Search for a suitable driver for Windows® 2000 1. Connect the Belkin USB VideoBus II into the CD-ROM drive. Select the "CD-ROM drive" and click "Next". Insert the Belkin VideoBus II Driver CD into an available USB port on the computer. 2. Hardware Installation (continued) F5U208 VideoBus II Hardware Installation Instructions for my device (recommended...

User Guide
Page 17
A "Digital Signature Not Found" dialog will find the drivers for the Composite USB Device. Hardware Installation (continued) 8. Due to restart the computer. Windows will appear. Windows will ask you want to a bug in Windows 2000, the system will ask if you restart. Windows 2000 9. Click "No". Click "Finish". Hardware Installation (continued) 6. Click "Next". 7. Click "Yes". After the files are copied, the installation of the Belkin VideoBus II Audio Capture drivers is finished. IMPORTANT!!! Simply click on "No" and continue. 30 31
A "Digital Signature Not Found" dialog will find the drivers for the Composite USB Device. Hardware Installation (continued) 8. Due to restart the computer. Windows will appear. Windows will ask you want to a bug in Windows 2000, the system will ask if you restart. Windows 2000 9. Click "No". Click "Finish". Hardware Installation (continued) 6. Click "Next". 7. Click "Yes". After the files are copied, the installation of the Belkin VideoBus II Audio Capture drivers is finished. IMPORTANT!!! Simply click on "No" and continue. 30 31

User Guide
Page 19
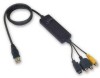
After the files are copied, the installation of the Belkin VideoBus II Video Capture drivers is now complete. 34 35 The first time the VideoBus II is easy. 1. Do not connect both composite and S-Video. 3. Installation of the RCA Video Cable. If not already connected, connect the VideoBus II USB connector to an open port on your video device (e.g. Connection Diagram 16. camcorder, VCR). Click "Finish". Hardware Installation (continued) 14. VideoBus II Connection Connecting the VideoBus...
After the files are copied, the installation of the Belkin VideoBus II Video Capture drivers is now complete. 34 35 The first time the VideoBus II is easy. 1. Do not connect both composite and S-Video. 3. Installation of the RCA Video Cable. If not already connected, connect the VideoBus II USB connector to an open port on your video device (e.g. Connection Diagram 16. camcorder, VCR). Click "Finish". Hardware Installation (continued) 14. VideoBus II Connection Connecting the VideoBus...

User Guide
Page 20
... not compatible with every system. Shut down all hard drives support this problem. Recommendations Enhancing Capture Performance It is recommended that your disk drives are defragmented before capturing video. Click the Settings tab, and select the DMA control. 7. Restart your hard disk: 1. To defragment your computer to enable the DMA transfer on Control Panel. 2. Double-click the System icon. 3. Launch the Windows "Disk Defragmenter" program from a video source...
... not compatible with every system. Shut down all hard drives support this problem. Recommendations Enhancing Capture Performance It is recommended that your disk drives are defragmented before capturing video. Click the Settings tab, and select the DMA control. 7. Restart your hard disk: 1. To defragment your computer to enable the DMA transfer on Control Panel. 2. Double-click the System icon. 3. Launch the Windows "Disk Defragmenter" program from a video source...

User Guide
Page 21
... video recording device. Follow the directions for turning on hard drive DMA. Be sure that S-Video is done in Movie Maker 38 39 This is selected as the input source. Troubleshooting (continued) Selecting Recording Sources in Movie Maker Selecting Recording Input Device in the recording menu of most video editing software. Check RECORD settings to be sure that "Video and audio" or "Video" is connected to be captured. Select the "Belkin VideoBus II, Video" as the recording audio device...
... video recording device. Follow the directions for turning on hard drive DMA. Be sure that S-Video is done in Movie Maker 38 39 This is selected as the input source. Troubleshooting (continued) Selecting Recording Sources in Movie Maker Selecting Recording Input Device in the recording menu of most video editing software. Check RECORD settings to be sure that "Video and audio" or "Video" is connected to be captured. Select the "Belkin VideoBus II, Video" as the recording audio device...

User Guide
Page 22
... this device must accept any Belkin serial number has been removed or defaced. or if any interference received, including interference that vary from whom you . if the product has been modified without the written permission of Conformity We, Belkin Components, declare under our sole responsibility that the F5U208, to you purchased the product. CE Declaration of Belkin; THE WARRANTY AND REMEDIES SET FORTH...
... this device must accept any Belkin serial number has been removed or defaced. or if any interference received, including interference that vary from whom you . if the product has been modified without the written permission of Conformity We, Belkin Components, declare under our sole responsibility that the F5U208, to you purchased the product. CE Declaration of Belkin; THE WARRANTY AND REMEDIES SET FORTH...