
User Guide
Page 3
... Rack-Mount Console KVM Switch (PS/2 Connection 13 Connecting Servers to the Rack-Mount Console KVM Switch (USB Connection 14 Connecting Multiple KVM Devices (Daisy-Chaining 16 DIP Switch Configuration Chart 17 Powering up the Systems 20 4. Glossary 44 7. Troubleshooting 43 6. Using your Rack-Mount Console KVM Switch 21 Selecting a Server Using Keyboard Hot Key Commands 21 AutoScan Mode 21 IntelliView Graphical On-Screen Display Menu Control 22 The AutoUpdate Firmware Update Utility...
... Rack-Mount Console KVM Switch (PS/2 Connection 13 Connecting Servers to the Rack-Mount Console KVM Switch (USB Connection 14 Connecting Multiple KVM Devices (Daisy-Chaining 16 DIP Switch Configuration Chart 17 Powering up the Systems 20 4. Glossary 44 7. Troubleshooting 43 6. Using your Rack-Mount Console KVM Switch 21 Selecting a Server Using Keyboard Hot Key Commands 21 AutoScan Mode 21 IntelliView Graphical On-Screen Display Menu Control 22 The AutoUpdate Firmware Update Utility...
User Guide
Page 4
... control over multiple servers, the Rack-Mount Console KVM Switch provides an excellent solution for output devices • Multi-console support • IntelliView™ Graphical On-Screen Display (OSD) • Server and server-group naming • Multi-level security • Server connection status and diagnosis • Flash-upgradeable firmware • Dual-port connectors (cables sold separately) • Belkin Two-Year Warranty • Free technical support • 17-inch LCD...
... control over multiple servers, the Rack-Mount Console KVM Switch provides an excellent solution for output devices • Multi-console support • IntelliView™ Graphical On-Screen Display (OSD) • Server and server-group naming • Multi-level security • Server connection status and diagnosis • Flash-upgradeable firmware • Dual-port connectors (cables sold separately) • Belkin Two-Year Warranty • Free technical support • 17-inch LCD...
User Guide
Page 5
... into groups. Firmware updates are free for yourself why Belkin is the number one-selling brand in your packaging. Overview Feature Overview This User Manual will provide details about your new Rack-Mount Console KVM Switch, from Belkin and flash-upgradeable firmware allow you to the Quick Installation Guide included in KVM switches worldwide. *For simplicity, the 1U Rack-Mount Console with Built-In 8-Port KVM Switch will be daisy...
... into groups. Firmware updates are free for yourself why Belkin is the number one-selling brand in your packaging. Overview Feature Overview This User Manual will provide details about your new Rack-Mount Console KVM Switch, from Belkin and flash-upgradeable firmware allow you to the Quick Installation Guide included in KVM switches worldwide. *For simplicity, the 1U Rack-Mount Console with Built-In 8-Port KVM Switch will be daisy...
User Guide
Page 6
... Server Ports The Rack-Mount Console KVM Switch features high-density, 50-pin, SCSI 2 connectors. These connectors allow the Rack-Mount Console KVM Switch to fit into a compact, 1U-height rack-mount case. • Micro-Cabling Technology Servers can 3 select one . section Overview Feature Overview • Video Resolution 1 The LCD supports SXGA video resolutions of your equipment. With a 60% reduction in both PS/2 and USB styles [Belkin part numbers F1D9400...
... Server Ports The Rack-Mount Console KVM Switch features high-density, 50-pin, SCSI 2 connectors. These connectors allow the Rack-Mount Console KVM Switch to fit into a compact, 1U-height rack-mount case. • Micro-Cabling Technology Servers can 3 select one . section Overview Feature Overview • Video Resolution 1 The LCD supports SXGA video resolutions of your equipment. With a 60% reduction in both PS/2 and USB styles [Belkin part numbers F1D9400...

User Guide
Page 9
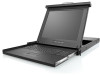
Overview Unit Display Diagrams Unit Display Diagrams OmniView ENTERPRISE 1U Rack-Mount Console with Built-In 8-Port KVM Switch LCD Handle Keylock LCD Mouse Drawer Handle Keyboard LCD Display Buttons Front Bracket Front View Flash Port Daisy-Chain Port, In Power Switch Optional Console Daisy-Chain PS/2 or USB Ports Port, Out 4 High-Density, 50-Pin, SCSI 2-Style Computer Ports, each Supporting 2 Servers IEC Power Connector Back View 6
Overview Unit Display Diagrams Unit Display Diagrams OmniView ENTERPRISE 1U Rack-Mount Console with Built-In 8-Port KVM Switch LCD Handle Keylock LCD Mouse Drawer Handle Keyboard LCD Display Buttons Front Bracket Front View Flash Port Daisy-Chain Port, In Power Switch Optional Console Daisy-Chain PS/2 or USB Ports Port, Out 4 High-Density, 50-Pin, SCSI 2-Style Computer Ports, each Supporting 2 Servers IEC Power Connector Back View 6

User Guide
Page 10
... control functions for each button. 4 5 6 7 Activate settings menu; select/unselect Exit to 3 access the buttons. You will need to use a fine-tipped object to previous screen Move cursor down and stored. change value Automatically adjust LCD settings Power LCD on/off 7 change value Move cursor up; The buttons are recessed in the panel to adjust the settings on the display. section Overview LCD Display Buttons 1 LCD Display Buttons The Rack-Mount Console KVM Switch includes six buttons on the LCD 2 panel...
... control functions for each button. 4 5 6 7 Activate settings menu; select/unselect Exit to 3 access the buttons. You will need to use a fine-tipped object to previous screen Move cursor down and stored. change value Automatically adjust LCD settings Power LCD on/off 7 change value Move cursor up; The buttons are recessed in the panel to adjust the settings on the display. section Overview LCD Display Buttons 1 LCD Display Buttons The Rack-Mount Console KVM Switch includes six buttons on the LCD 2 panel...

User Guide
Page 12
... designed for best video performance. d) Reliable Earthing - Beyond that USB cable length from the Rack-Mount Console KVM Switch to your servers be limited to 25 feet for rack-mount configuration in a standard 19-inch server rack. Installing the Rack-Mount Console KVM Switch into a Server Rack The Rack-Mount Console KVM Switch includes adjustable mounting brackets ideal for a sturdy rack installation. Installation of cables needed to connect those servers...
... designed for best video performance. d) Reliable Earthing - Beyond that USB cable length from the Rack-Mount Console KVM Switch to your servers be limited to 25 feet for rack-mount configuration in a standard 19-inch server rack. Installing the Rack-Mount Console KVM Switch into a Server Rack The Rack-Mount Console KVM Switch includes adjustable mounting brackets ideal for a sturdy rack installation. Installation of cables needed to connect those servers...

User Guide
Page 16
... Switch (PS/2 Connection) Connecting Servers to the Rack-Mount Console KVM 1 Switch (PS/2 Connection) 2 Step 1 Using the OmniView ENTERPRISE Dual-Port Micro-Cabling (part number F1D9400-XX, PS/2 style), connect the high-density, 50-pin, SCSI 2-style 3 connector to a free Rack-Mount Console KVM Switch port, starting with the port for each additional server you connect the keyboard and mouse cables to connect. 13 purple indicates the keyboard connector and green indicates the mouse connector...
... Switch (PS/2 Connection) Connecting Servers to the Rack-Mount Console KVM 1 Switch (PS/2 Connection) 2 Step 1 Using the OmniView ENTERPRISE Dual-Port Micro-Cabling (part number F1D9400-XX, PS/2 style), connect the high-density, 50-pin, SCSI 2-style 3 connector to a free Rack-Mount Console KVM Switch port, starting with the port for each additional server you connect the keyboard and mouse cables to connect. 13 purple indicates the keyboard connector and green indicates the mouse connector...

User Guide
Page 18
... have to the Rack-Mount Console KVM Switch via USB. the Rack-Mount Console KVM Switch will detect the Rack-Mount Console KVM Switch as a generic mouse and keyboard. This driver installation is complete, power down the server and disconnect the keyboard, mouse, and monitor. 5 Step 5 6 Connect the male VGA HDDB15 connector on the Micro-Cabling to the Rack-Mount Console KVM Switch (USB Connection) Step 4 1 Your server will...
... have to the Rack-Mount Console KVM Switch via USB. the Rack-Mount Console KVM Switch will detect the Rack-Mount Console KVM Switch as a generic mouse and keyboard. This driver installation is complete, power down the server and disconnect the keyboard, mouse, and monitor. 5 Step 5 6 Connect the male VGA HDDB15 connector on the Micro-Cabling to the Rack-Mount Console KVM Switch (USB Connection) Step 4 1 Your server will...
User Guide
Page 19
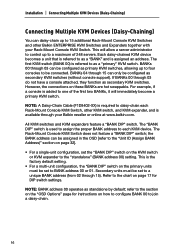
... 248 servers. refer to the section on the "OSD Options" page for instructions on page 17 for DIP switch settings. Secondary units must be assigned in the OSD [refer to the "Unit ID (Assign BANK Address)" section on the primary units must be connected. Installation Connecting Multiple KVM Devices (Daisy-Chaining) Connecting Multiple KVM Devices (Daisy-Chaining) You can...
... 248 servers. refer to the section on the "OSD Options" page for instructions on page 17 for DIP switch settings. Secondary units must be assigned in the OSD [refer to the "Unit ID (Assign BANK Address)" section on the primary units must be connected. Installation Connecting Multiple KVM Devices (Daisy-Chaining) Connecting Multiple KVM Devices (Daisy-Chaining) You can...
User Guide
Page 22
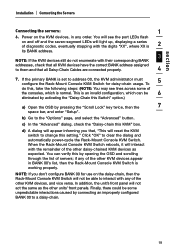
... change this setting." section Installation Connecting the Servers Connecting the servers: 1 6. To 5 do this by opening the OSD and scrolling through the list of servers; d) A dialog will reset the KVM switch to clear the dialog and automatically power-cycle the Rack-Mount Console KVM Switch. If the primary BANK is normal. c) In the "Advanced" dialog, check the "Daisy-chain this Switch" option.) a) Open the OSD by connecting...
... change this setting." section Installation Connecting the Servers Connecting the servers: 1 6. To 5 do this by opening the OSD and scrolling through the list of servers; d) A dialog will reset the KVM switch to clear the dialog and automatically power-cycle the Rack-Mount Console KVM Switch. If the primary BANK is normal. c) In the "Advanced" dialog, check the "Daisy-chain this Switch" option.) a) Open the OSD by connecting...
User Guide
Page 23
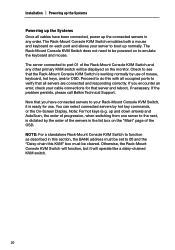
..." box must be set to 00 and the "Daisy-chain this with all cables have connected servers to your server to boot up normally. The Rack-Mount Console KVM Switch does not need to be powered on the monitor. Installation Powering up the Systems Powering up the Systems Once all occupied ports to verify that the Rack-Mount Console KVM Switch is working normally by use .
..." box must be set to 00 and the "Daisy-chain this with all cables have connected servers to your server to boot up normally. The Rack-Mount Console KVM Switch does not need to be powered on the monitor. Installation Powering up the Systems Powering up the Systems Once all occupied ports to verify that the Rack-Mount Console KVM Switch is working normally by use .

User Guide
Page 24
...)1 SL > SL > Space bar = Activates On-Screen Display 6 SL > SL > A = Toggles AutoScan Mode on the "Security" page in the OSD.) 1 (YY = 01 to 16 F1DE116C and F1DE216C) 21 For hot keys (e.g. Using your Rack-Mount Console KVM Switch section Using your Rack-Mount Console KVM Switch to scan and monitor the activities of all connected servers one by one server to the...
...)1 SL > SL > Space bar = Activates On-Screen Display 6 SL > SL > A = Toggles AutoScan Mode on the "Security" page in the OSD.) 1 (YY = 01 to 16 F1DE116C and F1DE216C) 21 For hot keys (e.g. Using your Rack-Mount Console KVM Switch section Using your Rack-Mount Console KVM Switch to scan and monitor the activities of all connected servers one by one server to the...

User Guide
Page 25
... Rack-Mount Console KVM Switch is capable of this User Manual for using the current OSD page. IntelliView OSD Features The "Main" page is the initial screen that is similar to many Windows-based operating systems. The user will display the banner, "Viewed by console X", where X corresponds to view the same server simultaneously; The OSD screen layout is currently logged-in. Selecting the "X" button will provide instructions for...
... Rack-Mount Console KVM Switch is capable of this User Manual for using the current OSD page. IntelliView OSD Features The "Main" page is the initial screen that is similar to many Windows-based operating systems. The user will display the banner, "Viewed by console X", where X corresponds to view the same server simultaneously; The OSD screen layout is currently logged-in. Selecting the "X" button will provide instructions for...

User Guide
Page 26
... server line and 2 switch the console's focus to the selected port. Clicking and dragging the mouse will allow the user to reposition the banner. • The Rack-Mount Console KVM Switch maintains the position settings of the OSD and banner windows during the Rack-Mount Console KVM Switch setup to make the locations identical for multiple server video resolutions. When 3 the error dialog is cleared, the...
... server line and 2 switch the console's focus to the selected port. Clicking and dragging the mouse will allow the user to reposition the banner. • The Rack-Mount Console KVM Switch maintains the position settings of the OSD and banner windows during the Rack-Mount Console KVM Switch setup to make the locations identical for multiple server video resolutions. When 3 the error dialog is cleared, the...
User Guide
Page 28
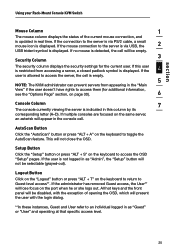
... the OSD "Setup" pages. section Using your Rack-Mount Console KVM Switch Mouse Column 1 The mouse column displays the status of opening the OSD, which will present the user with the login dialog. **In these instances, Guest and User refer to an individual logged in as "Admin", the "Setup" button will not be empty. 3 Security Column The security column displays the security settings for...
... the OSD "Setup" pages. section Using your Rack-Mount Console KVM Switch Mouse Column 1 The mouse column displays the status of opening the OSD, which will present the user with the login dialog. **In these instances, Guest and User refer to an individual logged in as "Admin", the "Setup" button will not be empty. 3 Security Column The security column displays the security settings for...

User Guide
Page 35
... a BANK address for the Rack-Mount Console KVM Switch is set to change this setting". Using your Rack-Mount Console KVM Switch Advanced Dialog Page Activating this button will immediately reboot in the new configuration. Disable Viewing When "Disable Viewing" is cleared). If the user selects "OK", the Rack-Mount Console KVM Switch will take the user to disable this if need be. Selecting "0" sets the BANK address to 00...
... a BANK address for the Rack-Mount Console KVM Switch is set to change this setting". Using your Rack-Mount Console KVM Switch Advanced Dialog Page Activating this button will immediately reboot in the new configuration. Disable Viewing When "Disable Viewing" is cleared). If the user selects "OK", the Rack-Mount Console KVM Switch will take the user to disable this if need be. Selecting "0" sets the BANK address to 00...
User Guide
Page 38
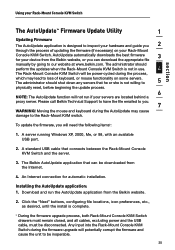
... on your Rack-Mount Console KVM Switch. A standard USB cable that can download the appropriate file manually by going to our website at www.belkin.com. An Internet connection for your device from the Belkin website, or you . 7 WARNING! Using your Rack-Mount Console KVM Switch section The AutoUpdate™ Firmware Update Utility 1 Updating Firmware The AutoUpdate application is not willing to 5 physically reset, before beginning the...
... on your Rack-Mount Console KVM Switch. A standard USB cable that can download the appropriate file manually by going to our website at www.belkin.com. An Internet connection for your device from the Belkin website, or you . 7 WARNING! Using your Rack-Mount Console KVM Switch section The AutoUpdate™ Firmware Update Utility 1 Updating Firmware The AutoUpdate application is not willing to 5 physically reset, before beginning the...
User Guide
Page 39
... Switch Connecting the server to complete the firmware installation. Connect one or more USB hubs between the server and the Rack-Mount Console KVM Switch if you must run the AutoUpdate application by selecting "AutoUpdate.exe" from the Internet and transfer it into the "Options" page in the OSD, press the "Display Version Numbers" button, and record the current version numbers; The user then needs...
... Switch Connecting the server to complete the firmware installation. Connect one or more USB hubs between the server and the Rack-Mount Console KVM Switch if you must run the AutoUpdate application by selecting "AutoUpdate.exe" from the Internet and transfer it into the "Options" page in the OSD, press the "Display Version Numbers" button, and record the current version numbers; The user then needs...

User Guide
Page 46
... Passwords" button. From the "Control Panels" menu, select "Keyboard". 7. Go to begin search. 5. From the "Apple" menu, select "Sherlock2". 2. From the "Apple" menu, select "Control Panels". 6. now I have a Macintosh® server that contains the Mac OS 9 system information. 3. NOTE: By creating a copy of 5 your monitor, keyboard, and mouse. • Connect the KVM switch to add another console. I want to add your desktop, you power...
... Passwords" button. From the "Control Panels" menu, select "Keyboard". 7. Go to begin search. 5. From the "Apple" menu, select "Sherlock2". 2. From the "Apple" menu, select "Control Panels". 6. now I have a Macintosh® server that contains the Mac OS 9 system information. 3. NOTE: By creating a copy of 5 your monitor, keyboard, and mouse. • Connect the KVM switch to add another console. I want to add your desktop, you power...


