Belkin F1D102 - OmniView SE 2 Port KVM Switch Support and Manuals
Get Help and Manuals for this Belkin item
View All Support Options Below
Free Belkin F1D102 manuals!
Problems with Belkin F1D102?
Ask a Question
Free Belkin F1D102 manuals!
Problems with Belkin F1D102?
Ask a Question
Belkin F1D102 Videos

Belkin F1D102 - Buy, Sell & Recycle | TelcoTraders
Duration: :22
Total Views: 5
Duration: :22
Total Views: 5
Popular Belkin F1D102 Manual Pages
User Manual - Page 2
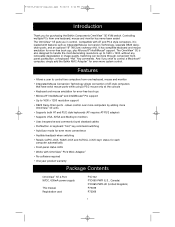
... DB25 daisychain ports, and an optional 19" (48.3cm) rackmount kit. It has complete keyboard and mouse emulation for purchasing the Belkin Components OmniView™ SE KVM switch. Switching can be done through convenient frontpanel pushbutton, or keyboard "Hot" key commands. allows control over more computers by adding more
OmniView™ SE units • Supports both AT and PS/2 style...
User Manual - Page 5
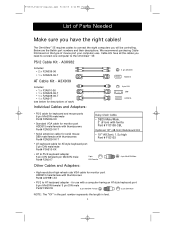
... Parts Needed
Make sure you need to connect one computer to the OmniView™ SE:
PS/2 Cable Kit - The OmniView™ SE requires cables to AT keyboard adapter - for descriptions of mouse port ... port
6 pin MiniDIN female/ 5 pin DIN male
Part# F2N018
6 pin MiniDIN Female
5 pin DIN Male
NOTE: The "XX" in the part number represents the length in feet.
4 Below are the Belkin part ...
User Manual - Page 6
... damage to put your computers and the OmniView™ SE. If the OmniView™ SE you are distanced properly.
3.
Monitor
5
See the USAGE section regarding multiple OmniView™ SE units.
NOT DOING SO MAY RESULT IN KEYBOARD AND/OR MOUSE ERRORS, OR FAULTY OPERATION.
DIP switches 1 & 2 set the SCAN_TIME. Belkin Components will be held responsible for more information...
User Manual - Page 7
... the OmniView™ SE. Using the VGA cable
(Belkin Part# F2N025-XX-T or A3H981-XX), connect the male end of the cable to the OmniView™ SE. Back of OmniView™ SE
Back of OmniView™ SE
PS/2 Style Keyboard
PS/2 Mouse
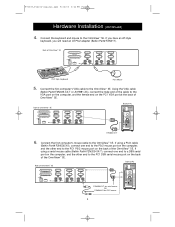
5. P73039_F1D102-eng_man.qxd 9/26/00 3:42 PM Page 6
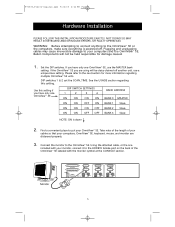
Hardware Installation (continued)
4. Connect the first computer's VGA cable to the
VGA port on...
User Manual - Page 8
... of the other end to an AT to the AT keyboard port on the back of the OmniView™ SE. P73039_F1D102-eng_man.qxd 9/26/00 3:42 PM Page 7
Hardware Installation (continued)
7.
Attach the power supply to not detect, or initialize the keyboard or mouse drivers properly.
7 The first computer will need a PS/2-AT keyboard adapter (Belkin Part# F2N018).
User Manual - Page 9
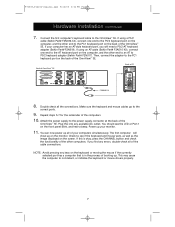
... 0 to any unused unique bank number from 1 through 3 are using the OmniView™ SE in a single-unit configuration, it must be set as a BANK. See diagram above shows two OmniView™ SE 2-Port units and two OmniView™ SE 4-Port units daisy-chained together.
The DIP switches must be set correctly for proper identification and usage. The example above for a total...
User Manual - Page 10

In such a scenario, it is an 8-Port, 19" (48.3cm) rackmountable OmniView™, having the same features as the OmniView™ SE, but adding On-Screen Display. BANKs 4 to 15 must be used by OmniView™ SE units. This is used by PRO units.
9
When the OmniView™ PRO is shown in the chain will benefit from the...
User Manual - Page 11
... a slave, then the other end goes to the Slave Input port of the MASTER (such as cable 1 in the diagram on ...switches of the unit. After all of the computers have a MASTER unit (or MASTER and slave units) set-up the computers connected to 9 in steps 5 to the newly added slave unit. You will see the LED display on the new slave unit will blink. Below is necessary to the OmniView™ SE...
User Manual - Page 12

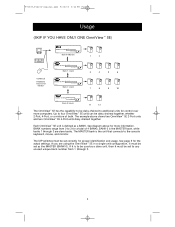
P73039_F1D102-eng_man.qxd 9/26/00 3:42 PM Page 11
Usage (continued)
Daisy-Chaining the OmniView™ SE:
Cable 1
MASTER (Bank 0)
Cable 2
slave (Bank 1)
Cable 3
slave (Bank 2)
slave (Bank 3)
11
User Manual - Page 13
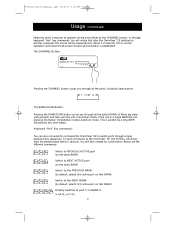
... BANK (by default, selects first active port on that BANK)
Directly switches to port Y on BANK X (x={0-3}, y={1-4})
12 Keyboard "Hot" Key commands:
You can be done either by the CHANNEL button, or through keyboard "Hot" key commands. This is normal operation and ensures that after the OmniView™ SE switches to another computer, the mouse will hear...
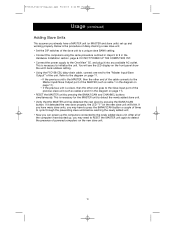
User Manual - Page 14

... can switch directly to prevent errors. Bank 0 (Master)
1
2
CONSOLE
Keyboard, mouse and
monitor
Bank 1 (slave) Bank 2 (slave)
3
4
5
6
7
8
9
10
AutoScan Mode
Bank 3 (slave)
11
12
Enable AutoScan mode
In AutoScan mode, the OmniView™ SE remains on one OmniView™ SE, the first key (X) must be selected. If there are slave units present, the SCAN_TIME setting is set on...
User Manual - Page 15
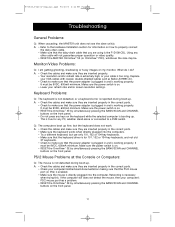
... the power switch is the F1D108-CBL. Rebooting is extremely high, or your computer's PS/2 mouse port has a problem.
• RESET the OmniView™ SE by simultaneously pressing...Replace your refresh rate and/or screen resolution settings. It must be 9VDC, 600mA minimum. Make sure the power switch is on.
• Lower your VGA cables with coaxial, double-shielded cables such as Belkin...
User Manual - Page 16
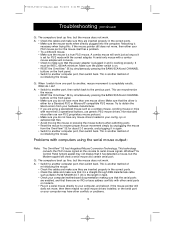
... power switch is on. • RESET the OmniView™ SE by simultaneously pressing the BANK/SCAN and CHANNEL buttons on your computer/motherboard documentation making sure that the serial ports
are no serial mouse drivers installed, or the serial port on the front panel.
• Make sure you are inserted properly in and is set for a Standard PS/2 or...
User Manual - Page 17
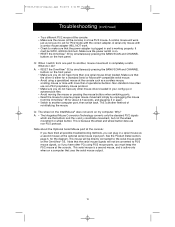
... by simultaneously pressing the BANK/SCAN and CHANNEL buttons on the OmniView™ SE. Why? Note about 2-3 seconds, and plugging it is set for the diagram. This mouse will work on a computer that the driver is another computer port, then switch back. It must keep the PS/2 mouse at the console. Non-standard mice often use non...
User Manual - Page 18

.... If a defect is discovered, Belkin will, at its option, repair or replace the product at no charge, provided it is subject to the following two conditions: (1) this device may be required. This warranty does not apply if the product has been damaged by accident, abuse, misuse, or misapplication; BELKIN SPECIFICALLY DISCLAIMS ANY AND ALL IMPLIED...
Belkin F1D102 Reviews
We have not received any reviews for Belkin yet.