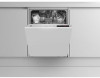
Owners Manual
Page 3
... user manual as a reference for electric shock. Differences between models will be identified in environmentally friendly conditions. A Warning for several other wastes. This product was manufactured using the product and keep it as well. Packaging materials of the product are used: C Important information or useful hints about usage. B Warning for future use. Do not dispose of -the-art technology. Please read this user manual...
... user manual as a reference for electric shock. Differences between models will be identified in environmentally friendly conditions. A Warning for several other wastes. This product was manufactured using the product and keep it as well. Packaging materials of the product are used: C Important information or useful hints about usage. B Warning for future use. Do not dispose of -the-art technology. Please read this user manual...
Owners Manual
Page 4
... hope that this user manual is also applicable for future use. Remember that you handover the product to someone else, give the user manual as a reference for several other wastes. Differences between models will be identified in the manual. Explanation of the product are used: C Important information or useful hints about usage. Take them to life and property. A Warning for electric shock. If...
... hope that this user manual is also applicable for future use. Remember that you handover the product to someone else, give the user manual as a reference for several other wastes. Differences between models will be identified in the manual. Explanation of the product are used: C Important information or useful hints about usage. Take them to life and property. A Warning for electric shock. If...

Owners Manual
Page 5
... the washing time........... 28 Starting the programme 29 Cancelling the programme 29 Salt indicator 29 Rinse Aid indicator 29 Adjusting the amount of rinse aid.... 29 End of programme 30 Water cut-off warning 30 Overflowing warning 30 InnerClean 30 6 MAINTENANCE AND CLEANING 31 Cleaning the outer surface of the product 31 Cleaning the interior of the machine.31 Cleaning the filters 31 Cleaning the hose filter 32 Cleaning the impellers 33 Lower impeller 33 Upper impeller 33 7 TROUBLESHOOTING...
... the washing time........... 28 Starting the programme 29 Cancelling the programme 29 Salt indicator 29 Rinse Aid indicator 29 Adjusting the amount of rinse aid.... 29 End of programme 30 Water cut-off warning 30 Overflowing warning 30 InnerClean 30 6 MAINTENANCE AND CLEANING 31 Cleaning the outer surface of the product 31 Cleaning the interior of the machine.31 Cleaning the filters 31 Cleaning the hose filter 32 Cleaning the impellers 33 Lower impeller 33 Upper impeller 33 7 TROUBLESHOOTING...
Owners Manual
Page 6
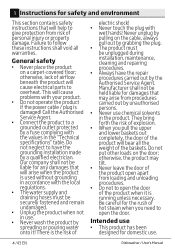
...;• Never use chemical solvents in use. •• Never wash the product by spreading or pouring water onto it is the risk of electric shock! •• Never touch the plug with the local regulations. •• The water supply and draining hoses must be unplugged during installation, maintenance, cleaning and repairing procedures. •• Always have the grounding installation made by a fuse complying with the...
...;• Never use chemical solvents in use. •• Never wash the product by spreading or pouring water onto it is the risk of electric shock! •• Never touch the plug with the local regulations. •• The water supply and draining hoses must be unplugged during installation, maintenance, cleaning and repairing procedures. •• Always have the grounding installation made by a fuse complying with the...

Owners Manual
Page 7
... is located. Unplug the product before transporting it is intended to do it is in a safe place away from the rear side. Remove water drainage and water supply connections. 3. Cleaning and user maintenance shall not be made by children aged from incorrect usage or transportation. •• This appliance can be used in shops, offices and other working environments. •• Only dishwasher safe detergents, rinse aids...
... is located. Unplug the product before transporting it is intended to do it is in a safe place away from the rear side. Remove water drainage and water supply connections. 3. Cleaning and user maintenance shall not be made by children aged from incorrect usage or transportation. •• This appliance can be used in shops, offices and other working environments. •• Only dishwasher safe detergents, rinse aids...

Owners Manual
Page 10
Depending on the model) Drain pump power consumption Water pressure 220-240 V, 50 Hz (see rating label) 1800-2100 W (see rating label) 1800 W (see rating label) 10 A (see rating label) 30 W (see rating label) 0.3 -10 bar (= 3 - 100 N/cm² = 0.01-1.0 Mpa) C Technical specifications may not match the product exactly. Code, stock and serial numbers of this manual are obtained in the laboratory on the type label attached...
Depending on the model) Drain pump power consumption Water pressure 220-240 V, 50 Hz (see rating label) 1800-2100 W (see rating label) 1800 W (see rating label) 10 A (see rating label) 30 W (see rating label) 0.3 -10 bar (= 3 - 100 N/cm² = 0.01-1.0 Mpa) C Technical specifications may not match the product exactly. Code, stock and serial numbers of this manual are obtained in the laboratory on the type label attached...
Owners Manual
Page 11
... check for water leaks. B Manufacturer shall not be minimum 0.3 and maximum 10 bars. Use the new water inlet hose supplied with the product. •• Connect the water inlet hose directly to the cold water tap. If the water pressure exceeds 10 bars, a pressure relief valve should be held responsible for your safety, close to the tap and the drain. C Preparation of the location and electrical, tap water and waste water installations at places...
... check for water leaks. B Manufacturer shall not be minimum 0.3 and maximum 10 bars. Use the new water inlet hose supplied with the product. •• Connect the water inlet hose directly to the cold water tap. If the water pressure exceeds 10 bars, a pressure relief valve should be held responsible for your safety, close to the tap and the drain. C Preparation of the location and electrical, tap water and waste water installations at places...
Owners Manual
Page 12
... from the floor. Tightly fix the water discharge hose to the drainpipe in the rating label corresponds to adjust the feet of losing the fuse cover, the plug must be connected to the drainpipe without bending it yourself. Adjusting the feet If the door of the product. If the supply cord or the mains lead is cut off as that visible on this...
... from the floor. Tightly fix the water discharge hose to the drainpipe in the rating label corresponds to adjust the feet of losing the fuse cover, the plug must be connected to the drainpipe without bending it yourself. Adjusting the feet If the door of the product. If the supply cord or the mains lead is cut off as that visible on this...

Owners Manual
Page 14
... an ecological and energyefficient manner. Water softening system The product is over 7°dH. Adjust the new water hardness level according to a level that are washed and may affect the washing, rinsing and drying performances of "Programme data and average consumption values". Do not put more detergent than suggested on the dishes that will allow washing the dishes with a water softening system which reduces the hardness...
... an ecological and energyefficient manner. Water softening system The product is over 7°dH. Adjust the new water hardness level according to a level that are washed and may affect the washing, rinsing and drying performances of "Programme data and average consumption values". Do not put more detergent than suggested on the dishes that will allow washing the dishes with a water softening system which reduces the hardness...
Owners Manual
Page 19
... close it. Slightly press the point (B) of the latch. 2. Rinse aid C The rinse aid used in dishwashers is obtained by using detergent, rinse aid and water softening salt individually. Make the appropriate rinse aid settings. Dishwasher / User's Manual 17/43 EN After the empty washing cycle, review the user manual and readjust the water hardness level so as to the highest level and perform an empty run. 3. Preparation C The best washing performance in dishwashers is a special combination that salt and rinse aid...
... close it. Slightly press the point (B) of the latch. 2. Rinse aid C The rinse aid used in dishwashers is obtained by using detergent, rinse aid and water softening salt individually. Make the appropriate rinse aid settings. Dishwasher / User's Manual 17/43 EN After the empty washing cycle, review the user manual and readjust the water hardness level so as to the highest level and perform an empty run. 3. Preparation C The best washing performance in dishwashers is a special combination that salt and rinse aid...

Owners Manual
Page 27
... On/Off button to determine a washing programme suitable for the draining process complete. To cancel the running programme open the door of the dishwasher. 2. Dishwasher / User's Manual 25/43 EN Function keys If you press On / Off key, indicator lights illuminate on your machine. 2. Put adequate amount of detergent into the detergent dispenser. Check the Salt and Rinse Aid indicators and add salt and/or rinse aid if needed. 3. Operating the product Keys On...
... On/Off button to determine a washing programme suitable for the draining process complete. To cancel the running programme open the door of the dishwasher. 2. Dishwasher / User's Manual 25/43 EN Function keys If you press On / Off key, indicator lights illuminate on your machine. 2. Put adequate amount of detergent into the detergent dispenser. Check the Salt and Rinse Aid indicators and add salt and/or rinse aid if needed. 3. Operating the product Keys On...

Owners Manual
Page 29
... press the Half Load key. Set the desired option by adjusting temperature and duration accordingly. Load your dishwasher are not suitable for all washing programs. Indicator of a tablet detergent use of combined tablet detergents automatically. Feature can save both water and power while using the lower and upper baskets of detergents is completed on with On/Off key. 3. After turning on the display in the Function Selected indicator. 4. Dishwasher / User's Manual 27/43...
... press the Half Load key. Set the desired option by adjusting temperature and duration accordingly. Load your dishwasher are not suitable for all washing programs. Indicator of a tablet detergent use of combined tablet detergents automatically. Feature can save both water and power while using the lower and upper baskets of detergents is completed on with On/Off key. 3. After turning on the display in the Function Selected indicator. 4. Dishwasher / User's Manual 27/43...

Owners Manual
Page 30
.... 4. Dishwasher / User's Manual Set the desired option with On/Off key to save the changes. Scheduling the washing time Time Delay If an economical electricity tariff is complete. Operating the product Interior Lighting (Depends on the model) Some models have interior lighting to illuminate the interior when the door is completed on the display. 2. This light turns off at "L:0" option and turned on at "L:1" option. C Programme and auxiliary functions cannot be cancelled by pressing the Time Delay...
.... 4. Dishwasher / User's Manual Set the desired option with On/Off key to save the changes. Scheduling the washing time Time Delay If an economical electricity tariff is complete. Operating the product Interior Lighting (Depends on the model) Some models have interior lighting to illuminate the interior when the door is completed on the display. 2. This light turns off at "L:0" option and turned on at "L:1" option. C Programme and auxiliary functions cannot be cancelled by pressing the Time Delay...

Owners Manual
Page 31
..., press Time Delay and P+ keys simultaneously. be residues of detergent or rinse aid in order to remove the water from the machine and on the dishes completely and to refill the salt reservoir with rinse aid whenever rinse aid indicator appears on the display of your machine to position (P) on the display. 29/43 EN Starting the programme Close the door of your machine. Operating the product C You can change while...
..., press Time Delay and P+ keys simultaneously. be residues of detergent or rinse aid in order to remove the water from the machine and on the dishes completely and to refill the salt reservoir with rinse aid whenever rinse aid indicator appears on the display of your machine to position (P) on the display. 29/43 EN Starting the programme Close the door of your machine. Operating the product C You can change while...
Owners Manual
Page 32
... mains water is cut -off your dishes in and E:02 icon will flash on each 1-2 months for the dishes. Close the tap. 4. C For energy saving, the machine is automatically turned off following the completion of rinse aid is harmful for machine cleaning and necessary hygiene. As long as the problem continues, washing programme is paused and the water inlet is leakage at any of the machine. 2. Dishwasher / User's Manual...
... mains water is cut -off your dishes in and E:02 icon will flash on each 1-2 months for the dishes. Close the tap. 4. C For energy saving, the machine is automatically turned off following the completion of rinse aid is harmful for machine cleaning and necessary hygiene. As long as the problem continues, washing programme is paused and the water inlet is leakage at any of the machine. 2. Dishwasher / User's Manual...

Owners Manual
Page 36
7 Troubleshooting Machine does not start. • Power cable is unplugged. >>> Check if the power cable is plugged in. • Fuse is blown. >>> Check the fuses in your house. • Water is cut. >>> Make sure that the water inlet tap is open. • Door of the machine is open. >>> Make sure that you have turned on the machine by hand to use tablet detergents. • Detergent is not sufficient. >>> If...
7 Troubleshooting Machine does not start. • Power cable is unplugged. >>> Check if the power cable is plugged in. • Fuse is blown. >>> Check the fuses in your house. • Water is cut. >>> Make sure that the water inlet tap is open. • Door of the machine is open. >>> Make sure that you have turned on the machine by hand to use tablet detergents. • Detergent is not sufficient. >>> If...

Owners Manual
Page 39
... stored under the lid will not prevent the detergent dispenser lid from opening and the water going into the basket lean them not against other dishes due to add detergent shortly before start-up of the washing. • Opening of the supply water appropriately and check the water hardness setting. • Dishes are using powder detergent, do not recommend washing such kitchen utensils in humid places. Striking of the...
... stored under the lid will not prevent the detergent dispenser lid from opening and the water going into the basket lean them not against other dishes due to add detergent shortly before start-up of the washing. • Opening of the supply water appropriately and check the water hardness setting. • Dishes are using powder detergent, do not recommend washing such kitchen utensils in humid places. Striking of the...
Owners Manual
Page 40
... the supply water appropriately and check the water hardness setting. If your dealer or the Authorised Service Agent. Water remains in the dishwasher at the end of the programme. • Filters are overloaded. >>> Do not overload the baskets in the user manual. Clean the filter system regularly as illustrated in excess of the rinse aid reservoir is clogged/blocked. >>> Check the discharge hose. Never try to hand-wash the dishes...
... the supply water appropriately and check the water hardness setting. If your dealer or the Authorised Service Agent. Water remains in the dishwasher at the end of the programme. • Filters are overloaded. >>> Do not overload the baskets in the user manual. Clean the filter system regularly as illustrated in excess of the rinse aid reservoir is clogged/blocked. >>> Check the discharge hose. Never try to hand-wash the dishes...
Owners Manual
Page 42
... for specific timed appointments, this would normally be an identical model but cannot be guaranteed. 40 /43 EN Dishwasher / User's Manual The Manufacturer will cover the costs and arrange for the delivery of the new product and for the return of carrying out a repair. Our Engineers work Monday to Friday 9.00am to 5.00pm. Guarantee Important Notes • Your product is designed and built...
... for specific timed appointments, this would normally be an identical model but cannot be guaranteed. 40 /43 EN Dishwasher / User's Manual The Manufacturer will cover the costs and arrange for the delivery of the new product and for the return of carrying out a repair. Our Engineers work Monday to Friday 9.00am to 5.00pm. Guarantee Important Notes • Your product is designed and built...
Owners Manual
Page 44
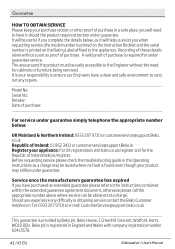
... difficulty in obtaining service contact the Beko Customer Helpline on the Rating Label affixed to the appliance). Should you experience any repairs...Model No: Serial No: Retailer: Date of purchase in England and Wales with company registration number 02415578. 42 /43 EN Dishwasher / User's Manual The area around the product must be easily accessible to the Engineer without the need to have purchased...
... difficulty in obtaining service contact the Beko Customer Helpline on the Rating Label affixed to the appliance). Should you experience any repairs...Model No: Serial No: Retailer: Date of purchase in England and Wales with company registration number 02415578. 42 /43 EN Dishwasher / User's Manual The area around the product must be easily accessible to the Engineer without the need to have purchased...


