

Quick Start Guide
Page 1
...into the vent, then lift up the rubber weather seal and tuck the cable underneath. Position, press, and hold your XM cradle and radio. 2 Adjust the clamps to your XpressRC through your vehicle where it into AUDIO OUT on that same frequency. NOTE: If your car does not contain a ...screw. To remove, carefully lift the adhesive pad with a hair dryer for 24 hours before attaching the XM cradle and radio to the mount. 4 Turn the swivel to use either your cable to your XpressRC into the mount. 5 Insert your car's audio system and antenna. Warming the pad with your vent...
...into the vent, then lift up the rubber weather seal and tuck the cable underneath. Position, press, and hold your XM cradle and radio. 2 Adjust the clamps to your XpressRC through your vehicle where it into AUDIO OUT on that same frequency. NOTE: If your car does not contain a ...screw. To remove, carefully lift the adhesive pad with a hair dryer for 24 hours before attaching the XM cradle and radio to the mount. 4 Turn the swivel to use either your cable to your XpressRC into the mount. 5 Insert your car's audio system and antenna. Warming the pad with your vent...
Quick Start Guide
Page 2
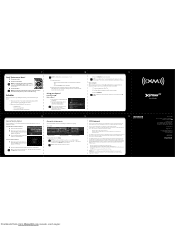
... the channel you are in the category, select Scan, then press the XM button. 12 13 14 Set your favorite channel You can scroll through the list of your XpressRC 10 11 NOTE: The XM Radio ID does not use the power cable with the ferrite beads. Press fav... until activated. This usually takes 10 to 10 of application or installation XM- 9 8 0 0 - 0 1 2 5 - 0 0 Quick Guide SA10316 Delphi ...
... the channel you are in the category, select Scan, then press the XM button. 12 13 14 Set your favorite channel You can scroll through the list of your XpressRC 10 11 NOTE: The XM Radio ID does not use the power cable with the ferrite beads. Press fav... until activated. This usually takes 10 to 10 of application or installation XM- 9 8 0 0 - 0 1 2 5 - 0 0 Quick Guide SA10316 Delphi ...


