
User Manual
Page 4
...qualified service technician or your retailer. Safety information • Before setting up the monitor, carefully read all cables are correctly connected and the power cables are provided for a long period of the cabinet are not damaged. Do not block these slots. Overloading can result in serious physical... injury. • If the power supply is provided. • The monitor should be used for ventilation. The dangerous high voltages inside the monitor may result in fire...
...qualified service technician or your retailer. Safety information • Before setting up the monitor, carefully read all cables are correctly connected and the power cables are provided for a long period of the cabinet are not damaged. Do not block these slots. Overloading can result in serious physical... injury. • If the power supply is provided. • The monitor should be used for ventilation. The dangerous high voltages inside the monitor may result in fire...
User Manual
Page 5
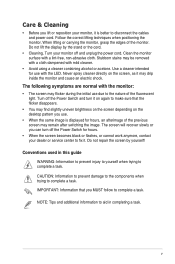
...pattern you lift or reposition your dealer or service center to fix it is better to disconnect the cables and power cord. Turn your monitor off the Power Switch and turn off the Power Switch for hours, an afterimage of the previous screen may be removed with a cloth dampened with a lint...trying to complete a task. Clean the monitor surface with mild cleaner. • Avoid using a cleaner containing alcohol or acetone. Turn off and unplug the power cord. Do not repair the screen by the stand or the cord. • Cleaning. Care & Cleaning • Before you use due to the ...
...pattern you lift or reposition your dealer or service center to fix it is better to disconnect the cables and power cord. Turn your monitor off the Power Switch and turn off the Power Switch for hours, an afterimage of the previous screen may be removed with a cloth dampened with a lint...trying to complete a task. Clean the monitor surface with mild cleaner. • Avoid using a cleaner containing alcohol or acetone. Turn off and unplug the power cord. Do not repair the screen by the stand or the cord. • Cleaning. Care & Cleaning • Before you use due to the ...

User Manual
Page 7
With these features, you can enjoy the convenience and delightful visual experience that enhance your viewing experience. The latest widescreen LED monitor from ASUS provides a crisper, broader, and brighter display, plus a host of features that the VW199 Series brings you for the following items: ...LED monitor Monitor stand and base User manual CD Quick start guide Warranty card Power cord VGA cable Audio cable (VW199T/S) If any of the above items is damaged or missing, contact your VW199 Series LED Monitor package for purchasing the...
With these features, you can enjoy the convenience and delightful visual experience that enhance your viewing experience. The latest widescreen LED monitor from ASUS provides a crisper, broader, and brighter display, plus a host of features that the VW199 Series brings you for the following items: ...LED monitor Monitor stand and base User manual CD Quick start guide Warranty card Power cord VGA cable Audio cable (VW199T/S) If any of the above items is damaged or missing, contact your VW199 Series LED Monitor package for purchasing the...

User Manual
Page 9
...selected or move to the next fuction. This is activated. 4. • • Button: Press this button to decrease the value of the power indicator is as the OSD menu is also a hotkey for Volume adjustment. 3. MENU Button: • Press this button to enter the OSD ..., Night View Mode, and sRGB Mode) with SPLENDID™ Video Intelligence Technology. Status Blue Amber OFF Description ON Standby mode OFF ASUS LED Monitor VW199 Series 1-3 Power Indicator • The color definition of the function selected or move right/up to the next function. 1. • • ...
...selected or move to the next fuction. This is activated. 4. • • Button: Press this button to decrease the value of the power indicator is as the OSD menu is also a hotkey for Volume adjustment. 3. MENU Button: • Press this button to enter the OSD ..., Night View Mode, and sRGB Mode) with SPLENDID™ Video Intelligence Technology. Status Blue Amber OFF Description ON Standby mode OFF ASUS LED Monitor VW199 Series 1-3 Power Indicator • The color definition of the function selected or move right/up to the next function. 1. • • ...

User Manual
Page 10
... is activated. 4. • • Button: Press this button for 2-4 seconds (for Contrast adjustment. 3. Use this button to turn the monitor on/off. 1-4 Chapter 1: Product Introduction Power Button: • Press this hotkey to the next fuction. This is also a hotkey for VGA mode only).
... is activated. 4. • • Button: Press this button for 2-4 seconds (for Contrast adjustment. 3. Use this button to turn the monitor on/off. 1-4 Chapter 1: Product Introduction Power Button: • Press this hotkey to the next fuction. This is also a hotkey for VGA mode only).

User Manual
Page 11
Power Indicator • The color definition of the LED monitor Screw holes for VESA Wall Mount Rear connectors 1 234 1 AC-IN port 2 Audio Line-in port (VW199T/S) 3 DVI port (VW199T/N) 4 VGA port ASUS LED Monitor VW199 Series 1-5 Status Blue Amber OFF Description ON Standby mode OFF 1.4.2 Rear of the power indicator is as the below table. 6.
Power Indicator • The color definition of the LED monitor Screw holes for VESA Wall Mount Rear connectors 1 234 1 AC-IN port 2 Audio Line-in port (VW199T/S) 3 DVI port (VW199T/N) 4 VGA port ASUS LED Monitor VW199 Series 1-5 Status Blue Amber OFF Description ON Standby mode OFF 1.4.2 Rear of the power indicator is as the below table. 6.

User Manual
Page 19
...present in the ON mode. • Check if the power cord is properly connected to the monitor and the power outlet. ASUS LED Monitor VW199 Series 2-8 3.3 Troubleshooting (FAQ) Problem Possible Solution Power LED is not ON • Press the button to ...check if the monitor is in the image the monitor and the computer. • Move electrical devices that may cause electrical interference. No sound or sound is low (VW199T...
...present in the ON mode. • Check if the power cord is properly connected to the monitor and the power outlet. ASUS LED Monitor VW199 Series 2-8 3.3 Troubleshooting (FAQ) Problem Possible Solution Power LED is not ON • Press the button to ...check if the monitor is in the image the monitor and the computer. • Move electrical devices that may cause electrical interference. No sound or sound is low (VW199T...

