
User Guide
Page 9
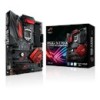
ROG STRIX Z370-H GAMING specifications summary CPU Chipset Memory Expansion slots VGA Multi-GPU support Storage LAN LGA1151 Socket for 8th Gen Intel® Core™ Processors Supports 14nm CPU Supports Intel® Turbo Boost Technology 2.0* * The Intel® Turbo... architecture Supports Intel® Extreme Memory Profile (XMP)* * The maximum memory frequency supported varies by processor. ** Refer to the latest version from ASUS support website. Adjust BIOS settings to use SATA device. ** Before using M.2 SATA mode device. Intel® I219-V Gigabit LAN- resolution 1920 x 1200...
ROG STRIX Z370-H GAMING specifications summary CPU Chipset Memory Expansion slots VGA Multi-GPU support Storage LAN LGA1151 Socket for 8th Gen Intel® Core™ Processors Supports 14nm CPU Supports Intel® Turbo Boost Technology 2.0* * The Intel® Turbo... architecture Supports Intel® Extreme Memory Profile (XMP)* * The maximum memory frequency supported varies by processor. ** Refer to the latest version from ASUS support website. Adjust BIOS settings to use SATA device. ** Before using M.2 SATA mode device. Intel® I219-V Gigabit LAN- resolution 1920 x 1200...

User Guide
Page 17
... SATA6G_12, SATA6G_34, SATA6G_56 9. USB 2.0 connectors (10-1 pin USB910, USB1112) 12. Chapter 1 Layout contents Connectors/Jumpers/Buttons and switches/Slots 1. LGA1151 CPU socket 3. CPU Over Voltage jumper (3-pin CPU_OV) 5. TPM connector (14-1 pin TPM) 13. M.2_2) 8. System panel connector (20-3...panel audio connector (10-1 pin AAFP) Page 1-17 1-4 1-16 1-10 1-5 1-14 1-19 1-12 1-18 1-9 1-15 1-14 1-13 1-13 ROG STRIX Z370-H GAMING 1-3 CPU, CPU optional, AiO pump, and chassis fan connectors (4-pin CPU_FAN; 4-pin CPU_OPT; 4-pin AIO_PUMP; 4-pin CHA_FAN1-2) 4. ATX power connectors ...
... SATA6G_12, SATA6G_34, SATA6G_56 9. USB 2.0 connectors (10-1 pin USB910, USB1112) 12. Chapter 1 Layout contents Connectors/Jumpers/Buttons and switches/Slots 1. LGA1151 CPU socket 3. CPU Over Voltage jumper (3-pin CPU_OV) 5. TPM connector (14-1 pin TPM) 13. M.2_2) 8. System panel connector (20-3...panel audio connector (10-1 pin AAFP) Page 1-17 1-4 1-16 1-10 1-5 1-14 1-19 1-12 1-18 1-9 1-15 1-14 1-13 1-13 ROG STRIX Z370-H GAMING 1-3 CPU, CPU optional, AiO pump, and chassis fan connectors (4-pin CPU_FAN; 4-pin CPU_OPT; 4-pin AIO_PUMP; 4-pin CHA_FAN1-2) 4. ATX power connectors ...

User Guide
Page 18
...before installing the CPU. • Upon purchase of the PnP cap. 1-4 Chapter 1: Product Introduction ASUS will shoulder the cost of repair only if the damage is on the LGA1151 socket. • The product warranty does not cover damage to the PnP cap/socket contacts/motherboard... components. ASUS will process Return Merchandise Authorization (RMA) requests only if the motherboard comes with a surface mount LGA1151 socket designed for the 8th Generation Intel® Core™ processor. • Ensure ...
...before installing the CPU. • Upon purchase of the PnP cap. 1-4 Chapter 1: Product Introduction ASUS will shoulder the cost of repair only if the damage is on the LGA1151 socket. • The product warranty does not cover damage to the PnP cap/socket contacts/motherboard... components. ASUS will process Return Merchandise Authorization (RMA) requests only if the motherboard comes with a surface mount LGA1151 socket designed for the 8th Generation Intel® Core™ processor. • Ensure ...

User Guide
Page 35
Chapter 2 Top of CPU Bottom of CPU ROG STRIX Z370-H GAMING Bottom of CPU 2-1 The motherboard layout may vary with models, but the installation steps are for reference only. DO NOT install a CPU designed for LGA1151 socket only. Chapter 2: Basic Installation Basic Installation 2.1 Building your PC system 2 The diagrams in this section are the same for all models. 2.1.1 CPU installation Ensure that you install the correct CPU designed for LGA1155 and LGA1156 sockets on the LGA1151 socket.
Chapter 2 Top of CPU Bottom of CPU ROG STRIX Z370-H GAMING Bottom of CPU 2-1 The motherboard layout may vary with models, but the installation steps are for reference only. DO NOT install a CPU designed for LGA1151 socket only. Chapter 2: Basic Installation Basic Installation 2.1 Building your PC system 2 The diagrams in this section are the same for all models. 2.1.1 CPU installation Ensure that you install the correct CPU designed for LGA1155 and LGA1156 sockets on the LGA1151 socket.

User Guide
Page 36
.... • Ensure to use a soft stable surface when installing the CPU to the CPU Installation Tool to prevent CPU damage. • ASUS will not cover damages resulting from incorrect CPU installation/removal, incorrect CPU orientation/placement, or other damages resulting from negligence by the user. 2-2... Tool. • Always firmly hold both sides of CPU Chapter 2 • The CPU Installation Tool is only compatible on ASUS motherboards with a Intel® LGA1151 socket. • Ensure that the CPU is firmly clicked into place before installing it onto the CPU socket on the motherboard....
.... • Ensure to use a soft stable surface when installing the CPU to the CPU Installation Tool to prevent CPU damage. • ASUS will not cover damages resulting from incorrect CPU installation/removal, incorrect CPU orientation/placement, or other damages resulting from negligence by the user. 2-2... Tool. • Always firmly hold both sides of CPU Chapter 2 • The CPU Installation Tool is only compatible on ASUS motherboards with a Intel® LGA1151 socket. • Ensure that the CPU is firmly clicked into place before installing it onto the CPU socket on the motherboard....