
User Guide
Page 2
... CONTAINED IN THIS MANUAL ARE FURNISHED FOR INFORMATIONAL USE ONLY, AND ARE SUBJECT TO CHANGE AT ANY TIME WITHOUT NOTICE, AND SHOULD NOT BE CONSTRUED AS A COMMITMENT BY ASUS. ii ASUS PROVIDES THIS MANUAL "AS IS" WITHOUT WARRANTY OF ANY KIND, EITHER EXPRESS OR IMPLIED, INCLUDING BUT...stored in a retrieval system, or translated into any language in it, may not be registered trademarks or copyrights of ASUSTeK COMPUTER INC. ("ASUS"). ASUS ASSUMES NO RESPONSIBILITY OR LIABILITY FOR ANY ERRORS OR INACCURACIES THAT MAY APPEAR IN THIS MANUAL, INCLUDING THE PRODUCTS AND SOFTWARE DESCRIBED IN IT...
... CONTAINED IN THIS MANUAL ARE FURNISHED FOR INFORMATIONAL USE ONLY, AND ARE SUBJECT TO CHANGE AT ANY TIME WITHOUT NOTICE, AND SHOULD NOT BE CONSTRUED AS A COMMITMENT BY ASUS. ii ASUS PROVIDES THIS MANUAL "AS IS" WITHOUT WARRANTY OF ANY KIND, EITHER EXPRESS OR IMPLIED, INCLUDING BUT...stored in a retrieval system, or translated into any language in it, may not be registered trademarks or copyrights of ASUSTeK COMPUTER INC. ("ASUS"). ASUS ASSUMES NO RESPONSIBILITY OR LIABILITY FOR ANY ERRORS OR INACCURACIES THAT MAY APPEAR IN THIS MANUAL, INCLUDING THE PRODUCTS AND SOFTWARE DESCRIBED IN IT...

User Guide
Page 4
Contents Chapter 3: Powering up 3.1 Starting up for the first time 3-1 3.2 Powering off the computer 3-2 3.2.1 Using the OS shut down function 3-2 3.2.2 Using the dual function power switch 3-2 Chapter 4: BIOS setup 4.1 Managing and updating your BIOS 4-1 4.1.1 Creating a bootable floppy disk 4-1 4.1.2 AFUDOS utility 4-2 4.1.3 ASUS CrashFree BIOS 2 utility 4-4 4.2 BIOS setup program 4-5 4.2.1 BIOS menu screen 4-6 4.2.2 Menu bar 4-6 4.2.3 Navigation...
Contents Chapter 3: Powering up 3.1 Starting up for the first time 3-1 3.2 Powering off the computer 3-2 3.2.1 Using the OS shut down function 3-2 3.2.2 Using the dual function power switch 3-2 Chapter 4: BIOS setup 4.1 Managing and updating your BIOS 4-1 4.1.1 Creating a bootable floppy disk 4-1 4.1.2 AFUDOS utility 4-2 4.1.3 ASUS CrashFree BIOS 2 utility 4-4 4.2 BIOS setup program 4-5 4.2.1 BIOS menu screen 4-6 4.2.2 Menu bar 4-6 4.2.3 Navigation...

User Guide
Page 16
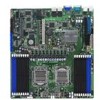
...‑point serial interconnections between integrated circuits in packets. Serial Attached SCSI (SAS) technology support (KFSN4-DRE/SAS model only) SAS is projected to increase the communication speed between devices and allows higher clockspeeds by ...cache structure for AMD Opteron™ 2000 series processors. Building on and improving the parallel SCSI foundation, SAS is the new industry standard that speeds up to meet the higher bandwidth requirements of the Ultra320 SCSI technology...each core and shared L3 cache to 48 times faster than other existing technologies.
...‑point serial interconnections between integrated circuits in packets. Serial Attached SCSI (SAS) technology support (KFSN4-DRE/SAS model only) SAS is projected to increase the communication speed between devices and allows higher clockspeeds by ...cache structure for AMD Opteron™ 2000 series processors. Building on and improving the parallel SCSI foundation, SAS is the new industry standard that speeds up to meet the higher bandwidth requirements of the Ultra320 SCSI technology...each core and shared L3 cache to 48 times faster than other existing technologies.

User Guide
Page 17
...and data are corrupted. The system fan rotations per minute (RPM) is monitored for critical components. 1.4.2 Innovative ASUS features CrashFree BIOS 2 This feature allows you to restore the original BIOS data from the 12 Mbps bandwidth ... loading to buy a replacement ROM chip. This protection eliminates the need to ensure quiet, cool, and efficient operation. ASUS KFSN4-DRE Series 1-3 USB 2.0 is monitored by the ASIC (Winbond W83793G) to a fast 480 Mbps on USB 2.0. The ... The SATA 3Gb/s specification provides twice the bandwidth of current for timely failure detection.
...and data are corrupted. The system fan rotations per minute (RPM) is monitored for critical components. 1.4.2 Innovative ASUS features CrashFree BIOS 2 This feature allows you to restore the original BIOS data from the 12 Mbps bandwidth ... loading to buy a replacement ROM chip. This protection eliminates the need to ensure quiet, cool, and efficient operation. ASUS KFSN4-DRE Series 1-3 USB 2.0 is monitored by the ASIC (Winbond W83793G) to a fast 480 Mbps on USB 2.0. The ... The SATA 3Gb/s specification provides twice the bandwidth of current for timely failure detection.

User Guide
Page 37
ASUS KFSN4-DRE Series 2-17 2.5.3 Interrupt assignments Standard interrupt assignments IRQ Priority 0 1 1 2 2 - 3 11 4 12 5 13 6 14 7 15 8 3 9 4 10 5 11 6 12 7 13 8 14 9 15 10 Standard Function System ... Controller Re-direct to IRQ#9 Communications Port (COM2)* Communications Port (COM1)* IRQ holder for PCI steering* Floppy Disk Controller Printer Port (LPT1)* System CMOS/Real Time Clock IRQ holder for PCI steering* IRQ holder for PCI steering* IRQ holder for PCI steering* PS/2 Compatible Mouse Port* Numeric Data Processor Primary IDE...
ASUS KFSN4-DRE Series 2-17 2.5.3 Interrupt assignments Standard interrupt assignments IRQ Priority 0 1 1 2 2 - 3 11 4 12 5 13 6 14 7 15 8 3 9 4 10 5 11 6 12 7 13 8 14 9 15 10 Standard Function System ... Controller Re-direct to IRQ#9 Communications Port (COM2)* Communications Port (COM1)* IRQ holder for PCI steering* Floppy Disk Controller Printer Port (LPT1)* System CMOS/Real Time Clock IRQ holder for PCI steering* IRQ holder for PCI steering* IRQ holder for PCI steering* PS/2 Compatible Mouse Port* Numeric Data Processor Primary IDE...

User Guide
Page 39
... system boot failure! ® CLRTC1 2 1 Normal (Default) 3 2 Clear CMOS KFSN4-DRE Series Clear RTC RAM ASUS KFSN4-DRE Series 2-19 2.6 Jumpers 1. Plug the power cord and turn ON the computer. 6. You can clear the CMOS memory of date, time, and system setup parameters by erasing the CMOS RTC RAM data. Except when...clearing the RTC RAM, NEVER remove the cap on pins 2-3 for about 5~10 seconds, then move the cap back to clear the Real Time Clock (RTC) RAM in CMOS, which include system setup information such as system passwords. Hold down the key during the boot process and enter...
... system boot failure! ® CLRTC1 2 1 Normal (Default) 3 2 Clear CMOS KFSN4-DRE Series Clear RTC RAM ASUS KFSN4-DRE Series 2-19 2.6 Jumpers 1. Plug the power cord and turn ON the computer. 6. You can clear the CMOS memory of date, time, and system setup parameters by erasing the CMOS RTC RAM data. Except when...clearing the RTC RAM, NEVER remove the cap on pins 2-3 for about 5~10 seconds, then move the cap back to clear the Real Time Clock (RTC) RAM in CMOS, which include system setup information such as system passwords. Hold down the key during the boot process and enter...

User Guide
Page 54
Chapter summary 3 3.1 Starting up for the first time 3-1 3.2 Powering off the computer 3-2 ASUS KFSN4-DRE Series
Chapter summary 3 3.1 Starting up for the first time 3-1 3.2 Powering off the computer 3-2 ASUS KFSN4-DRE Series

User Guide
Page 55
... the system case cover. 2. Monitor b. If you do not see anything within 30 seconds from the time you press the ATX power button. For systems with a surge protector. 5. ASUS KFSN4-DRE Series 3-1 After applying power, the system power LED on the system front panel case lights up when ... the system LED lights up . Connect the power cord to enter the BIOS Setup. 3.1 Starting up for assistance. 7. If your retailer for the first time 1. External SCSI devices (starting with "green" standards or if it has a "power standby" feature, the monitor LED may have failed a power-on...
... the system case cover. 2. Monitor b. If you do not see anything within 30 seconds from the time you press the ATX power button. For systems with a surge protector. 5. ASUS KFSN4-DRE Series 3-1 After applying power, the system power LED on the system front panel case lights up when ... the system LED lights up . Connect the power cord to enter the BIOS Setup. 3.1 Starting up for assistance. 7. If your retailer for the first time 1. External SCSI devices (starting with "green" standards or if it has a "power standby" feature, the monitor LED may have failed a power-on...

User Guide
Page 64
... select items in the menu and change the settings. 4.2.1 BIOS menu screen Menu items Menu bar Configuration fields General help Main Advanced System Date System Time Floppy A Server BIOS SETUP UTILITY Security Boot Exit [Wed, 07/25/2007] [11:07:30] [1.44 MB 3½"] IDE Configuration Primary IDE Master Primary IDE...
... select items in the menu and change the settings. 4.2.1 BIOS menu screen Menu items Menu bar Configuration fields General help Main Advanced System Date System Time Floppy A Server BIOS SETUP UTILITY Security Boot Exit [Wed, 07/25/2007] [11:07:30] [1.44 MB 3½"] IDE Configuration Primary IDE Master Primary IDE...

User Guide
Page 65
... an item that item. 4.2.8 Scroll bar A scroll bar appears on the menu bar have their respective menu items. System Date System Time Floppy A IDE Configuration Primary IDE Master Primary IDE Slave Secondary IDE Master Secondary IDE Slave Tertiary IDE Master Fourth IDE Master Fifth IDE ...items on the screen. 4.2.9 General help Pop-up window with the configuration options for the menu items. If an item is highlighted when selected. ASUS KFSN4-DRE Series 4-7 To display the sub-menu, select the item and press . 4.2.6 Configuration fields These fields show the values for that is a ...
... an item that item. 4.2.8 Scroll bar A scroll bar appears on the menu bar have their respective menu items. System Date System Time Floppy A IDE Configuration Primary IDE Master Primary IDE Slave Secondary IDE Master Secondary IDE Slave Tertiary IDE Master Fourth IDE Master Fifth IDE ...items on the screen. 4.2.9 General help Pop-up window with the configuration options for the menu items. If an item is highlighted when selected. ASUS KFSN4-DRE Series 4-7 To display the sub-menu, select the item and press . 4.2.6 Configuration fields These fields show the values for that is a ...

User Guide
Page 66
...Save and Exit ESC Exit V02.61 (C)Copyright 1985-2006, American Megatrends, Inc. 4.3.1 System Date [Day xx/xx/xxxx] Allows you to set the system time. 4.3.3 Floppy A [1.44 MB 3½"] Sets the type of the basic system information. Use [+] or [-] to navigate through them. Configuration options: [...items and how to configure system Date. →← Select Screen ↑↓ Select Item +- Main Advanced System Date System Time Server Floppy A IDE Configuration Primary IDE Master Primary IDE Slave Secondary IDE Master Secondary IDE Slave Tertiary IDE Master Fourth IDE Master ...
...Save and Exit ESC Exit V02.61 (C)Copyright 1985-2006, American Megatrends, Inc. 4.3.1 System Date [Day xx/xx/xxxx] Allows you to set the system time. 4.3.3 Floppy A [1.44 MB 3½"] Sets the type of the basic system information. Use [+] or [-] to navigate through them. Configuration options: [...items and how to configure system Date. →← Select Screen ↑↓ Select Item +- Main Advanced System Date System Time Server Floppy A IDE Configuration Primary IDE Master Primary IDE Slave Secondary IDE Master Secondary IDE Slave Tertiary IDE Master Fourth IDE Master ...

User Guide
Page 68
...] Selects the type of the appropriate IDE device type. When set to [Disabled], the data transfer from and to the device occurs one sector at a time if the device supports multi-sector transfer feature. The BIOS automatically detects the values opposite the dimmed items (Device, Vendor, Size, LBA Mode, Block Mode... Device) if your device is installed in the system. When set to [Auto], the data transfer from and to the device occurs multiple sectors at a time.
...] Selects the type of the appropriate IDE device type. When set to [Disabled], the data transfer from and to the device occurs one sector at a time if the device supports multi-sector transfer feature. The BIOS automatically detects the values opposite the dimmed items (Device, Vendor, Size, LBA Mode, Block Mode... Device) if your device is installed in the system. When set to [Auto], the data transfer from and to the device occurs multiple sectors at a time.

User Guide
Page 72
...NorthBridge Configuration The NorthBridge Configuration menu allows you to display the sub-menu. Advanced BIOS SETUP UTILITY NorthBridge Configuration Memory Configuration DRAM Timing Configuration ECC Configuration IOMMU Option Menu Memory CLK :200 MHz CAS Latency(Tcl) :3.0 RAS/CAS Delay(Trcd) :3 CLK Row Precharge... Time(Trp) :3 CLK Min Active RAS(Tras) :8 CLK RAS/RAS Delay(Trrd) :2 CLK Row Cycle (Trc) :12 CLK NUMA Function [Enabled] →←...
...NorthBridge Configuration The NorthBridge Configuration menu allows you to display the sub-menu. Advanced BIOS SETUP UTILITY NorthBridge Configuration Memory Configuration DRAM Timing Configuration ECC Configuration IOMMU Option Menu Memory CLK :200 MHz CAS Latency(Tcl) :3.0 RAS/CAS Delay(Trcd) :3 CLK Row Precharge... Time(Trp) :3 CLK Min Active RAS(Tras) :8 CLK RAS/RAS Delay(Trrd) :2 CLK Row Cycle (Trc) :12 CLK NUMA Function [Enabled] →←...

User Guide
Page 74
...[Both] The following item appears when Memory Clock Mode is set to [Limit] or [Manual]. DRAM Timing Configuration Main Advanced BIOS SETUP UTILITY DRAM Timing Configuration Memory Clock Mode DRAM Timing Mode [Auto] [Auto] Options Auto Limit Manual Memory Clock Mode [Auto] Configuration options: [Auto] ...[Limit] [Manual] The following items appear when DRAM Timing Mode is set to [DCT 0], [DCT 1] or [Both]. CAS Latency (CL) [Auto] Configuration options: [Auto] [3 CLK] [4 CLK] [5 CLK]...
...[Both] The following item appears when Memory Clock Mode is set to [Limit] or [Manual]. DRAM Timing Configuration Main Advanced BIOS SETUP UTILITY DRAM Timing Configuration Memory Clock Mode DRAM Timing Mode [Auto] [Auto] Options Auto Limit Manual Memory Clock Mode [Auto] Configuration options: [Auto] ...[Limit] [Manual] The following items appear when DRAM Timing Mode is set to [DCT 0], [DCT 1] or [Both]. CAS Latency (CL) [Auto] Configuration options: [Auto] [3 CLK] [4 CLK] [5 CLK]...

User Guide
Page 75
... CLK] [4 CLK] [Auto] tRDRD [2 CLK] Configuration options: [2 CLK] [3 CLK] [4 CLK] [5 CLK] [Auto] The following item appears when DRAM Timing Mode is set to [DCT 0], [DCT 1] or [Both]. tRFC0 [Auto] Configuration options: [75ns] [105ns] [127.5ns] [195ns] [327.5ns] [Auto...Configuration options: [75ns] [105ns] [127.5ns] [195ns] [327.5ns] [Auto] tRFC3 [Auto] Configuration options: [75ns] [105ns] [127.5ns] [195ns] [327.5ns] [Auto] ASUS KFSN4-DRE Series 4-17 tRWTTO [2 CLK] Configuration options: [2 CLK] [3 CLK] [4 CLK] [5 CLK] [6 CLK] [7 CLK] [8 CLK] [9 CLK] [Auto] tWRRD [0 CLK] Configuration ...
... CLK] [4 CLK] [Auto] tRDRD [2 CLK] Configuration options: [2 CLK] [3 CLK] [4 CLK] [5 CLK] [Auto] The following item appears when DRAM Timing Mode is set to [DCT 0], [DCT 1] or [Both]. tRFC0 [Auto] Configuration options: [75ns] [105ns] [127.5ns] [195ns] [327.5ns] [Auto...Configuration options: [75ns] [105ns] [127.5ns] [195ns] [327.5ns] [Auto] tRFC3 [Auto] Configuration options: [75ns] [105ns] [127.5ns] [195ns] [327.5ns] [Auto] ASUS KFSN4-DRE Series 4-17 tRWTTO [2 CLK] Configuration options: [2 CLK] [3 CLK] [4 CLK] [5 CLK] [6 CLK] [7 CLK] [8 CLK] [9 CLK] [Auto] tWRRD [0 CLK] Configuration ...

User Guide
Page 87
... Intrusion Function [Enabled] to change other items appear to allow you have set your BIOS password, you can clear it by erasing the CMOS Real Time Clock (RTC) RAM. From the password box, type a password composed of the screen shows the default Not Installed. After you to set a Supervisor Password: 1. See...-2006, American Megatrends, Inc. To set or change the supervisor password, follow the same steps as in setting a user password. Confirm the password when prompted. ASUS KFSN4-DRE Series 4-29
... Intrusion Function [Enabled] to change other items appear to allow you have set your BIOS password, you can clear it by erasing the CMOS Real Time Clock (RTC) RAM. From the password box, type a password composed of the screen shows the default Not Installed. After you to set a Supervisor Password: 1. See...-2006, American Megatrends, Inc. To set or change the supervisor password, follow the same steps as in setting a user password. Confirm the password when prompted. ASUS KFSN4-DRE Series 4-29

User Guide
Page 88
... the default Not Installed. Configuration options: [Disabled] [Enabled] 4-30 Chapter 4: BIOS setup again to change the user password, follow the same steps as Date and Time. [Full Access] allows viewing and changing all the fields in setting a user password. Select the Change User Password item and press . 2. The message "Password Installed...
... the default Not Installed. Configuration options: [Disabled] [Enabled] 4-30 Chapter 4: BIOS setup again to change the user password, follow the same steps as Date and Time. [Full Access] allows viewing and changing all the fields in setting a user password. Select the Change User Password item and press . 2. The message "Password Installed...

User Guide
Page 90
... function allows the option ROMs to boot the system. Configuration options: [Disabled] [Enabled] 4-32 Chapter 4: BIOS setup This will decrease the time needed to trap Interrupt 19. Change Field Tab Select Field F1 General Help F10 Save and Exit ESC Exit V02.61 (C)Copyright 1985-2006,... [Disabled] [Enabled] Full Logo Display [Enabled] Allows you to select the power-on self tests (POST) while booting to decrease the time needed to use the ASUS MyLogo2™ feature. Quick Boot [Enabled] Enabling this item to [Enabled] to boot the system. →← Select Screen ↑↓...
... function allows the option ROMs to boot the system. Configuration options: [Disabled] [Enabled] 4-32 Chapter 4: BIOS setup This will decrease the time needed to trap Interrupt 19. Change Field Tab Select Field F1 General Help F10 Save and Exit ESC Exit V02.61 (C)Copyright 1985-2006,... [Disabled] [Enabled] Full Logo Display [Enabled] Allows you to select the power-on self tests (POST) while booting to decrease the time needed to use the ASUS MyLogo2™ feature. Quick Boot [Enabled] Enabling this item to [Enabled] to boot the system. →← Select Screen ↑↓...

User Guide
Page 91
... while exiting. Select Exit & Save Changes or make other than System Date, System Time, and Password, the BIOS asks for this menu. Exit & Discard Changes Select this option, a confirmation appears. F10 key can be used for a confirmation before exiting. ASUS KFSN4-DRE Series 4-33 Pressing does not immediately exit this operation. →← Select...
... while exiting. Select Exit & Save Changes or make other than System Date, System Time, and Password, the BIOS asks for this menu. Exit & Discard Changes Select this option, a confirmation appears. F10 key can be used for a confirmation before exiting. ASUS KFSN4-DRE Series 4-33 Pressing does not immediately exit this operation. →← Select...

User Guide
Page 114
Managing hot spares You may create the hot spare disk at the same time you create the IM/IME volume. LSI Logic Config Utility View Array -- Follow steps 1 ~ 3 of 1 LSILOGICLogical Volume 3000 IME 0 51498 Optimal Slot Device Identifier Num 0 ...
Managing hot spares You may create the hot spare disk at the same time you create the IM/IME volume. LSI Logic Config Utility View Array -- Follow steps 1 ~ 3 of 1 LSILOGICLogical Volume 3000 IME 0 51498 Optimal Slot Device Identifier Num 0 ...