
H81M-D User's Manual
Page 3
Contents Safety information...iv About this guide...iv Package contents...vi H81M-D series specifications summary vi Product introduction 1.1 Before you proceed 1-1 1.2 Motherboard overview 1-1 1.3 Central Processing Unit (CPU 1-4 1.4 System memory 1-7 1.5 Expansion slots 1-9 1.6 Jumpers...1-11 1.7 Connectors 1-13 1.8 Onboard LEDs 1-... 2-1 2.2 BIOS setup program 2-5 2.3 Main menu...2-9 2.4 Ai Tweaker menu 2-9 2.5 Advanced menu 2-11 2.6 Monitor menu 2-12 2.7 Boot menu 2-13 2.8 Tools menu 2-14 2.9 Exit menu...2-14 Appendices Notices...A-1 ASUS contact information A-3 iii
Contents Safety information...iv About this guide...iv Package contents...vi H81M-D series specifications summary vi Product introduction 1.1 Before you proceed 1-1 1.2 Motherboard overview 1-1 1.3 Central Processing Unit (CPU 1-4 1.4 System memory 1-7 1.5 Expansion slots 1-9 1.6 Jumpers...1-11 1.7 Connectors 1-13 1.8 Onboard LEDs 1-... 2-1 2.2 BIOS setup program 2-5 2.3 Main menu...2-9 2.4 Ai Tweaker menu 2-9 2.5 Advanced menu 2-11 2.6 Monitor menu 2-12 2.7 Boot menu 2-13 2.8 Tools menu 2-14 2.9 Exit menu...2-14 Appendices Notices...A-1 ASUS contact information A-3 iii

H81M-D User's Manual
Page 6
... 1600MHz and higher memory modules on XMP mode will work depending on the CPU types. ** Refer to 1920x1200@60Hz - H81M-D series specifications summary CPU LGA1150 socket for Intel® 4th Generation CoreTM i7/ i5 / i3, Pentium® and ...x Serial ATA 3.0 Gb/s connectors (dark brown) - Graphics Integrated Graphics Processor - Package contents Check your motherboard package for the following items. Motherboard ASUS H81M-D Series motherboard Cables 2 x Serial ATA 6.0 Gb/s cables Accessories 1 x I/O Shield Application DVD Support DVD Documentation User Guide If any of the...
... 1600MHz and higher memory modules on XMP mode will work depending on the CPU types. ** Refer to 1920x1200@60Hz - H81M-D series specifications summary CPU LGA1150 socket for Intel® 4th Generation CoreTM i7/ i5 / i3, Pentium® and ...x Serial ATA 3.0 Gb/s connectors (dark brown) - Graphics Integrated Graphics Processor - Package contents Check your motherboard package for the following items. Motherboard ASUS H81M-D Series motherboard Cables 2 x Serial ATA 6.0 Gb/s cables Accessories 1 x I/O Shield Application DVD Support DVD Documentation User Guide If any of the...

H81M-D User's Manual
Page 9
..., ensure that you install the motherboard, study the configuration of your chassis to ensure that the motherboard fits into the chassis in the image below. ASUS H81M-D Series 1-1 Product introduction 1 1.1 Before you proceed Take note of the following precautions before you install motherboard components or change any motherboard settings. • Unplug the...
..., ensure that you install the motherboard, study the configuration of your chassis to ensure that the motherboard fits into the chassis in the image below. ASUS H81M-D Series 1-1 Product introduction 1 1.1 Before you proceed Take note of the following precautions before you install motherboard components or change any motherboard settings. • Unplug the...

H81M-D User's Manual
Page 11
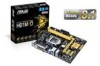
...CLRTC USBPW9-12 COM USB910 USB1112 SATA6G_1 SATA6G_2 SATA3G_1 SATA3G_2 17 16 15 14 13 12 11 10 9 ASUS H81M-D Series 1-3 Motherboard features vary between models. 1.2.3 Motherboard layout H81M-D Series motherboards include H81M-D and H81M-D PLUS models. KBMS 12 3 4 18.3cm(7.2in) 35 DIGI +VRM CPU_FAN ATX12V DVI DDR3 DIMM_A1...64bit, 240-pin module) EATXPWR USB3_E12 22.6cm(8.9in) LPT VGA LGA1150 2 USB3_12 PS2_USBPW1-4 LAN_USB34 CHA_FAN 6 AUDIO Realtek 8111G BATTERY H81M-D PLUS PCIEX16 Super I/O PCIEX1_1 ALC 887- The layout illustrations in this user guide are for...
...CLRTC USBPW9-12 COM USB910 USB1112 SATA6G_1 SATA6G_2 SATA3G_1 SATA3G_2 17 16 15 14 13 12 11 10 9 ASUS H81M-D Series 1-3 Motherboard features vary between models. 1.2.3 Motherboard layout H81M-D Series motherboards include H81M-D and H81M-D PLUS models. KBMS 12 3 4 18.3cm(7.2in) 35 DIGI +VRM CPU_FAN ATX12V DVI DDR3 DIMM_A1...64bit, 240-pin module) EATXPWR USB3_E12 22.6cm(8.9in) LPT VGA LGA1150 2 USB3_12 PS2_USBPW1-4 LAN_USB34 CHA_FAN 6 AUDIO Realtek 8111G BATTERY H81M-D PLUS PCIEX16 Super I/O PCIEX1_1 ALC 887- The layout illustrations in this user guide are for...

H81M-D User's Manual
Page 13
1.3.1 Installing the CPU 1 2 3 A B 4 C 5 A B ASUS H81M-D Series 1-5
1.3.1 Installing the CPU 1 2 3 A B 4 C 5 A B ASUS H81M-D Series 1-5

H81M-D User's Manual
Page 15
A DDR3 module is recommended to protect the CPU. ASUS H81M-D Series 1-7 DO NOT install a DDR or DDR2 memory module to Intel® CPU spec, DIMM voltage below 1.65V is notched differently from a DDR or DDR2 module. DIMM_A1 DIMM_B1 H81M-D PLUS H81M-D PLUS 240-pin DDR3 DIMM sockets Channel Channel A Channel B Sockets DIMM_A1 DIMM_B1 1.4.2 Memory configurations...
A DDR3 module is recommended to protect the CPU. ASUS H81M-D Series 1-7 DO NOT install a DDR or DDR2 memory module to Intel® CPU spec, DIMM voltage below 1.65V is notched differently from a DDR or DDR2 module. DIMM_A1 DIMM_B1 H81M-D PLUS H81M-D PLUS 240-pin DDR3 DIMM sockets Channel Channel A Channel B Sockets DIMM_A1 DIMM_B1 1.4.2 Memory configurations...

H81M-D User's Manual
Page 17
.... The following sub‑sections describe the slots and the expansion cards that it flips out with extra force. 1 2. Remove the DIMM from the socket. ASUS H81M-D Series 1-9 Firmly insert the DIMM into a socket in the wrong direction to avoid damaging the DIMM. 3. Failure to do so may need to unlock the...
.... The following sub‑sections describe the slots and the expansion cards that it flips out with extra force. 1 2. Remove the DIMM from the socket. ASUS H81M-D Series 1-9 Firmly insert the DIMM into a socket in the wrong direction to avoid damaging the DIMM. 3. Failure to do so may need to unlock the...

H81M-D User's Manual
Page 19
... do not help, remove the onboard battery and move the cap back to clear the CMOS RTC RAM data. For system failure due to pins 2-3. ASUS H81M-D Series 1-11 You can clear the CMOS memory of date, time, and system setup parameters by erasing the CMOS RTC RAM data.... H81M-D PLUS CLRTC 12 23 Normal (Default) Clear RTC H81M-D PLUS Clear RTC RAM To erase the RTC RAM: 1. Move the jumper cap from pins 1-2 (default) to overclocking, use the CPU...
... do not help, remove the onboard battery and move the cap back to clear the CMOS RTC RAM data. For system failure due to pins 2-3. ASUS H81M-D Series 1-11 You can clear the CMOS memory of date, time, and system setup parameters by erasing the CMOS RTC RAM data.... H81M-D PLUS CLRTC 12 23 Normal (Default) Clear RTC H81M-D PLUS Clear RTC RAM To erase the RTC RAM: 1. Move the jumper cap from pins 1-2 (default) to overclocking, use the CPU...

H81M-D User's Manual
Page 21
..., the function of this port becomes Front Speaker Out. 6. This port supports LPT devices such as printers. 3. LAN (RJ-45) port. This port connects a microphone. ASUS H81M-D Series 1-13 LPT connector. Line Out port (lime). Microphone port (pink). 1.7 1.7.1 ̾ Connectors Rear panel connectors 2 3 45 ̾̾ 10 9 8 7 6 1. This port connects the tape...
..., the function of this port becomes Front Speaker Out. 6. This port supports LPT devices such as printers. 3. LAN (RJ-45) port. This port connects a microphone. ASUS H81M-D Series 1-13 LPT connector. Line Out port (lime). Microphone port (pink). 1.7 1.7.1 ̾ Connectors Rear panel connectors 2 3 45 ̾̾ 10 9 8 7 6 1. This port connects the tape...

H81M-D User's Manual
Page 23
...is for an additional Sony/Philips Digital Interface (S/PDIF) port. Connect the S/PDIF Out module cable to this connector, set to [HD]. ASUS H81M-D Series 1-15 By default, this connector, set the Front Panel Type item in the BIOS setup to [HD]. 2. Connect one end ...I /O module that you connect a high-definition front panel audio module to this connector to avail of the system chassis. +5V SPDIFOUT GND H81M-D PLUS SPDIF_OUT H81M-D PLUS Digital audio connector The S/PDIF module is for a chassis-mounted front panel audio I /O module cable to [AC97]. 1.7.2 Internal connectors...
...is for an additional Sony/Philips Digital Interface (S/PDIF) port. Connect the S/PDIF Out module cable to this connector, set to [HD]. ASUS H81M-D Series 1-15 By default, this connector, set the Front Panel Type item in the BIOS setup to [HD]. 2. Connect one end ...I /O module that you connect a high-definition front panel audio module to this connector to avail of the system chassis. +5V SPDIFOUT GND H81M-D PLUS SPDIF_OUT H81M-D PLUS Digital audio connector The S/PDIF module is for a chassis-mounted front panel audio I /O module cable to [AC97]. 1.7.2 Internal connectors...

H81M-D User's Manual
Page 25
...use a PSU with higher power output when configuring a system with a minimum of 300W power rating. ATX12V EATXPWR +12V DC +12V DC H81M-D PLUS GND GND +3 Volts +12 Volts +12 Volts +5V Standby Power OK PIN 1 GND +5 Volts GND +5 Volts GND +3 Volts +3 Volts PIN...and 4-pin power plugs. • DO NOT forget to hear system beeps and warnings. +5V GND GND Speaker Out SPEAKER H81M-D PLUS PIN 1 H81M-D PLUS Speaker Out Connector ASUS H81M-D Series 1-17 5. The power supply plugs are uncertain about the minimum power supply requirement for ATX power supply plugs. Speaker ...
...use a PSU with higher power output when configuring a system with a minimum of 300W power rating. ATX12V EATXPWR +12V DC +12V DC H81M-D PLUS GND GND +3 Volts +12 Volts +12 Volts +5V Standby Power OK PIN 1 GND +5 Volts GND +5 Volts GND +3 Volts +3 Volts PIN...and 4-pin power plugs. • DO NOT forget to hear system beeps and warnings. +5V GND GND Speaker Out SPEAKER H81M-D PLUS PIN 1 H81M-D PLUS Speaker Out Connector ASUS H81M-D Series 1-17 5. The power supply plugs are uncertain about the minimum power supply requirement for ATX power supply plugs. Speaker ...

H81M-D User's Manual
Page 27
... panel connector (10-1 pin F_PANEL) This connector supports several chassis-mounted functions. Connect the HDD Activity LED cable to this connector. ASUS H81M-D Series 1-19 Ground HWRST# (NC) H81M-D PLUS PIN 1 +HDD_LED RESET H81M-D PLUS System panel connector • System power LED (2-pin PWR_LED) This 2-pin connector is for the system power LED. The...
... panel connector (10-1 pin F_PANEL) This connector supports several chassis-mounted functions. Connect the HDD Activity LED cable to this connector. ASUS H81M-D Series 1-19 Ground HWRST# (NC) H81M-D PLUS PIN 1 +HDD_LED RESET H81M-D PLUS System panel connector • System power LED (2-pin PWR_LED) This 2-pin connector is for the system power LED. The...

H81M-D User's Manual
Page 29
SB_PWR H81M-D PLUS ON OFF Standby Power Powered Off H81M-D PLUS Onboard LED ASUS H81M-D Series 1-21 The illustration below shows the location of the onboard LED. 1.8 Onboard LEDs 1. This is ON, in sleep mode, or in any motherboard component. Standby Power LED The motherboard comes with a standby power LED that lights up to indicate that the system is a reminder that you should shut down the system and unplug the power cable before removing or plugging in soft-off mode.
SB_PWR H81M-D PLUS ON OFF Standby Power Powered Off H81M-D PLUS Onboard LED ASUS H81M-D Series 1-21 The illustration below shows the location of the onboard LED. 1.8 Onboard LEDs 1. This is ON, in sleep mode, or in any motherboard component. Standby Power LED The motherboard comes with a standby power LED that lights up to indicate that the system is a reminder that you should shut down the system and unplug the power cable before removing or plugging in soft-off mode.

H81M-D User's Manual
Page 31
... menu bar. Click to automatically update your motherboard's softwares, drivers and the BIOS version easily. Copy the original motherboard BIOS using the ASUS Update utility. 2.1.1 EZ Update EZ Update is a utility that allows you to automatically update your motherboard's driver, software and firmware Click... case you need to update the BIOS EZ Update requires an Internet connection either through a network or an ISP (Internet Service Provider). ASUS H81M-D Series 2-1 With this utlity, you can also manually update the saved BIOS and select a boot logo when the system goes into POST...
... menu bar. Click to automatically update your motherboard's softwares, drivers and the BIOS version easily. Copy the original motherboard BIOS using the ASUS Update utility. 2.1.1 EZ Update EZ Update is a utility that allows you to automatically update your motherboard's driver, software and firmware Click... case you need to update the BIOS EZ Update requires an Internet connection either through a network or an ISP (Internet Service Provider). ASUS H81M-D Series 2-1 With this utlity, you can also manually update the saved BIOS and select a boot logo when the system goes into POST...

H81M-D User's Manual
Page 33
... you to copy the current BIOS file that you to enter BIOS Setup to the USB port. 3. Before updating BIOS 1. ASUS H81M-D Series 2-3 2.1.3 ASUS CrashFree BIOS 3 utility The ASUS CrashFree BIOS 3 is not supported under a DOS environment. Do not save them on the system. 2. The actual utility screen... When found, the utility reads the BIOS file and enters ASUS EZ Flash 2 utility automatically. 4. Insert the support DVD to the optical drive or the USB flash drive that allows you to H81MD.CAP (for H81M-D), H81MDP.CAP (for H81M-D PLUS). • The BIOS file in NTFS format. ...
... you to copy the current BIOS file that you to enter BIOS Setup to the USB port. 3. Before updating BIOS 1. ASUS H81M-D Series 2-3 2.1.3 ASUS CrashFree BIOS 3 utility The ASUS CrashFree BIOS 3 is not supported under a DOS environment. Do not save them on the system. 2. The actual utility screen... When found, the utility reads the BIOS file and enters ASUS EZ Flash 2 utility automatically. 4. Insert the support DVD to the optical drive or the USB flash drive that allows you to H81MD.CAP (for H81M-D), H81MDP.CAP (for H81M-D PLUS). • The BIOS file in NTFS format. ...

H81M-D User's Manual
Page 35
... using the BIOS Setup program. Entering BIOS Setup at startup To enter BIOS Setup at startup: • Press during the Power-On Self Test (POST). ASUS H81M-D Series 2-5 If you to update the BIOS or configure its routines. 3. Restart your computer. The BIOS screens include navigation keys and brief online help to...
... using the BIOS Setup program. Entering BIOS Setup at startup To enter BIOS Setup at startup: • Press during the Power-On Self Test (POST). ASUS H81M-D Series 2-5 If you to update the BIOS or configure its routines. 3. Restart your computer. The BIOS screens include navigation keys and brief online help to...

H81M-D User's Manual
Page 37
... BIOS setup program without saving the changes, saves the changes and resets the system, or enters the Advanced Mode Power Saving mode Boot device priority ASUS Optimal mode Selects the Advanced mode functions Displays the Advanced mode menus Normal mode Selects the boot device priority Loads optimized default Displays the system... the devices you installed to the system. • The Boot Menu(F8) button is available only when the boot device is installed to the system. ASUS H81M-D Series 2-7
... BIOS setup program without saving the changes, saves the changes and resets the system, or enters the Advanced Mode Power Saving mode Boot device priority ASUS Optimal mode Selects the Advanced mode functions Displays the Advanced mode menus Normal mode Selects the boot device priority Loads optimized default Displays the system... the devices you installed to the system. • The Boot Menu(F8) button is available only when the boot device is installed to the system. ASUS H81M-D Series 2-7

H81M-D User's Manual
Page 39
... settings. • If you to configure overclocking-related items. Be cautious when changing the settings of the basic system information, and allows you to malfunction. ASUS H81M-D Series 2-9 The Main menu provides you an overview of the Ai Tweaker menu items. Incorrect field values can cause the system to set a password, these...
... settings. • If you to configure overclocking-related items. Be cautious when changing the settings of the basic system information, and allows you to malfunction. ASUS H81M-D Series 2-9 The Main menu provides you an overview of the Ai Tweaker menu items. Incorrect field values can cause the system to set a password, these...

H81M-D User's Manual
Page 41
Scroll down to display the following items: 2.5 Advanced menu The Advanced menu items allow you to malfunction. ASUS H81M-D Series 2-11 Be cautious when changing the settings of the Advanced menu items. Incorrect field values can cause the system to change the settings for the CPU and other system devices.
Scroll down to display the following items: 2.5 Advanced menu The Advanced menu items allow you to malfunction. ASUS H81M-D Series 2-11 Be cautious when changing the settings of the Advanced menu items. Incorrect field values can cause the system to change the settings for the CPU and other system devices.

H81M-D User's Manual
Page 43
2.7 Boot menu The Boot menu items allow you to display the following items: ASUS H81M-D Series 2-13 Scroll down to change the system boot options.
2.7 Boot menu The Boot menu items allow you to display the following items: ASUS H81M-D Series 2-13 Scroll down to change the system boot options.


