
User Manual
Page 2
...for identification purposes only. All trademarks are the property of their respective owners. Every effort has been made to ensure that the contents of this manual, including the products and software described in any form or by any language in it, may be registered trademarks or copyrights of their respective ... February 2010 Copyright © 2010 ASUSTeK COMPUTER INC. All Rights Reserved. However, the manufacturer makes no guarantee regarding the accuracy of ASUSTeK COMPUTER, INC. ("ASUS"). No part of this manual are used for backup purposes, without prior notice.
...for identification purposes only. All trademarks are the property of their respective owners. Every effort has been made to ensure that the contents of this manual, including the products and software described in any form or by any language in it, may be registered trademarks or copyrights of their respective ... February 2010 Copyright © 2010 ASUSTeK COMPUTER INC. All Rights Reserved. However, the manufacturer makes no guarantee regarding the accuracy of ASUSTeK COMPUTER, INC. ("ASUS"). No part of this manual are used for backup purposes, without prior notice.
User Manual
Page 3
... Compliance and Declaration 10 Takeback Services...10 UL Safety Precaution...10 Notes for this manual...11 Safety information...12 Setting up your system...12 Care during use...12 Welcome 13 Package contents...13 Getting to know your EeeTop PC 14 Front view...14 Rear view...16 Side views...18 Using the touch screen......19 Showing the touch pointer...19 Cleaning the touch screen...20 Using the keyboard...21 Function keys (for wireless keyboard only 22 Positioning your EeeTop PC 23 Placing on the desktop...23 Mounting to the wall (for wall mount model only 24
... Compliance and Declaration 10 Takeback Services...10 UL Safety Precaution...10 Notes for this manual...11 Safety information...12 Setting up your system...12 Care during use...12 Welcome 13 Package contents...13 Getting to know your EeeTop PC 14 Front view...14 Rear view...16 Side views...18 Using the touch screen......19 Showing the touch pointer...19 Cleaning the touch screen...20 Using the keyboard...21 Function keys (for wireless keyboard only 22 Positioning your EeeTop PC 23 Placing on the desktop...23 Mounting to the wall (for wall mount model only 24

User Manual
Page 11
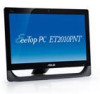
... information for the latest information. Visit the ASUS website at www.asus.com for special situations. All illustrations and screenshots in this manual are for reference only. English Notes for this manual To ensure that help you complete a task. WARNING: Vital information that you MUST follow to yourself. EeeTop PC ET2010 Series 11 IMPORTANT: Instructions that...
... information for the latest information. Visit the ASUS website at www.asus.com for special situations. All illustrations and screenshots in this manual are for reference only. English Notes for this manual To ensure that help you complete a task. WARNING: Vital information that you MUST follow to yourself. EeeTop PC ET2010 Series 11 IMPORTANT: Instructions that...

User Manual
Page 24
...kit package. Firmly install your wall mount kit (VESA75 or VESA100) to the EeeTop PC using four screws (M4 x 16mm) that came with the wall mount kit package. • The wall mount kit in the installation manual that you leave a distance of 6cm at least between the system and the wall.... 24 EeeTop PC ET2010 Series Carefullly fasten the wall mount kit to the wall following instructions. 1. For ventilation's sake, ...
...kit package. Firmly install your wall mount kit (VESA75 or VESA100) to the EeeTop PC using four screws (M4 x 16mm) that came with the wall mount kit package. • The wall mount kit in the installation manual that you leave a distance of 6cm at least between the system and the wall.... 24 EeeTop PC ET2010 Series Carefullly fasten the wall mount kit to the wall following instructions. 1. For ventilation's sake, ...


