
User Manual
Page 14
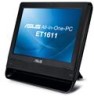
... -one PC ET1611 Series. If any of the following illustration displays the package contents of ASUS All-in-one PC ET1611 Series Keyboard (wired or wireless) Mouse (wired or wireless) AC adapter Power cord Quick Guide Wall mount kit (optional) Wall mount adapter (optional) Quick guide Warranty card Note: The keyboard, mouse, and power supply illustrations...
... -one PC ET1611 Series. If any of the following illustration displays the package contents of ASUS All-in-one PC ET1611 Series Keyboard (wired or wireless) Mouse (wired or wireless) AC adapter Power cord Quick Guide Wall mount kit (optional) Wall mount adapter (optional) Quick guide Warranty card Note: The keyboard, mouse, and power supply illustrations...

User Manual
Page 22
Mount your ASUS All-in -one PC to the wall, purchase an optional wall mount adapter (160mm x 92mm) and a wall mount kit (pad and rack). Remove the four screws on a flat surface such as a table or desk, and �p�u�l�l�t�h�e��s&#..., tilt the display panel to an angle of between 10 and 35 degrees from an upright position. 10° 0° 0° 35° Mounting to the wall To mount your ASUS All-in -one PC according to the following instructions. 1. Keep the screws for future use in case you want to reinstall the stand...
Mount your ASUS All-in -one PC to the wall, purchase an optional wall mount adapter (160mm x 92mm) and a wall mount kit (pad and rack). Remove the four screws on a flat surface such as a table or desk, and �p�u�l�l�t�h�e��s&#..., tilt the display panel to an angle of between 10 and 35 degrees from an upright position. 10° 0° 0° 35° Mounting to the wall To mount your ASUS All-in -one PC according to the following instructions. 1. Keep the screws for future use in case you want to reinstall the stand...

User Manual
Page 24
Hook your wall mount kit package. English 5. For ventilation's sake, ensure that came with your All-in -one PC to the wall following the instructions described in this illustration is for reference only. 6. Fasten the wall mount rack to the wall mount rack securely. The wall mount rack in the installation manual that you leave a distance of 6cm at least between the system and the wall. 24 ASUS All-in -one PC ET1611 Series
Hook your wall mount kit package. English 5. For ventilation's sake, ensure that came with your All-in -one PC to the wall following the instructions described in this illustration is for reference only. 6. Fasten the wall mount rack to the wall mount rack securely. The wall mount rack in the installation manual that you leave a distance of 6cm at least between the system and the wall. 24 ASUS All-in -one PC ET1611 Series
