ASUS A4110 users manual for English
Page 2
...for identification or explanation and to the owners' benefit, without the express written permission of ASUSTeK COMPUTER INC. ("ASUS"). SPECIFICATIONS AND INFORMATION CONTAINED IN THIS MANUAL ARE FURNISHED FOR INFORMATIONAL USE ONLY, AND ARE SUBJECT TO CHANGE AT ANY TIME WITHOUT NOTICE, AND SHOULD NOT ...BE CONSTRUED AS A COMMITMENT BY ASUS. Products and corporate names appearing in this manual, including the products and software described in it, may be reproduced, transmitted, transcribed, stored in a retrieval system,...
...for identification or explanation and to the owners' benefit, without the express written permission of ASUSTeK COMPUTER INC. ("ASUS"). SPECIFICATIONS AND INFORMATION CONTAINED IN THIS MANUAL ARE FURNISHED FOR INFORMATIONAL USE ONLY, AND ARE SUBJECT TO CHANGE AT ANY TIME WITHOUT NOTICE, AND SHOULD NOT ...BE CONSTRUED AS A COMMITMENT BY ASUS. Products and corporate names appearing in this manual, including the products and software described in it, may be reproduced, transmitted, transcribed, stored in a retrieval system,...
ASUS A4110 users manual for English
Page 3
Contents About this manual...6 Conventions used in this manual 7 Typography...7 Icons...8 Safety information...9 Setting up your system 9 Care during use...9 Sound Pressure Warning 11 Adapter...11 DC Fan Warning...11 Package contents...12 Chapter 1: Hardware Setup Getting to know your ASUS All-in-One PC 13 Front view...13... Rear view...15 Top view...18 Left side view...19 Right side view...19 Chapter 2: Using your ASUS All-in-One PC Positioning your ASUS All-in-One PC 21 Connecting a wired keyboard and mouse 22 Connecting a wireless keyboard and mouse (optional 23 Mounting...
Contents About this manual...6 Conventions used in this manual 7 Typography...7 Icons...8 Safety information...9 Setting up your system 9 Care during use...9 Sound Pressure Warning 11 Adapter...11 DC Fan Warning...11 Package contents...12 Chapter 1: Hardware Setup Getting to know your ASUS All-in-One PC 13 Front view...13... Rear view...15 Top view...18 Left side view...19 Right side view...19 Chapter 2: Using your ASUS All-in-One PC Positioning your ASUS All-in-One PC 21 Connecting a wired keyboard and mouse 22 Connecting a wireless keyboard and mouse (optional 23 Mounting...

ASUS A4110 users manual for English
Page 6
About this manual This manual provides information about the hardware and software features of your ASUS All-in-One PC, organized through the following chapters: Chapter 1: Hardware Setup This chapter details the hardware components of using your ASUS Allin-One PC. Appendix This section includes notices and safety statements for your ASUS All-in-One PC...
About this manual This manual provides information about the hardware and software features of your ASUS All-in-One PC, organized through the following chapters: Chapter 1: Hardware Setup This chapter details the hardware components of using your ASUS Allin-One PC. Appendix This section includes notices and safety statements for your ASUS All-in-One PC...

ASUS A4110 users manual for English
Page 7
... that can refer to your device's data and components. Italic = This indicates sections that you safe while performing tasks and prevent damage to in this manual, some texts are presented as follows: IMPORTANT! This message contains vital information that must be followed to complete a task. WARNING! This message contains important information...
... that can refer to your device's data and components. Italic = This indicates sections that you safe while performing tasks and prevent damage to in this manual, some texts are presented as follows: IMPORTANT! This message contains vital information that must be followed to complete a task. WARNING! This message contains important information...
ASUS A4110 users manual for English
Page 8
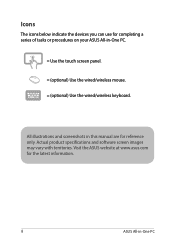
All illustrations and screenshots in -One PC Visit the ASUS website at www.asus.com for the latest information. 8 ASUS All-in this manual are for completing a series of tasks or procedures on your ASUS All-in-One PC. = Use the touch screen panel. = (optional) Use the wired/wireless mouse. = (optional) Use the wired/wireless keyboard. Actual product specifications and software screen images may vary with territories. Icons The icons below indicate the devices you can use for reference only.
All illustrations and screenshots in -One PC Visit the ASUS website at www.asus.com for the latest information. 8 ASUS All-in this manual are for completing a series of tasks or procedures on your ASUS All-in-One PC. = Use the touch screen panel. = (optional) Use the wired/wireless mouse. = (optional) Use the wired/wireless keyboard. Actual product specifications and software screen images may vary with territories. Icons The icons below indicate the devices you can use for reference only.
ASUS A4110 users manual for English
Page 26
4. Install the wall mount kit. Follow the instructions described in -One PC NOTE: Ensure that came with your wall mount kit. Attach the wall mount screws and ASUS All-in-One PC assembly to the wall mount kit. 26 ASUS All-in the installation manual that the wall mount kit is stable and fixed firmly on the wall. 5.
4. Install the wall mount kit. Follow the instructions described in -One PC NOTE: Ensure that came with your wall mount kit. Attach the wall mount screws and ASUS All-in-One PC assembly to the wall mount kit. 26 ASUS All-in the installation manual that the wall mount kit is stable and fixed firmly on the wall. 5.


